How to do SalesForce integration
Prospects in Samplead can be automatically or manually exported to Salesforce through this integration.
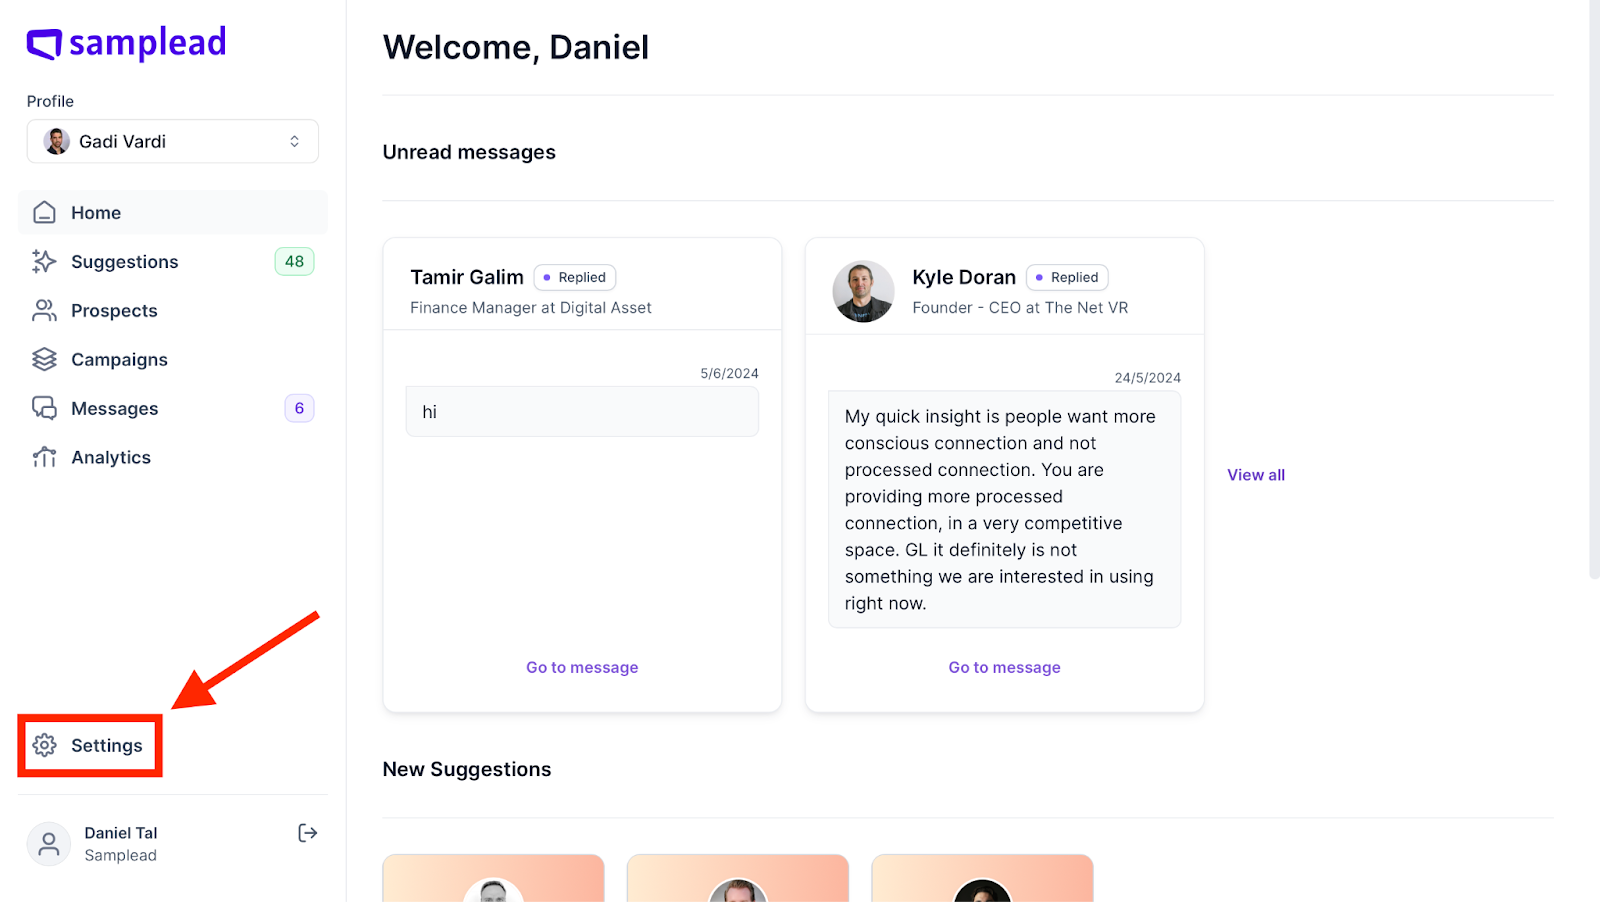
- From the home page, go into ‘Settings’ at the left hand side of the screen.
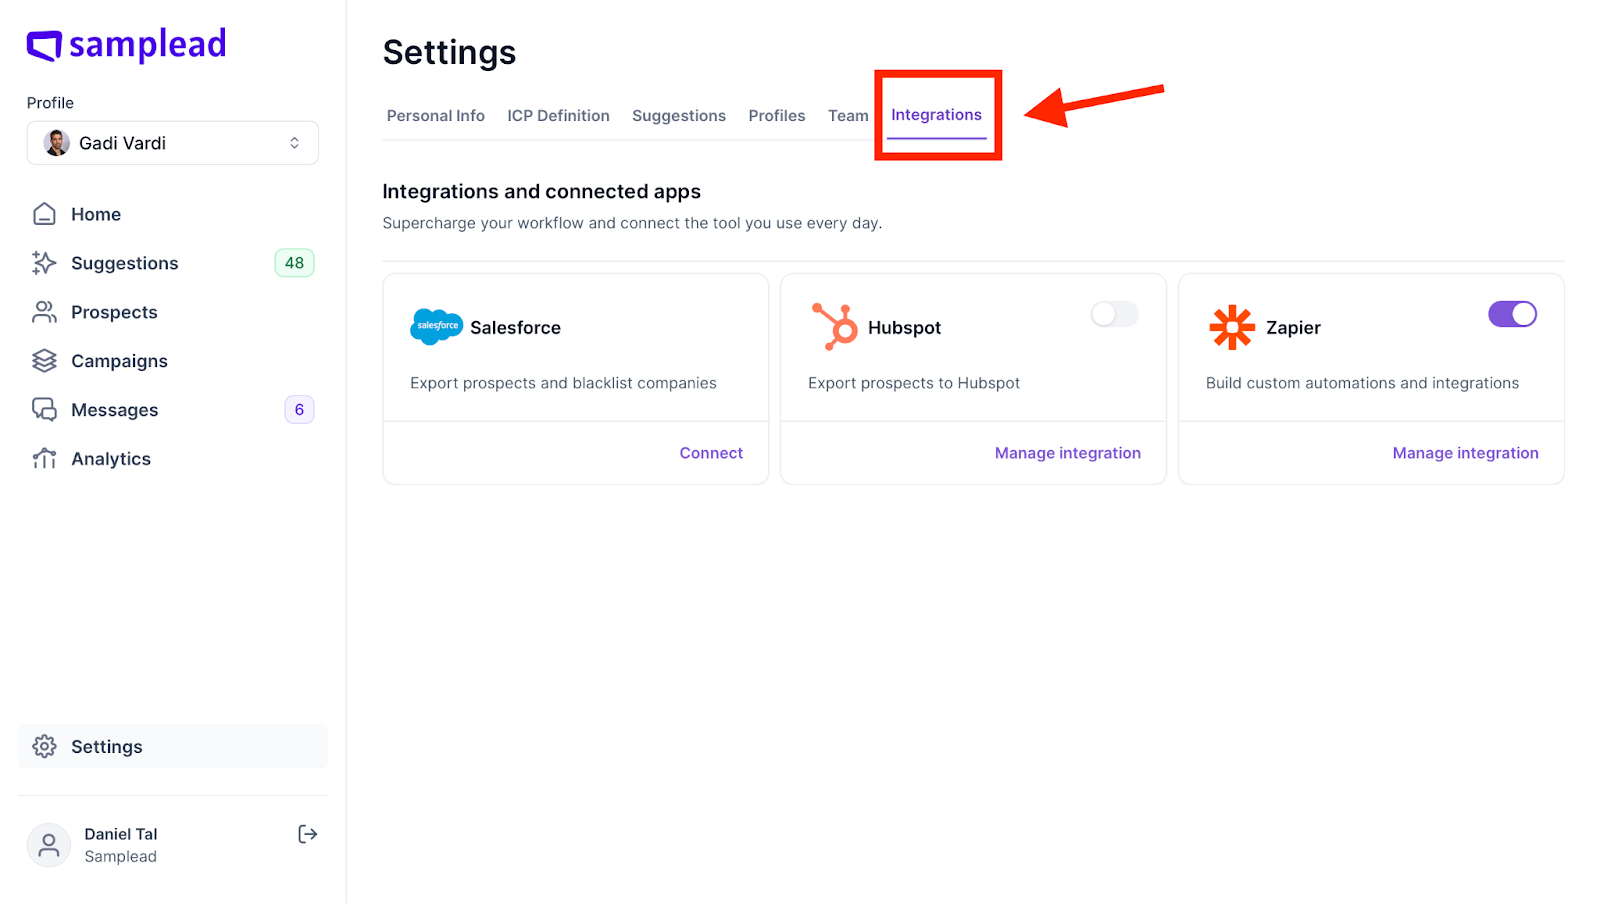
- From settings, click on the ‘Integrations’ tab at the top of the screen.
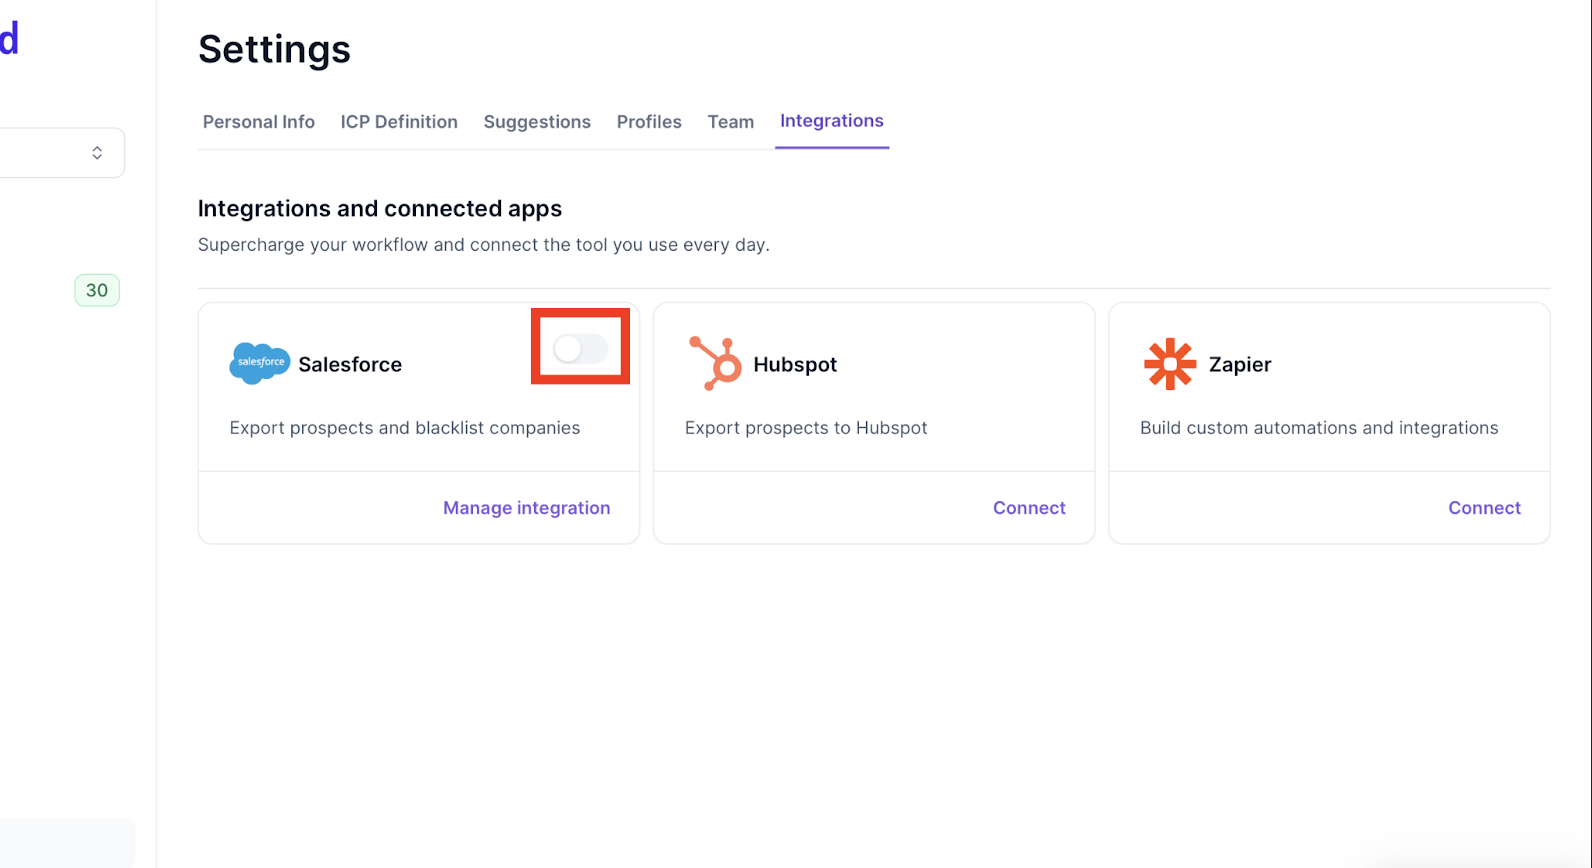
- Activate by turning the toggle switch to purple when clicking it.
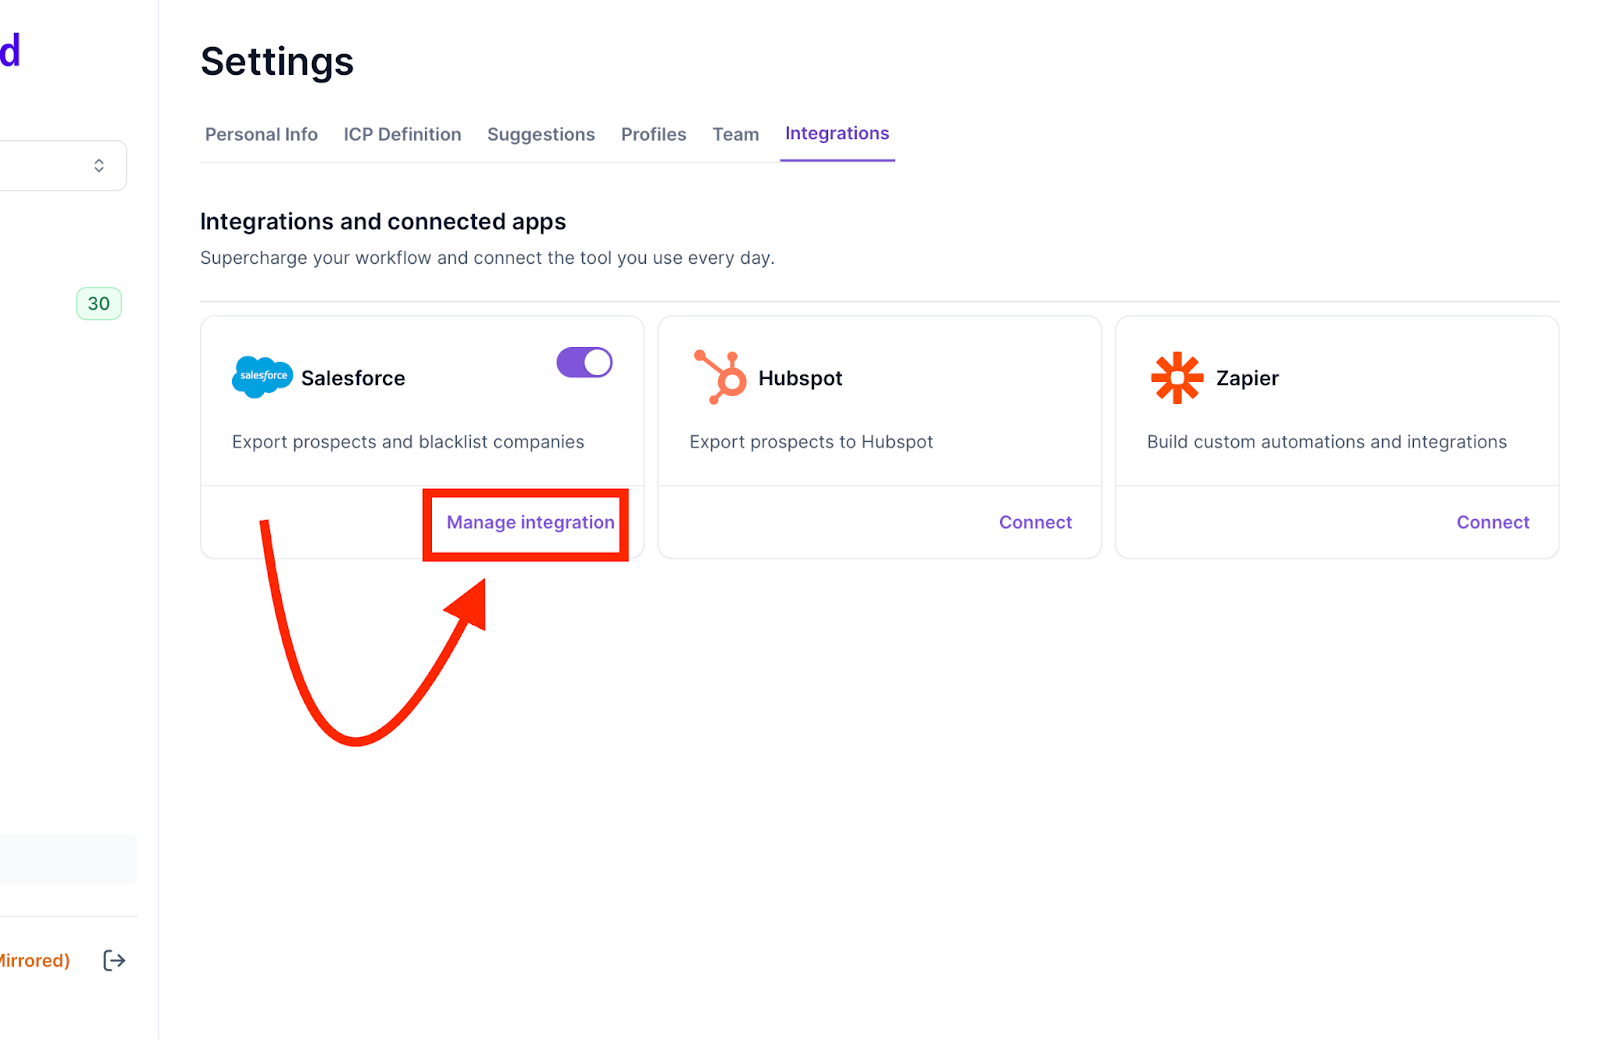
- Clicking on "Manage Integration" to customize how prospects will appear in the SalesForce CRM.
- In General Settings, you can select a specific status for prospects to be imported into SalesForce. For example, if you choose the "in queue" status, prospects labeled as ‘in queue’ will be exported to Salesforce.
The different statuses are:
In queue
Connection request sent
Connected
Replied
Interested
Booked
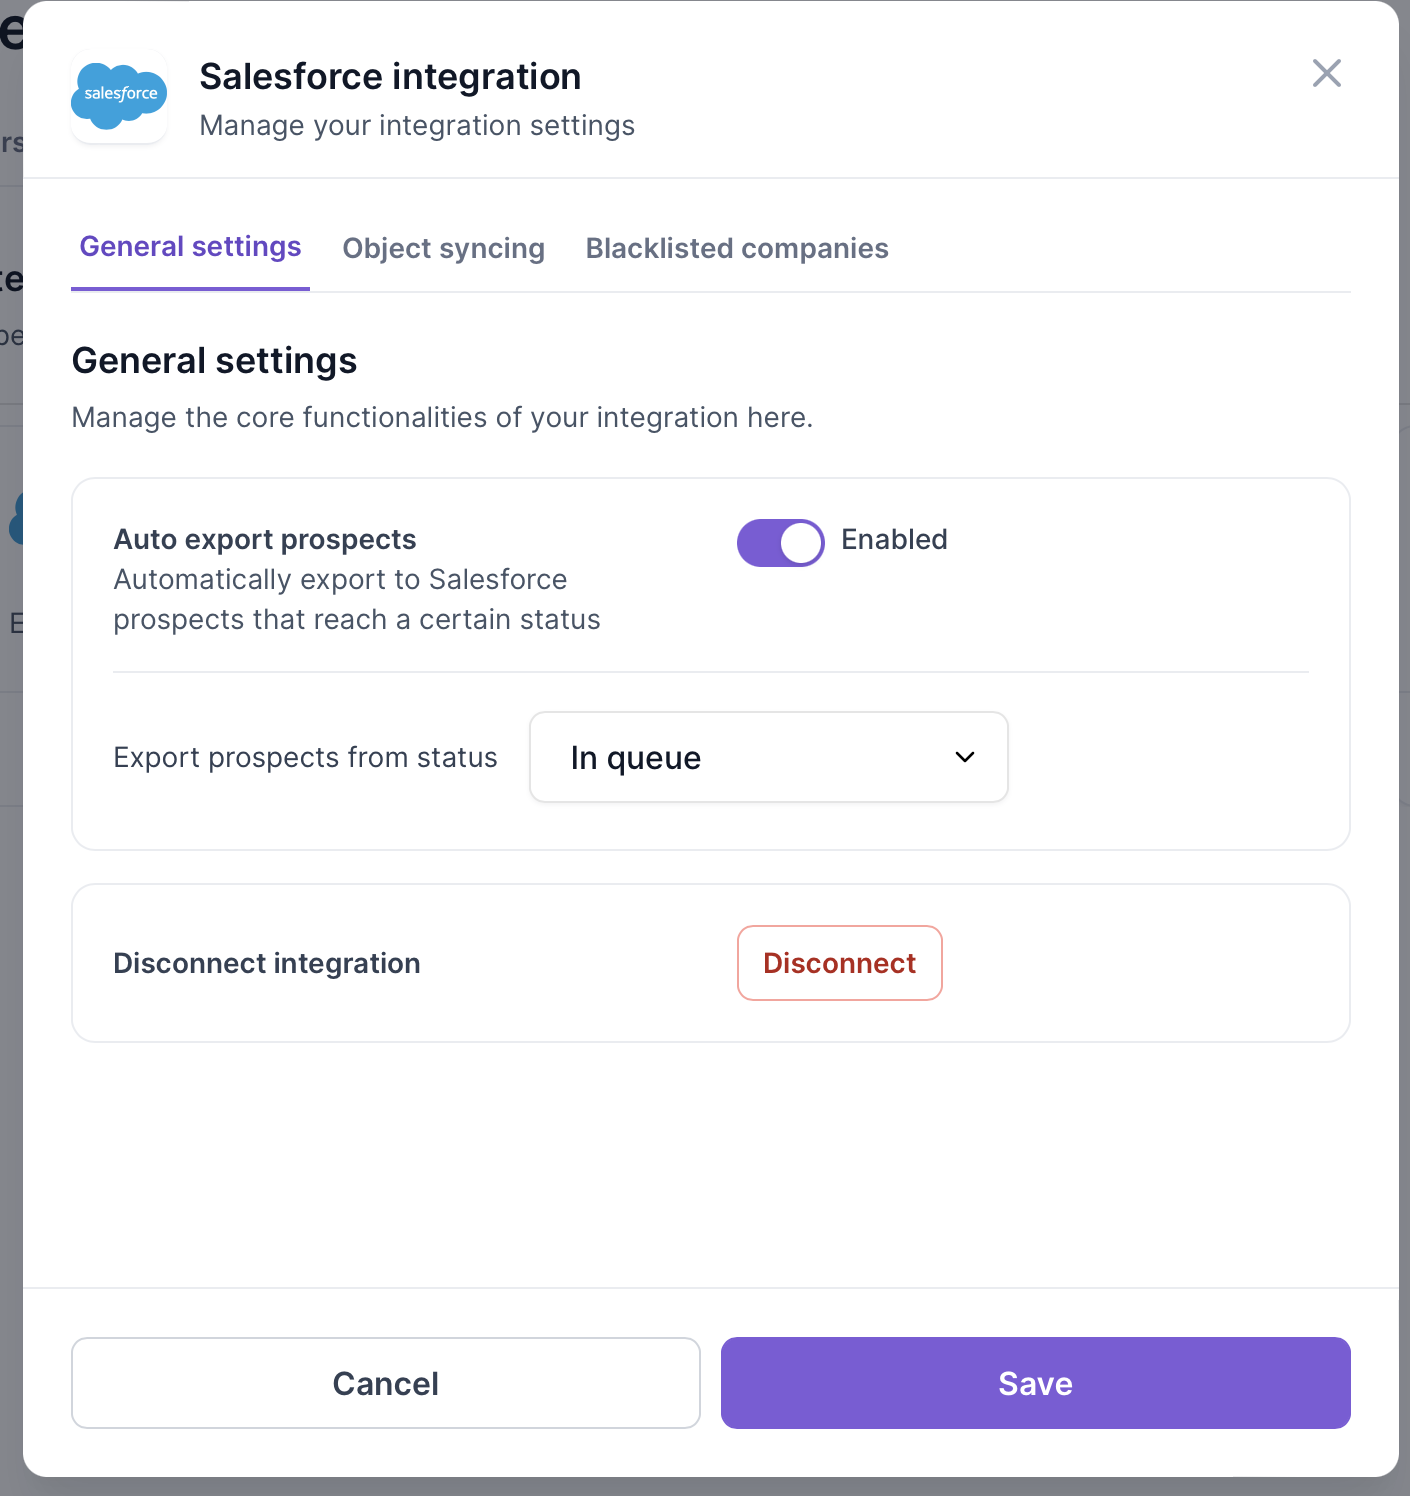
- Auto export means prospects will automatically be exported to SalesForce however if this toggle is off the integration can still take place but the user will have to do it manually by selecting which prospects to export within Samplead
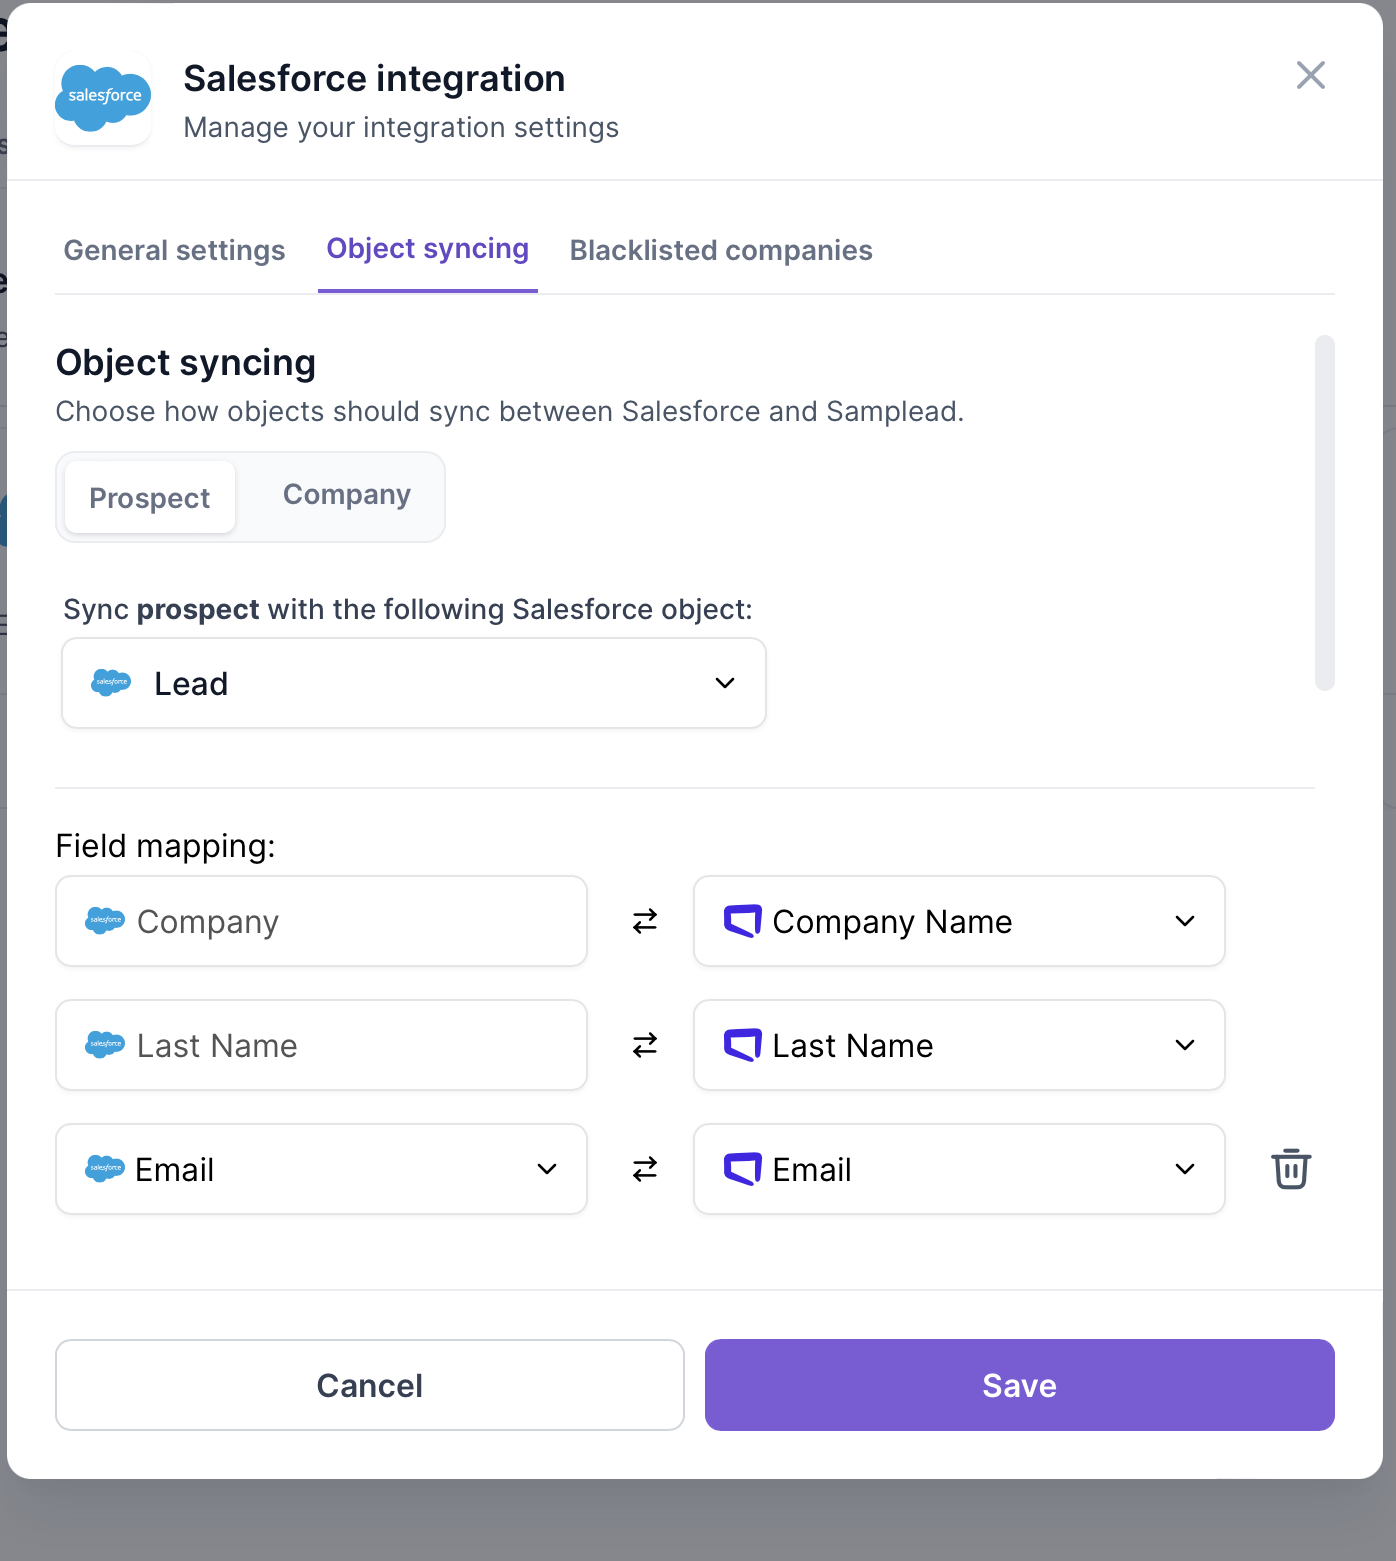
- Field mapping customizes how prospect information appears in Salesforce and what data is included. You can sync this information by prospect or company.
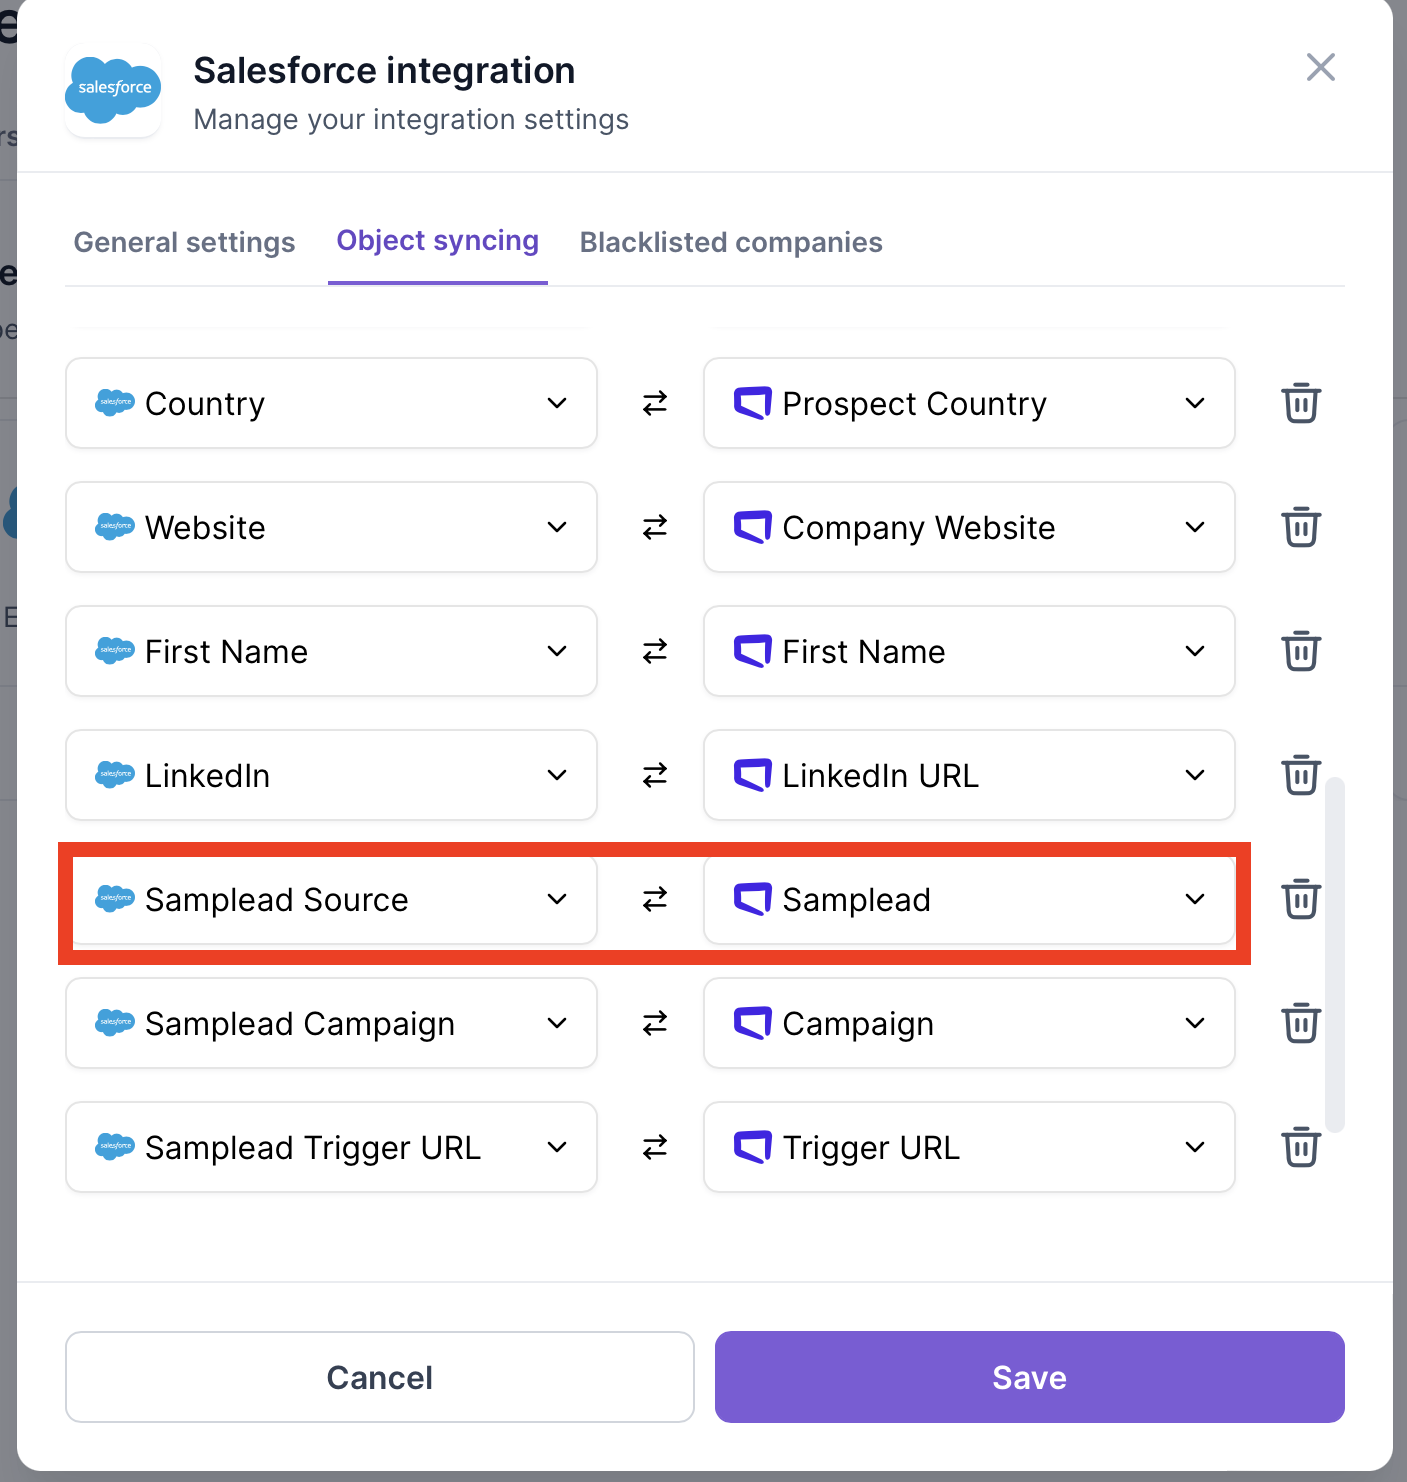
- When mapping if you want the source of the prospect (Samplead) to appear in Salesforce add this field …
- The next step is to blacklist companies that are competitors or current clients you don't want to reach out to. To customize their representation, click on "Blacklisted Companies" and fill out the required information.
The values will be different per client as it depends on how the sales cycle is set up in SalesForce.

*Object represents a primary entity within the CRM*
*A field represents a specific characteristic of an object, meaning the object must possess this characteristic to appear in the CRM. (For every client the field is going to be different, once you choose a field then the dropdown menu for select values will appear)
*Select Values are values associated with the Object and Field. You can choose these values based on your desired data display.*
*The Company Name Field is a field within the Company object that stores the name of the business or organization. This field is essential for identifying and organizing companies in your CRM*
This is an example of how a client has set up their blacklist:
9. When finished, make sure you click save before leaving the screen.