How to add a single prospect to a campaign
The Value of Manual Prospect Integration
'I'm doing my own prospecting, and I found someone I want to add to a campaign - how can I do this?'
Manually adding a prospect allows you to quickly integrate high-value contacts, such as someone you just met at an event or found through a high-intent signal, into your automated outreach. This ensures they receive the correct message immediately, maximizing your conversion opportunity.
Before getting started, make sure you have:
- An active campaign ready to receive the prospect.
- The URL of the prospect from The Outreach Platform
Step 1: Start the Addition Process
Navigate to the Prospects tab in your Spear dashboard.
Step 2: Initiate the manual addition process.
Click the '+ Add Prospect' button to start the addition process.

Step 3: Input Prospect Details
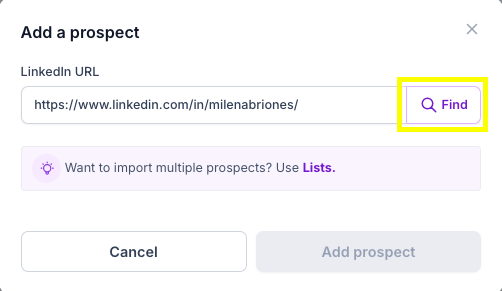
Copy and Paste the prospect's LinkedIn URL into the designated field and click the "Find" button. The system will quickly verify the profile and pull the available basic data.
Step 4: Assign to a Campaign
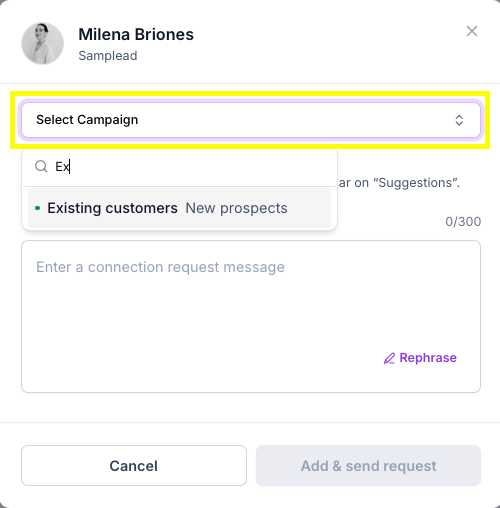
Click the "Select campaign" button and choose the campaign you want to add this prospect to from the campaign dropdown list.
Step 5: Write and Send the Message
Depending on the type of campaign you selected, the final step will vary:
- For Custom Message campaigns: You do not need to add a trigger or enter a message. Since the messaging is pre-defined, the system handles the outreach automatically. Simply click the action button to finish.
- For Personalized Message campaigns: You must add a trigger and write a custom message before sending the prospect.
- Direct Send: Enter a connection request message to further personalize it and click Add & send request.
- Monitoring Option: You also have the option to Monitor the prospect. This way, the system will find a trigger, and the prospect will appear in your "Suggestions" tab later instead of being sent immediately.

Useful Tips and Best Practices
Review Message Tone: Always take a moment to review the connection request message's tone and placeholders before hitting 'Add & send request'. This ensures the message feels personalized, even when using a template.
Prioritize High-Intent Contacts: Use the single prospect addition feature for contacts where you have a clear, recent reason to reach out (e.g., a direct meeting or a very specific intent signal) to maximize the connection rate.
Maintain Campaign Strategy: Confirm that the prospect fits the specific strategic goal of the campaign you are assigning them to (e.g., adding a CTO to a specific executive-focused sequence).
Related Articles
Now that you understand the process for adding a single prospect, if you have several prospects to upload at once, you can save time and effort by using our Lists feature, read our step-by-step guide on How to Import a List of Prospects to efficiently filter and select the right audience for your outreach.


.avif)