How to Import a List of Prospects
Prospect Import Flow
The prospect import flow allows you to upload external prospect lists and integrate them into your active campaigns.
How This Works in Spear
This flow is handled through the Lists feature, which lets you upload and manage your own prospect data in Spear.
When to Use This Flow
This flow is especially useful when working with:
- Lists of conference attendees
- Prospects who previously attended an event (such as a webinar or signed up for a free trial)
Before you begin, make sure you already have at least one campaign ready (you can assign prospects to one or multiple campaigns during upload)
→ Click here to learn how to set up a campaign.
Import a Prospect List (Step-by-Step)
Step 1: In Lists on the left sidebar, click + Create list.

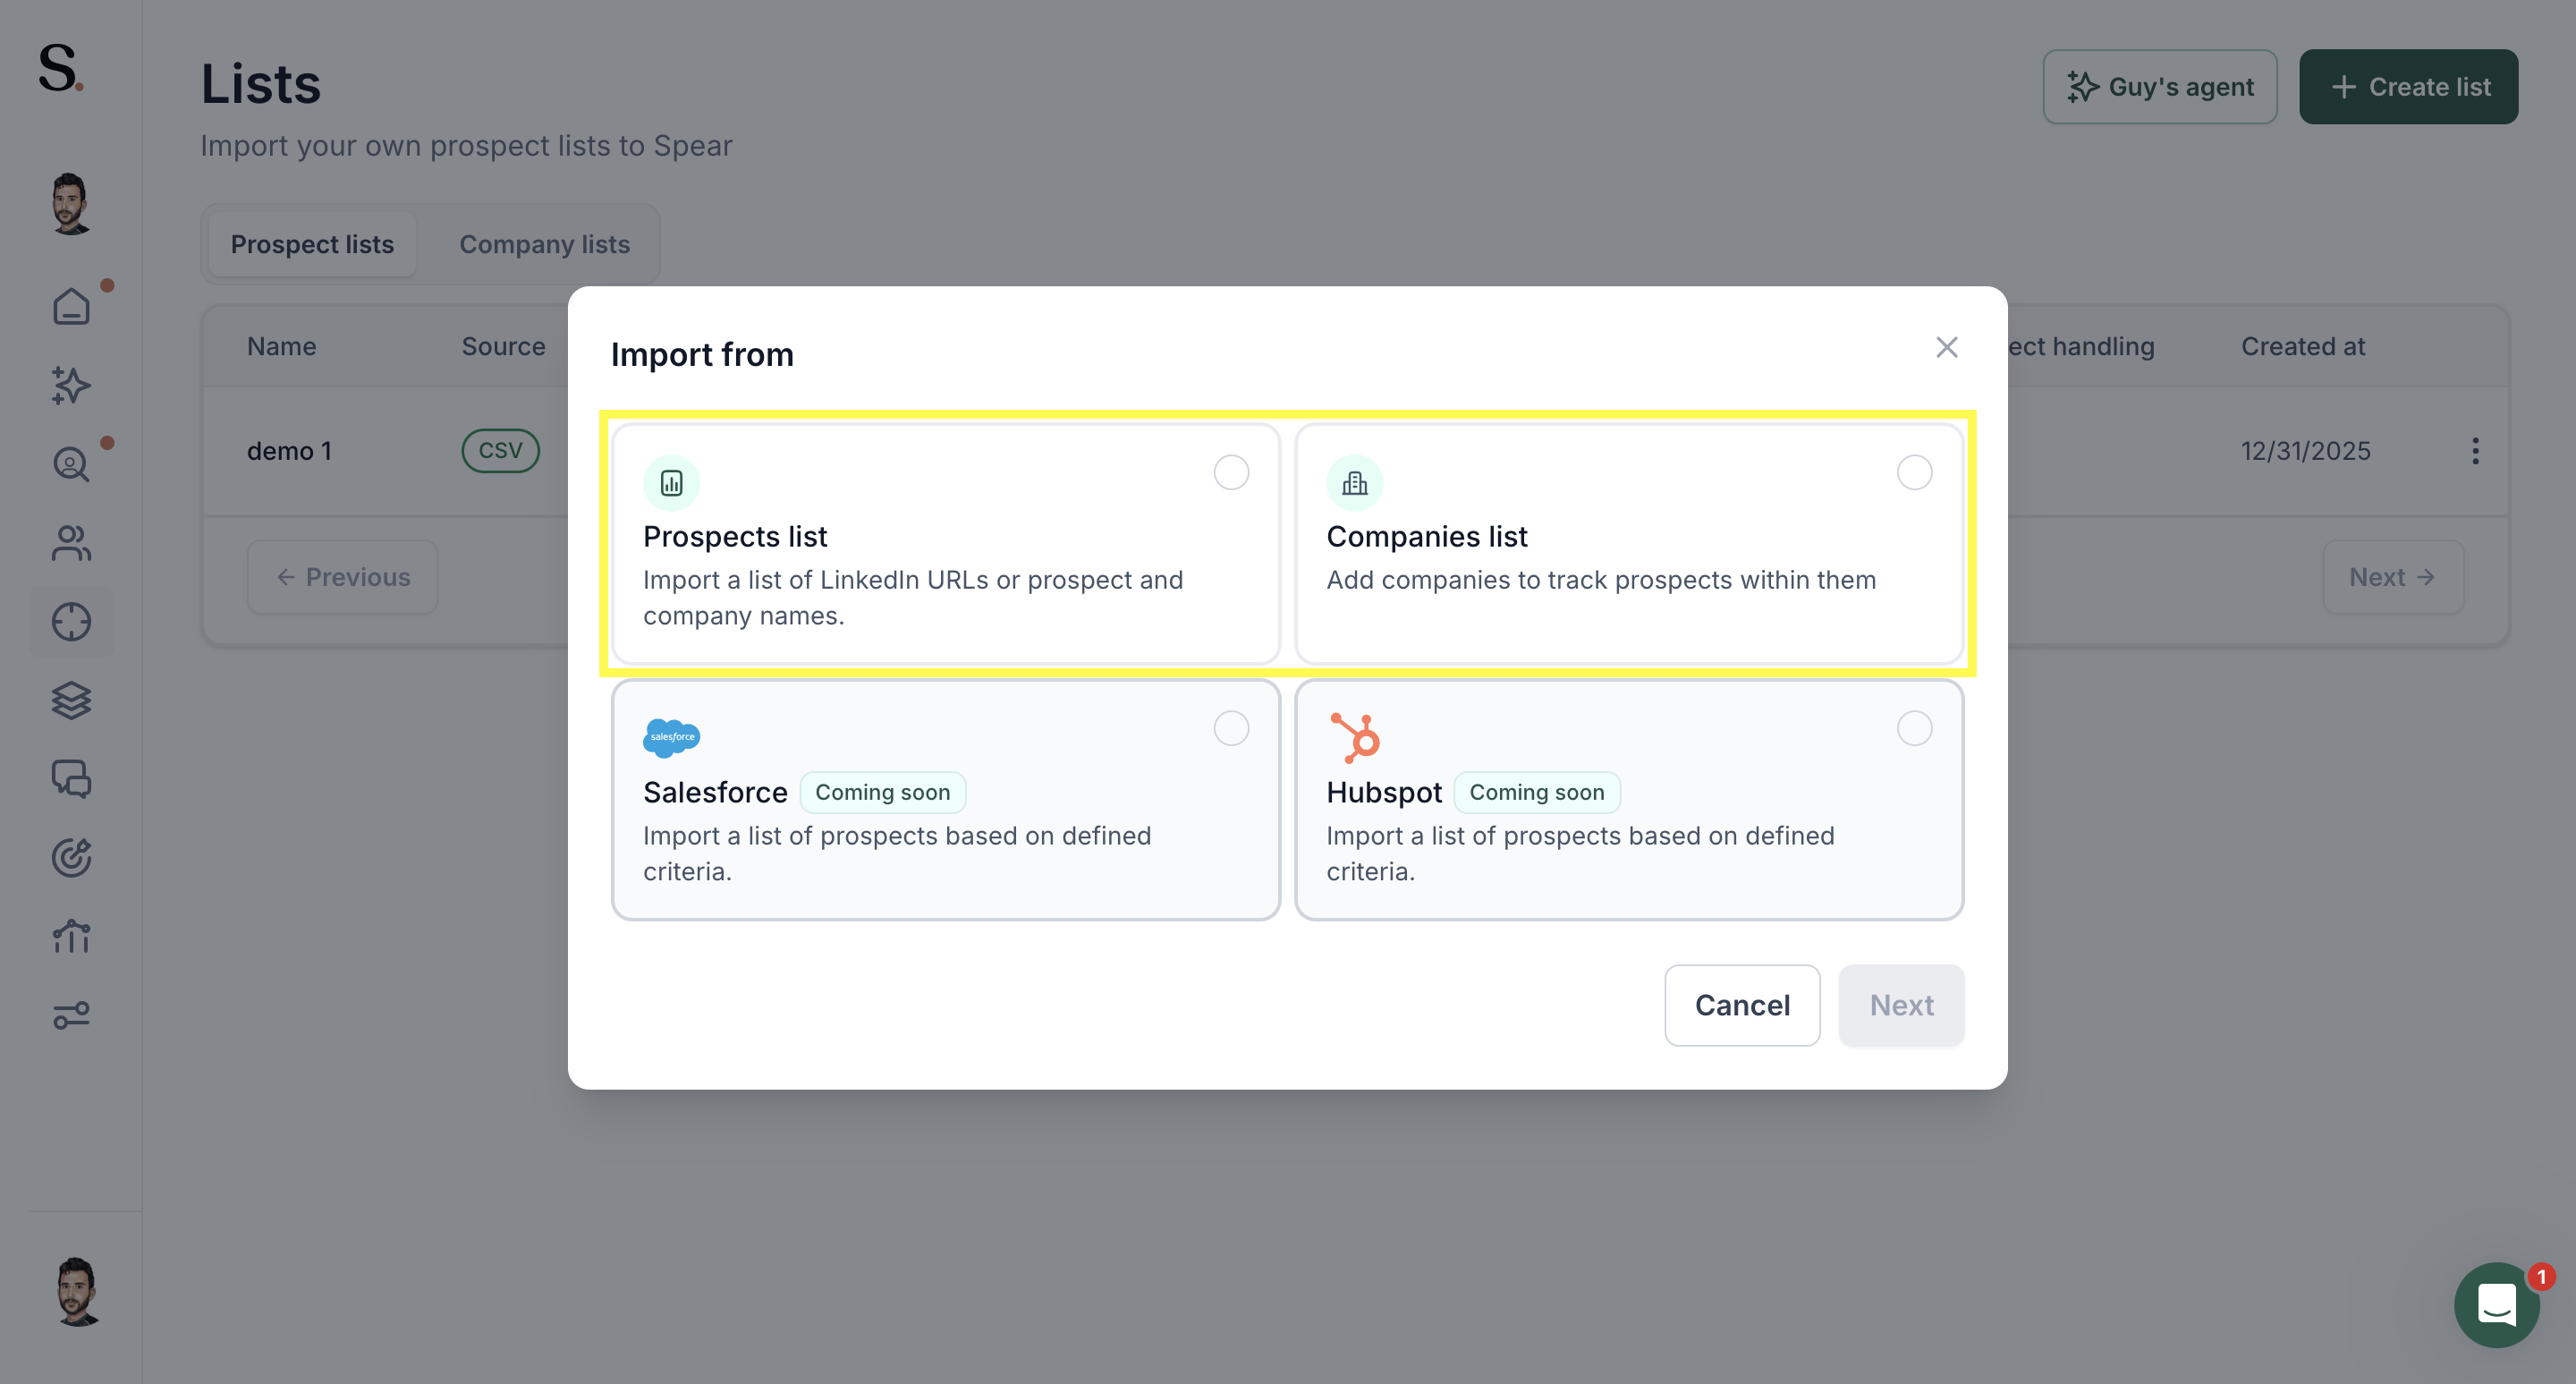
Step 2: In the "Import from" modal, select the type of list you want to import:
- Prospects list — import a list of LinkedIn URLs or prospect and company names
- Companies list — add companies to track prospects within them
Then click Next.
Step 3: Fill in your list details:
- List name — enter a descriptive name to easily identify this list later
- Identifier type — choose how your prospects are identified: LinkedIn URLs or Prospect and Company names
- LinkedIn URL column (or name column) — select the column in your CSV that contains the relevant data
- Filter by ICP — choose whether to validate prospects against your ICP criteria
Then upload your CSV by clicking "Click to upload" or dragging and dropping (CSV only, max 6MB).
💡 Heads up: The only fields Spear needs are the LinkedIn Profile URL, or alternatively the Prospect Name + Company Name. Extra columns won't affect the import. If you see a "file too large" error, simply delete any extra columns — no need to split your list or upload in batches.

Note: If you select "Prospect and Company name", ensure you provide a column that contains the prospect’s full name (first name and last name combined in one cell).
If your CSV currently has first name and last name in separate columns, you can create a full name column by using this formula:
=CONCAT(A2, " ", B2)
Where
-A2 is the first name
-B2 is the last name
-" " adds a space between them
Step 4: Choose whether to filter your list by ICP.
- ON — prospects are validated against your ICP criteria before being created
- OFF — only excluded companies and duplicates are blocked; other filters won't apply
⚠️ Important: Filtering by ICP may significantly reduce valid prospects. We recommend uploading without ICP filtering and reviewing in Suggestions manually.

Step 5: Choose how prospects should be handled
Choose what happens after the upload:
- Send to Monitor (for review)
- Automatically approve using either a Custom message or a Personalized message
Step 6: Assign prospects to campaigns (single or multiple)
Select the campaign(s) you want to assign prospects to. You can assign the same list to multiple campaigns during this step.
Step 7: Review upload results (preview)
Review the upload summary. Spear will indicate whether prospects are New, Existing, Duplicates, or Missing data.
📝 Note: this is a preview only — you can view these statuses, but you can't edit them from this screen.


.avif)