How to Approve and Deny prospects
 May 12, 2026
 5 min read
Spear combines two key functions in one platform.
It helps you find the right prospects and also assists in managing your conversations with them until a meeting is booked.
In this guide, we'll walk you through the approval/denial process for reviewing prospects.
- Open the Suggestions tab
Here you'll find new prospect suggestions awaiting review each day. You can go down in chronological order or use the filters at the top to prioritize what you want to approach first.
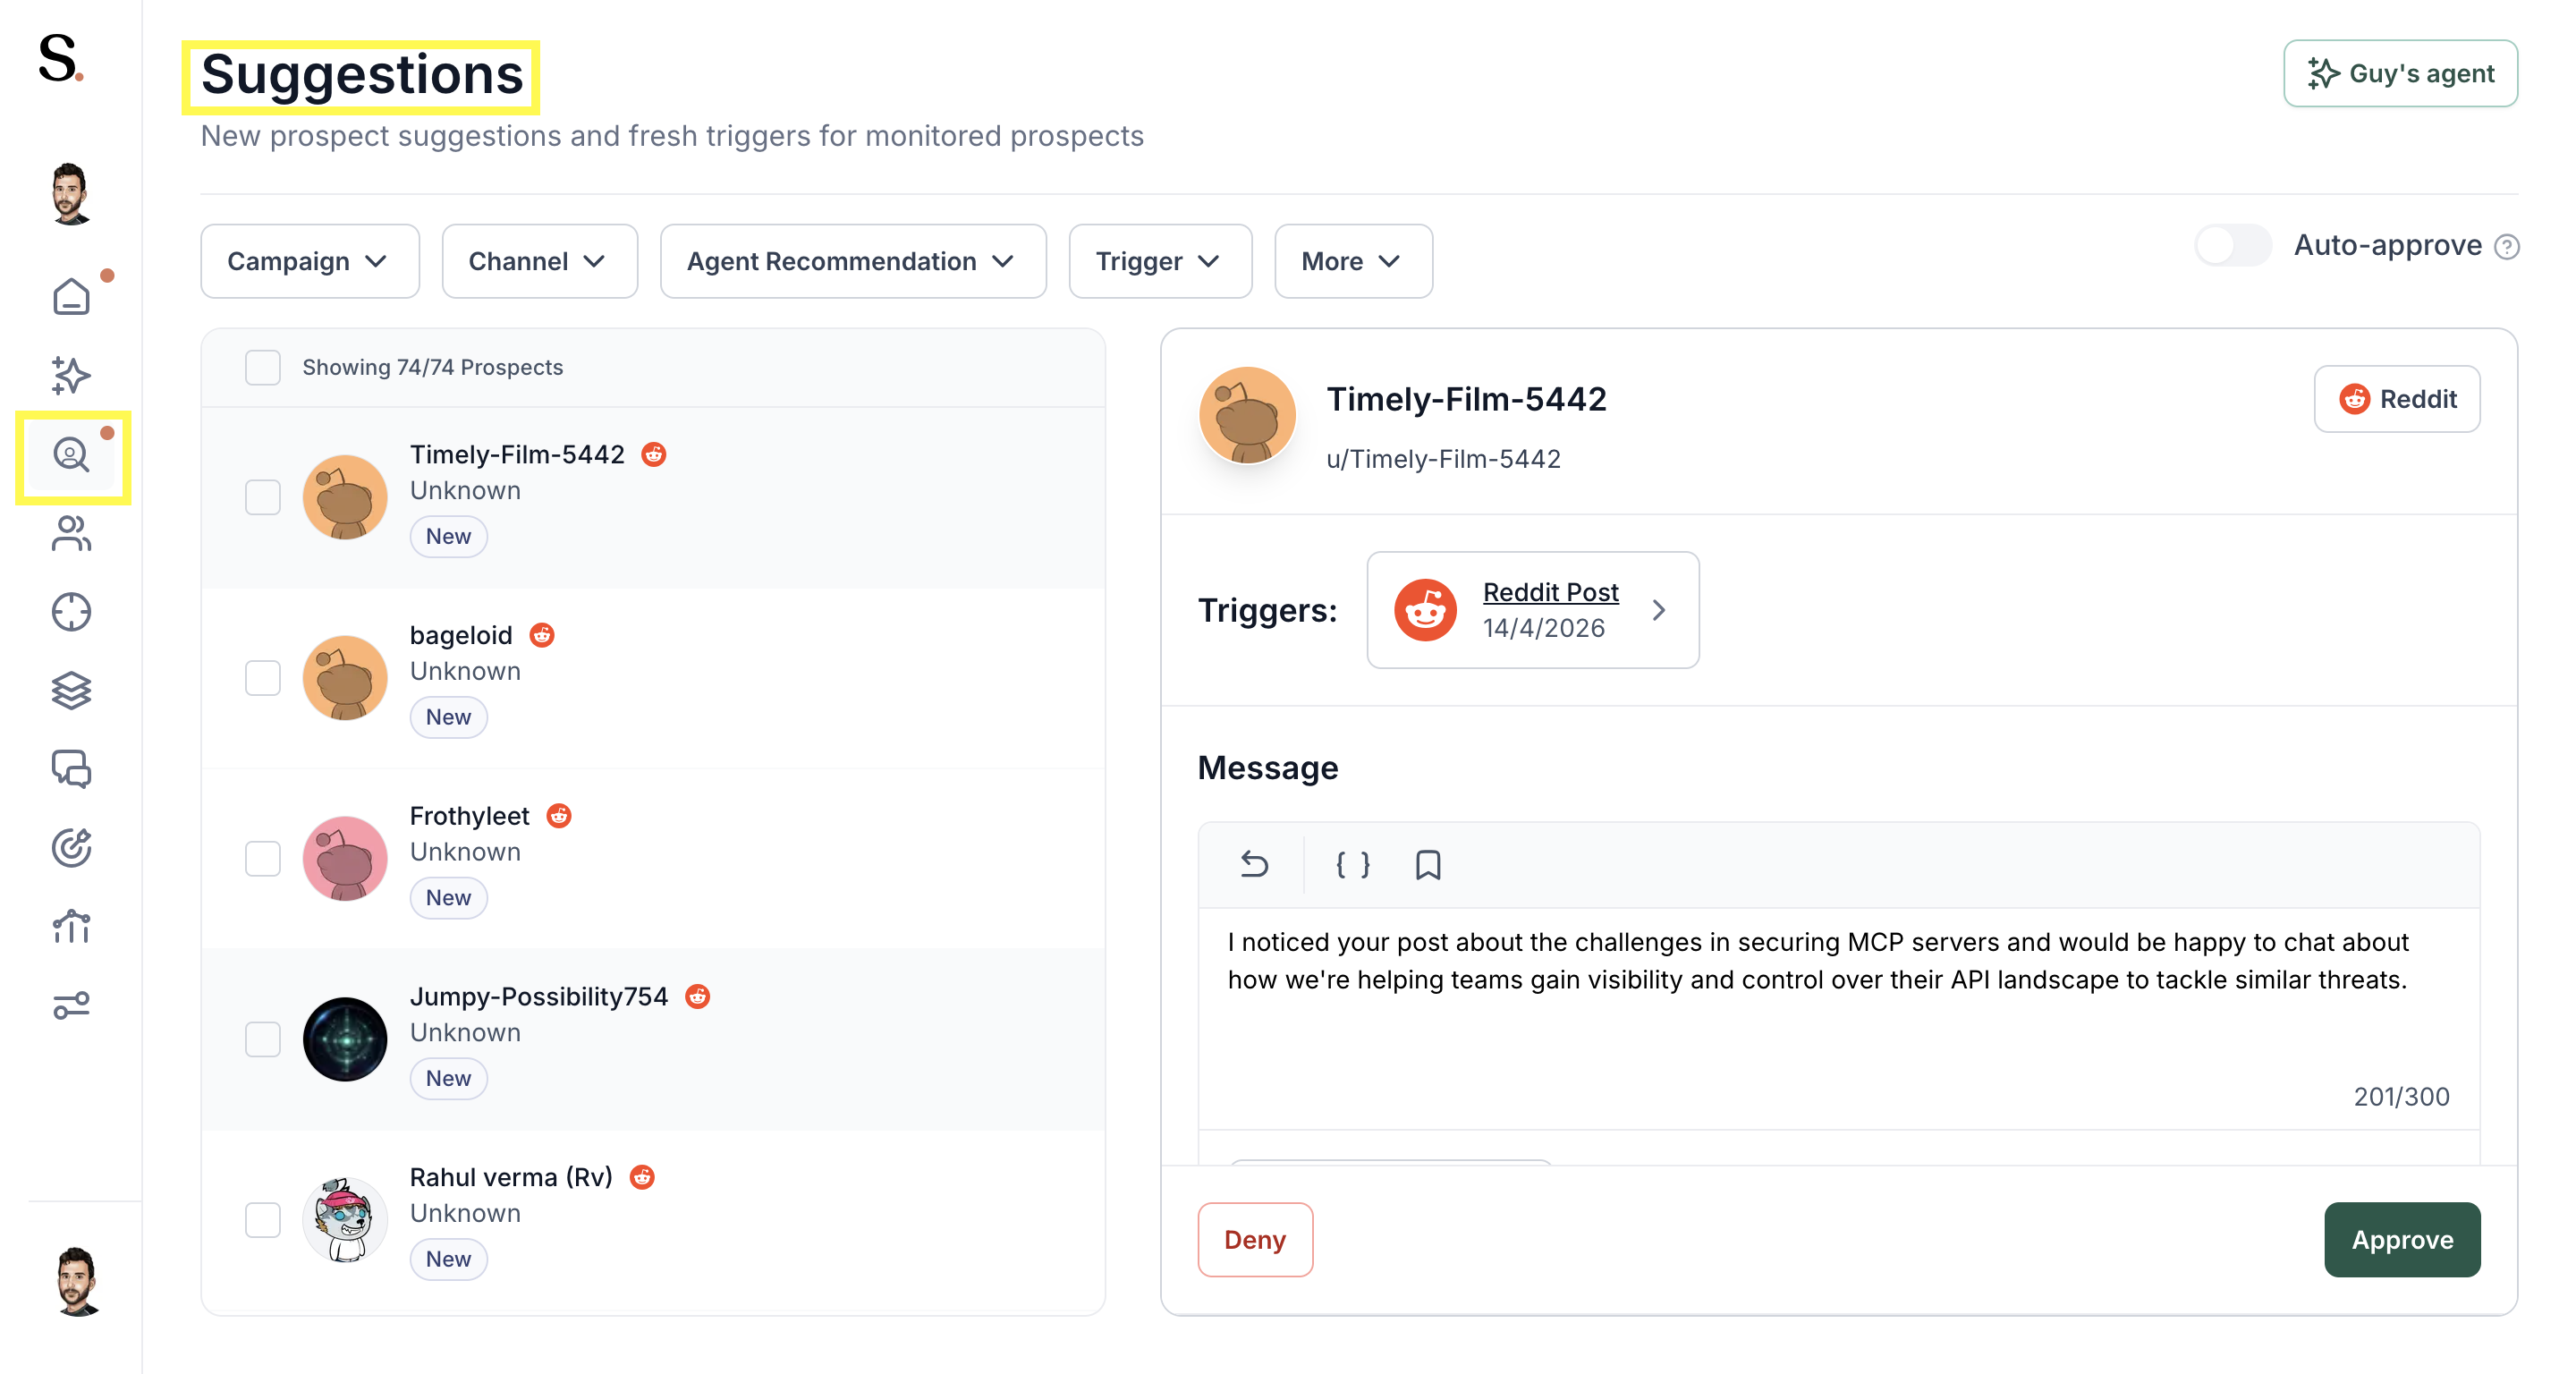
- Review the prospect card
What can you see on the Prospect Card?
- Name & ICP Match: At the top of the card, you'll see the prospect's name and a tag indicating their Match to ICP percentage.
- Professional Summary: Below the name, the card displays the prospect's Job Title, Company, and Location.
- LinkedIn Shortcut: A button in the top-right corner allows you to jump directly to their LinkedIn profile.
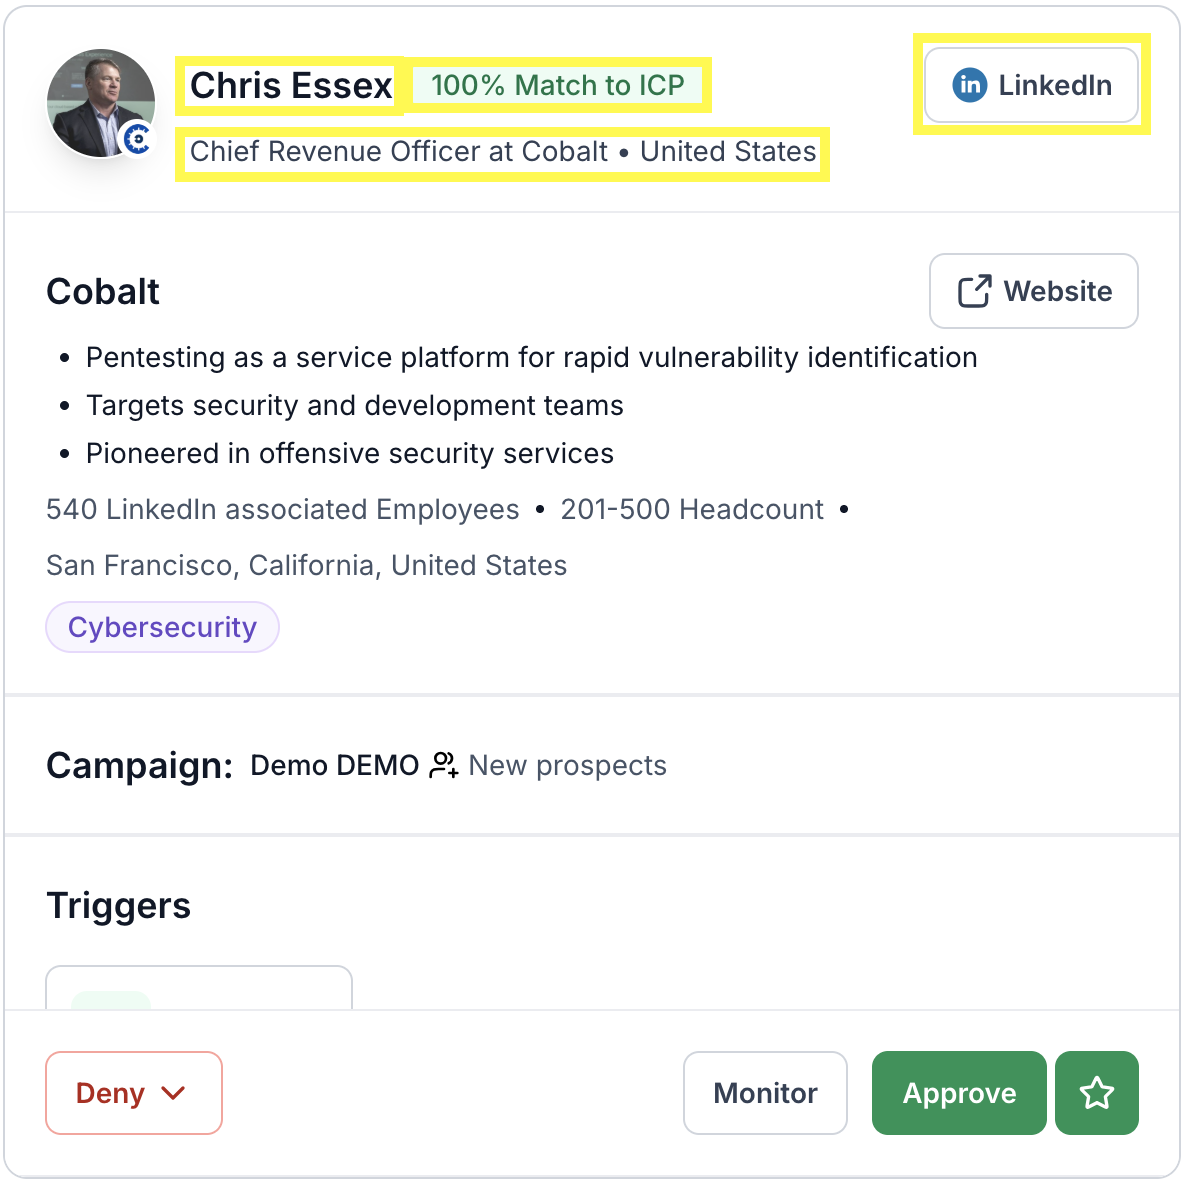
- Company Overview: This section provides key information about the organization, including:
- Website Link: Located at the top right corner of this section for quick access to their corporate site.
- Description: A summary of the company’s core business and services.
- Employee Count: Total number of employees associated with the company.
- Company Location: The headquarters or primary office location of the business.
- Industry Tags: Categories that define their market (e.g., Cybersecurity).

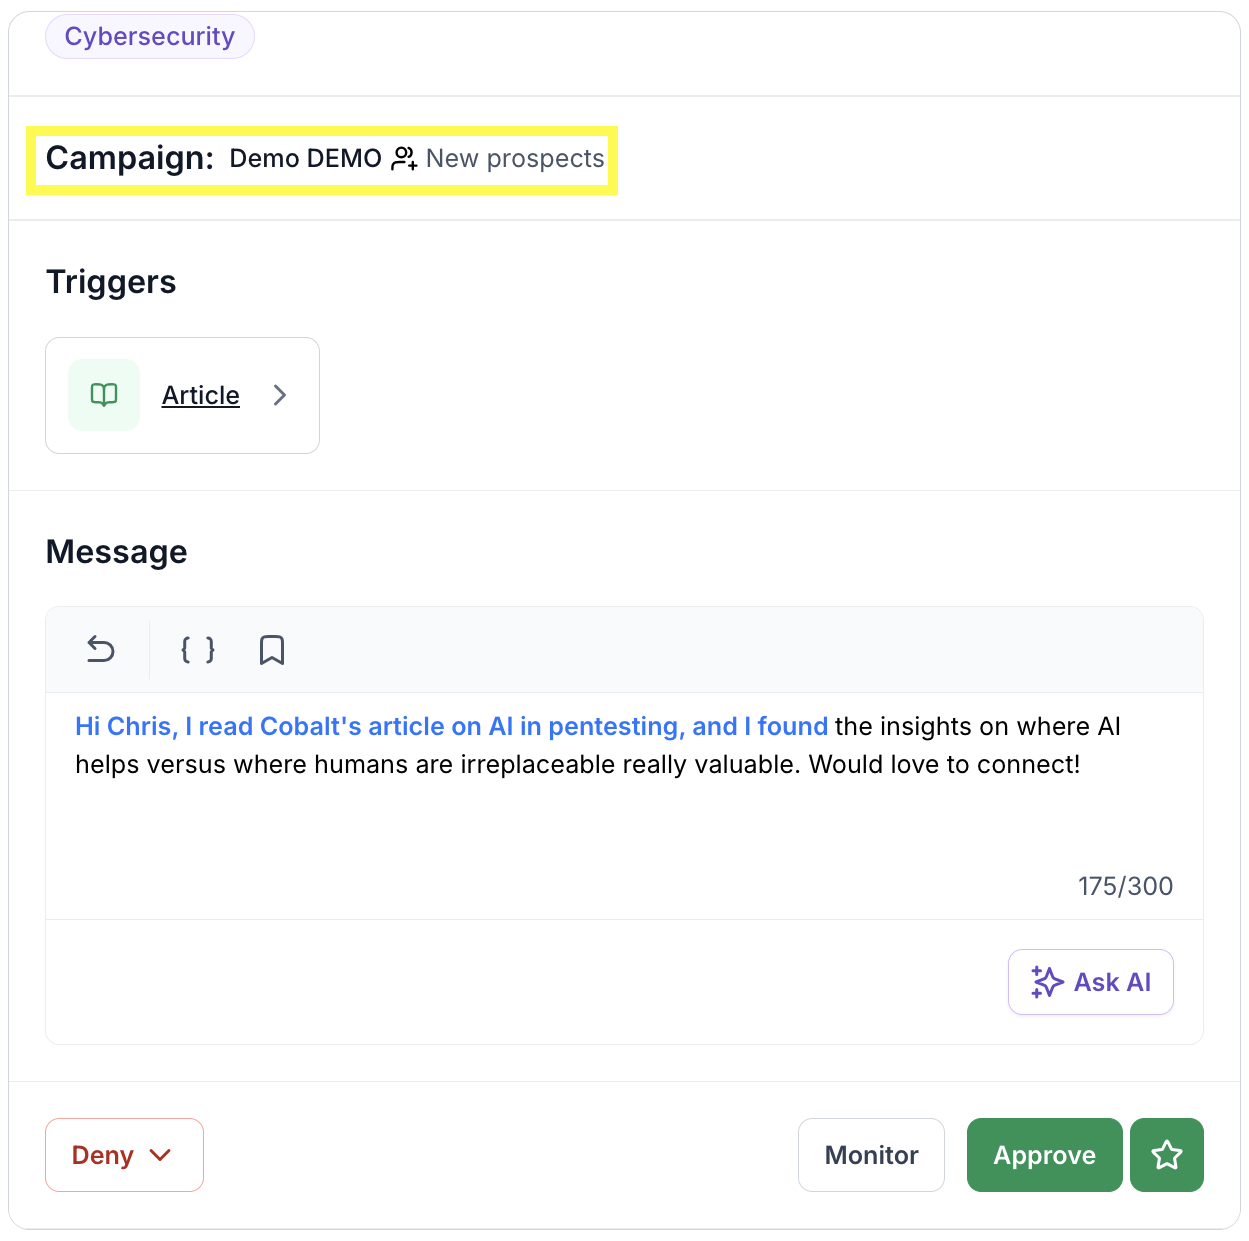
- Campaign Info: Displays the specific Campaign name and segment where the prospect is located.
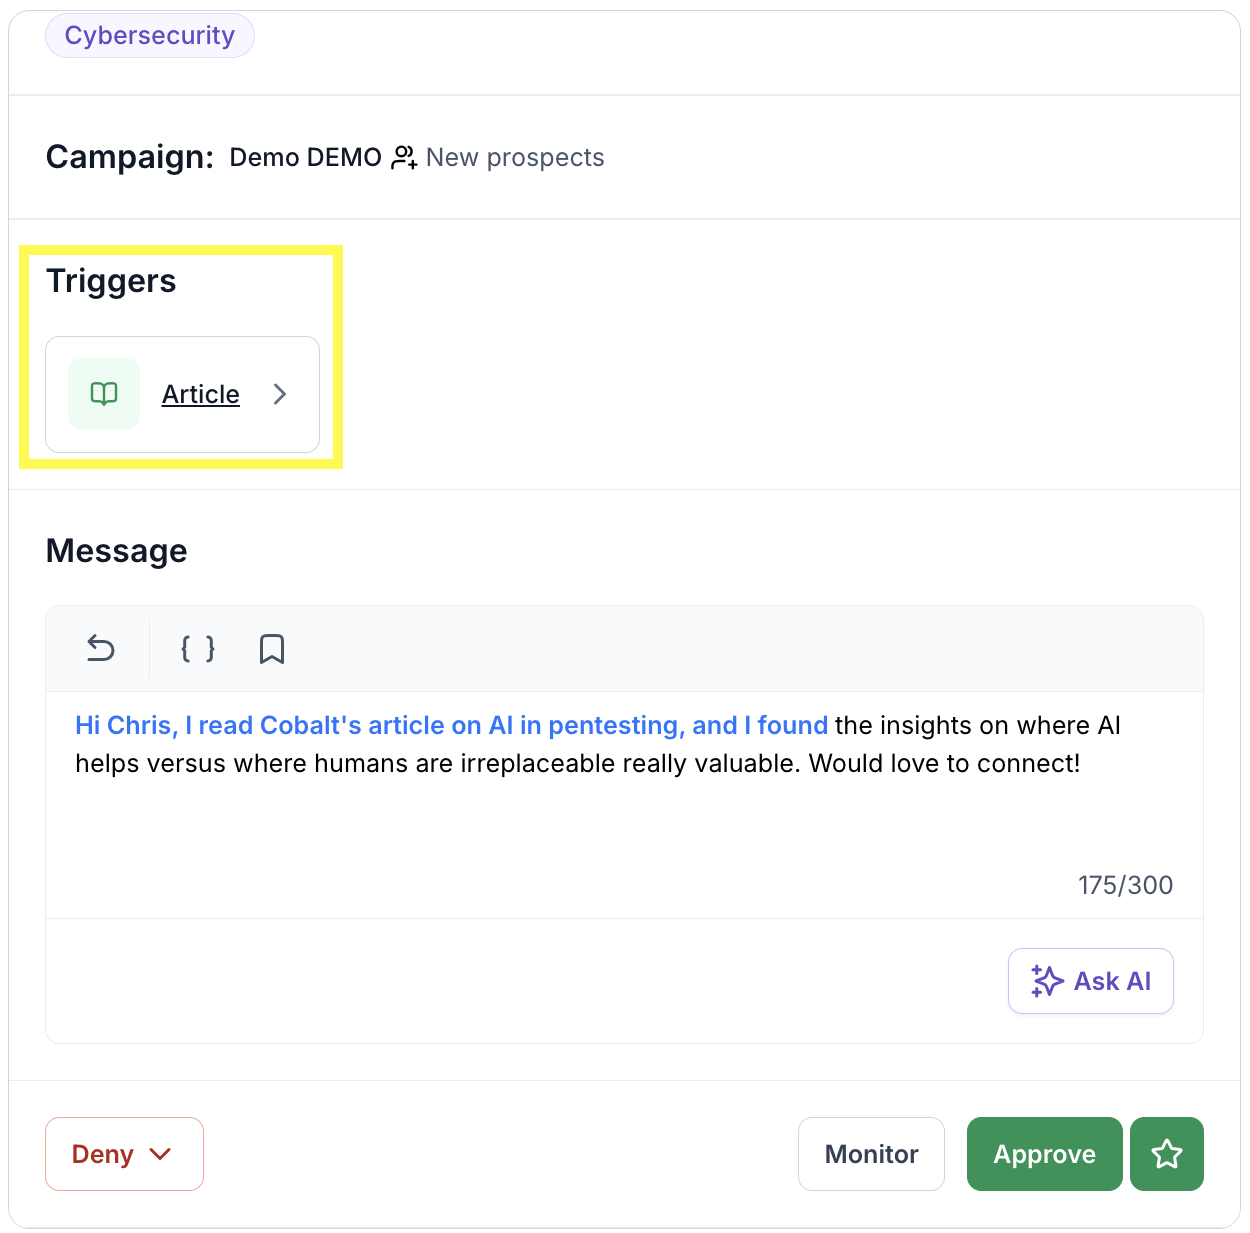
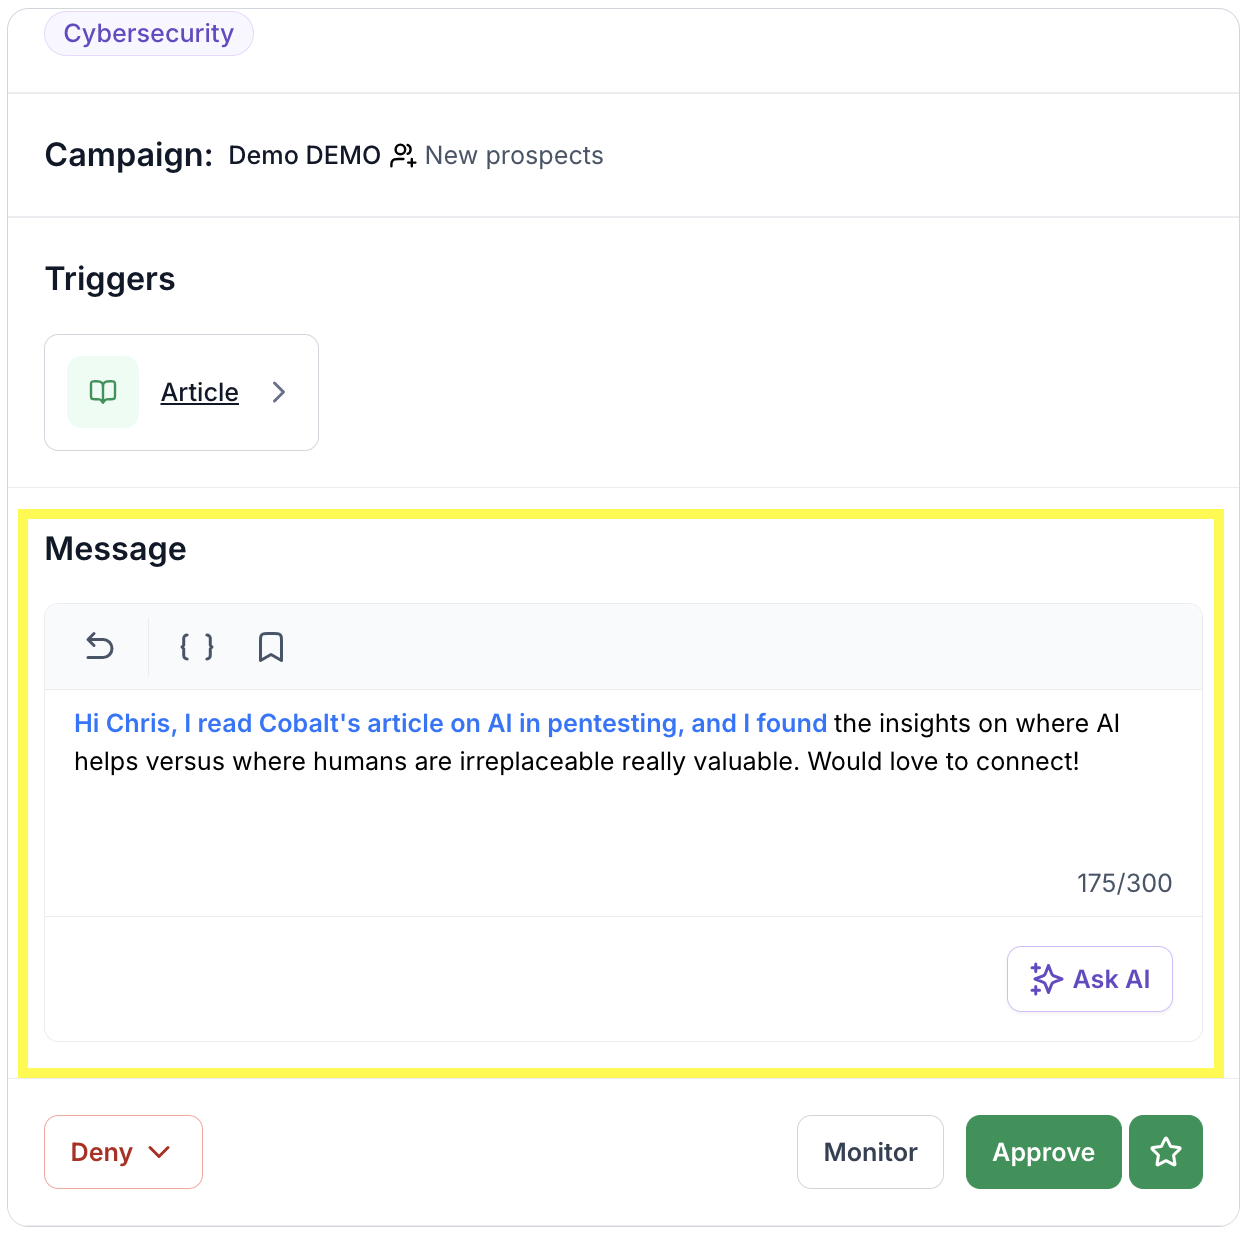
- Triggers: The source Spear uses to generate the personalized outreach message. Clicking on it will take you directly to the original source the message was based on. (Eg: Article)
- Deep Dive: For a more comprehensive look at how these signals work, check out our guide on Trigger-based Outbound.
Message Customization
- AI-Generated Draft: Spear provides a pre-written message tailored to the prospect based on the identified triggers.
- Editing Tools: Use the toolbar to Undo changes, Save to Library, or use the Ask AI button to instantly refine and polish the draft.
- Character Counter: A real-time counter (e.g., 175/300) ensures your message stays within recommended limits.
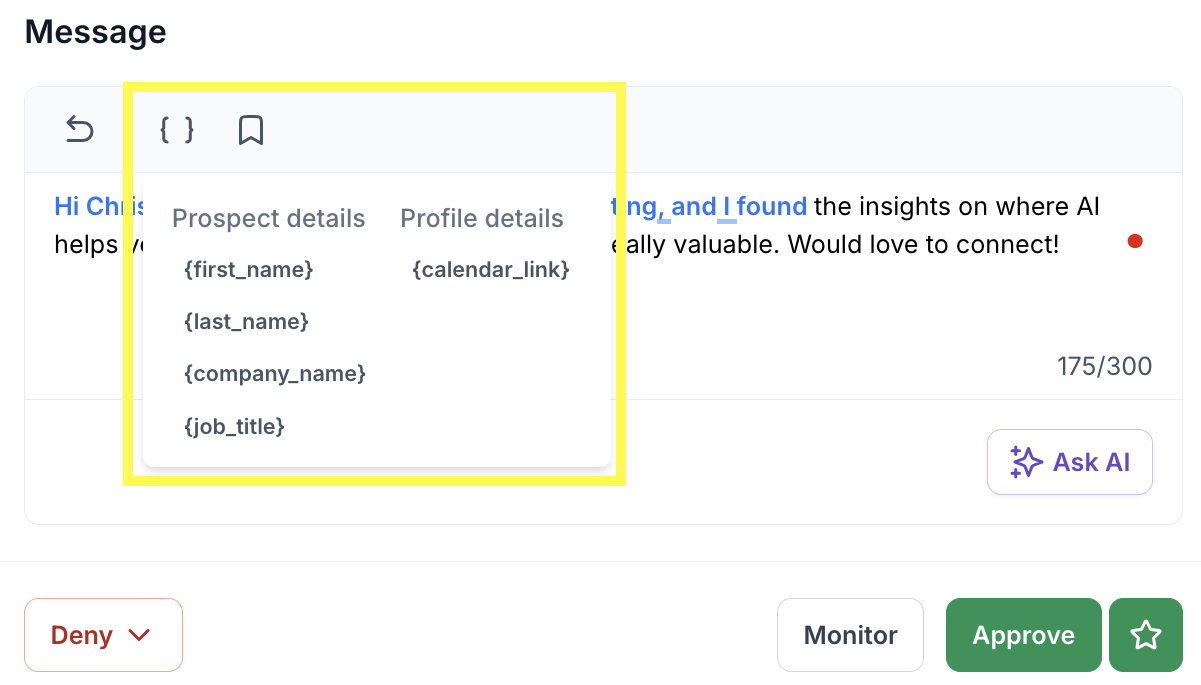
- Using PlaceholdersIn Spear, brackets are used as placeholders that automatically pull data about the prospect to personalize your message at scale. By clicking the { } icon, you can insert:
- Prospect Details:
{first_name},{last_name},{company_name}, or{job_title}. - Profile Details:
{calendar_link}.
- Prospect Details:
Final Actions:
Once you have reviewed the details and finalized the message, use the bottom toolbar to manage the prospect:
- Deny: Use the dropdown to reject the prospect or mark them as "not a fit".
- Monitor: Save the prospect to watch for future updates without immediate outreach.
- Approve: Confirm the prospect and the message to move them forward in your campaign.
1. To approve, click on the "Approve button"
Note: you can also "super approve ⭐" a prospect who is a perfect match to what you're looking for - the system will

2. How to Deny and Provide Feedback
When reviewing prospects, you have two distinct options to manage those who do not fit your criteria:

- Standard Denial: To remove a prospect from the current campaign without providing specific feedback, simply click the "Deny" button. This action removes the individual from the queue but does not apply broader exclusions to your campaign logic.

- Deny and Exclude: This option allows you to provide direct feedback to the system, acting as a powerful tool to accelerate ICP (Ideal Customer Profile) refinement.

- Real-Time ICP Correction via "Deny and Exclude"

This functionality transforms a simple rejection into a technical adjustment of your prospecting logic:
- Dynamic Attribute Exclusion: When you identify an undesirable prospect, you can immediately correct your ICP by excluding specific attributes, such as Company or Job Title. By selecting these options, you instruct the platform to cease searching for any profiles matching those criteria across the entire campaign.
- Real-Time Refinement: Instead of just removing a single lead, this process acts as a corrective measure for your targeting strategy. By providing this actionable feedback, you train the algorithm to filter similar profiles in future iterations automatically. This significantly narrows the margin of error in your ICP and drastically reduces manual review time for future batches.
3. Monitor
- Monitor: Selecting this option tells the system to keep tracking the prospect. The system will "re-surface" them approximately every 3 weeks if it finds new relevant triggers or updates.

Tips & Best Practices
- Be consistent: Put aside 15 minutes every morning to review prospects so they don’t pile up
- Always provide feedback when denying: it helps the system improve your prospect matches
- Keep your ICP definition updated


.avif)