How to integrate Spear to Salesforce
 May 12, 2026
 5 min read
Spear to Salesforce
Spear offers a native integration with Salesforce. This is a two-way integration, allowing you to push prospects from Spear into your CRM, and set up categories for company exclusion.
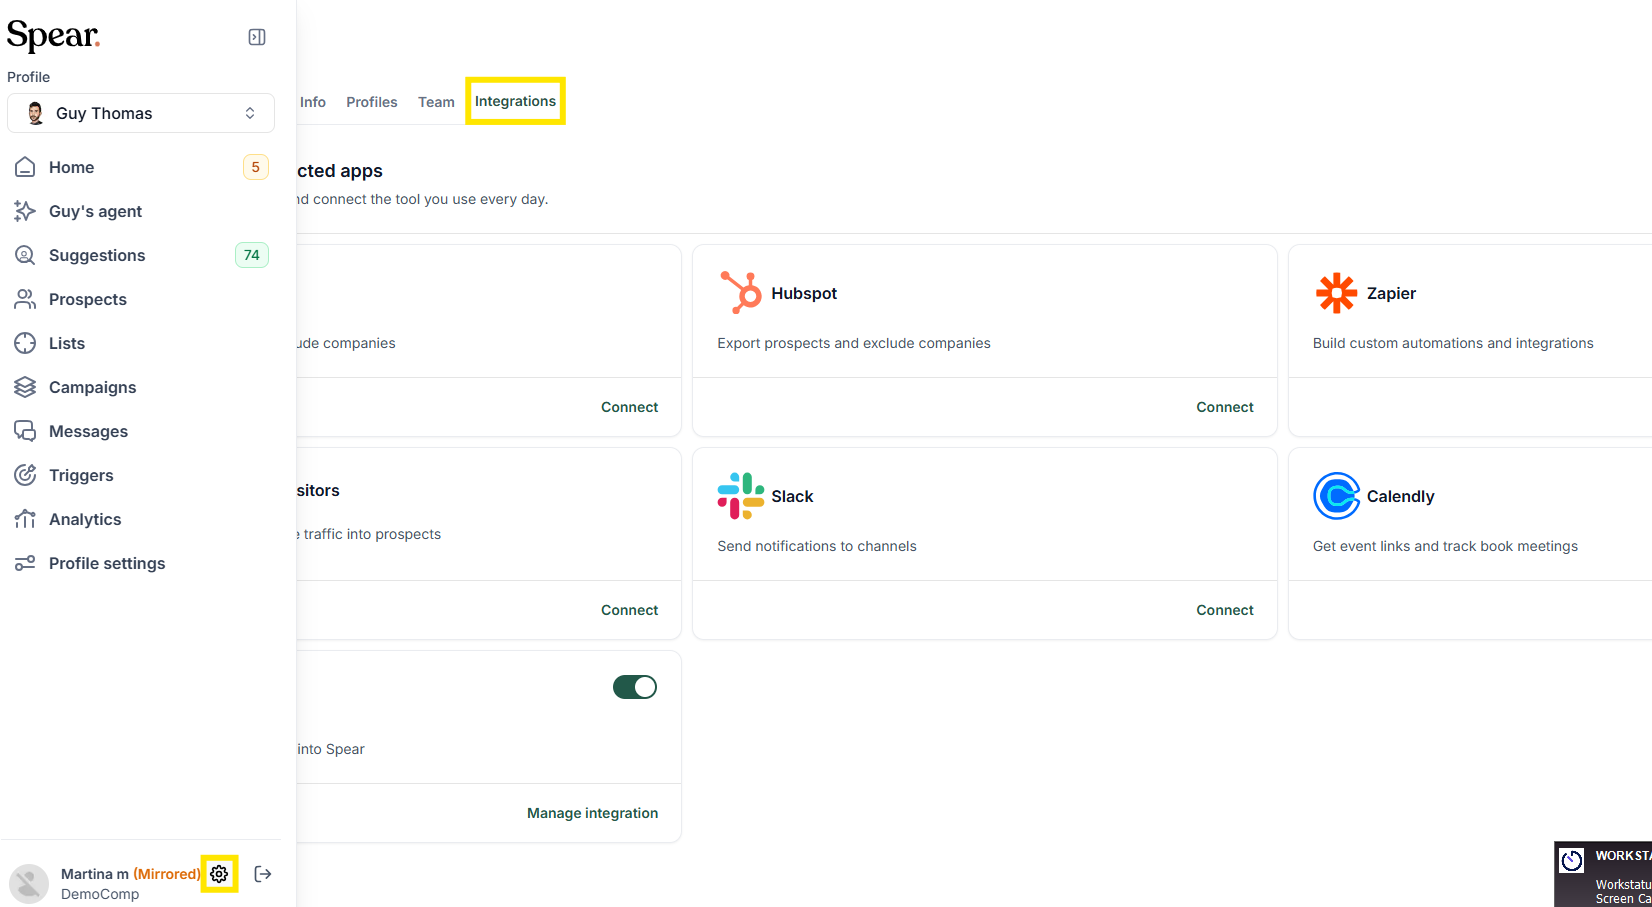
Step 1: In the bottom left corner, click the gear icon, Settings > Integrations > Connect Salesforce
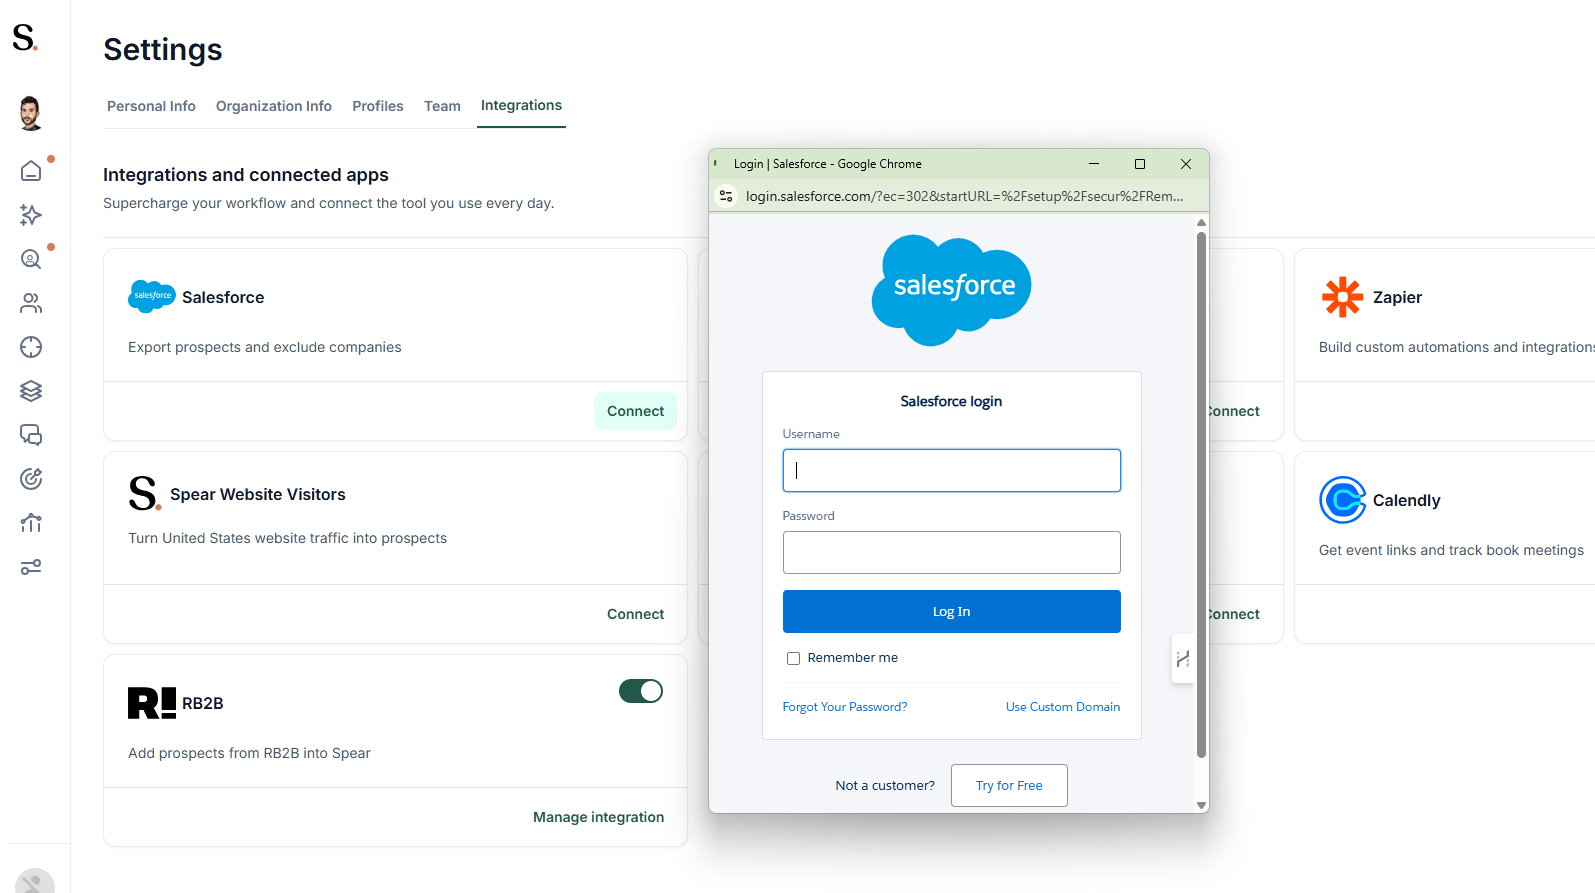
Step 2: Connect to Salesforce
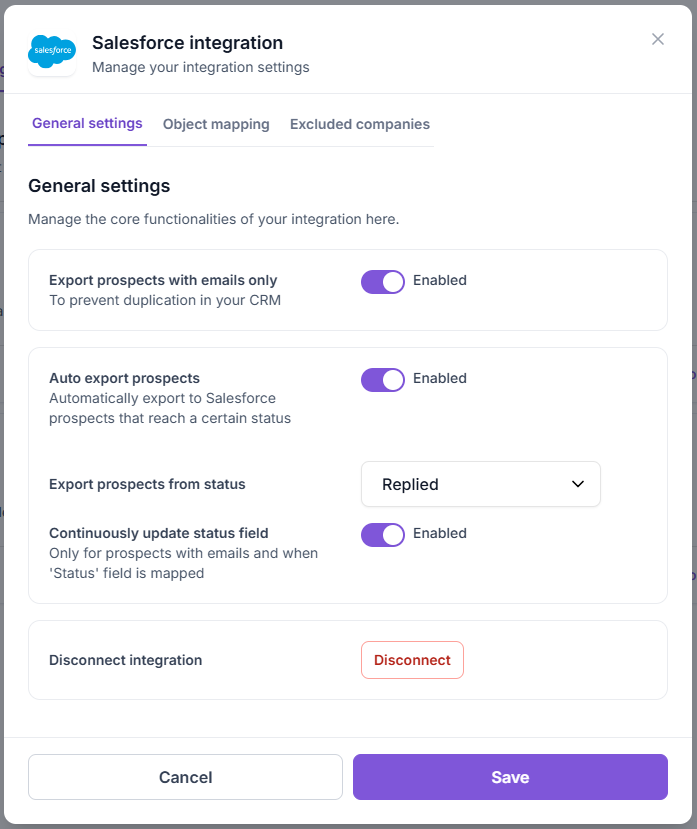
Step 3: Complete Integration setup
To activate Auto export to Salesforce:
- Enable Auto export prospects
- Select the prospect status from which exports should begin
We also recommend enabling:
- Continuously update the status field – to ensure prospect statuses in Salesforce stay in sync with Spear
- Export prospects with emails only – to help prevent duplicate records in Salesforce
If Auto Export is turned off, you can still export prospects manually via Approved Prospects > Export to Salesforce
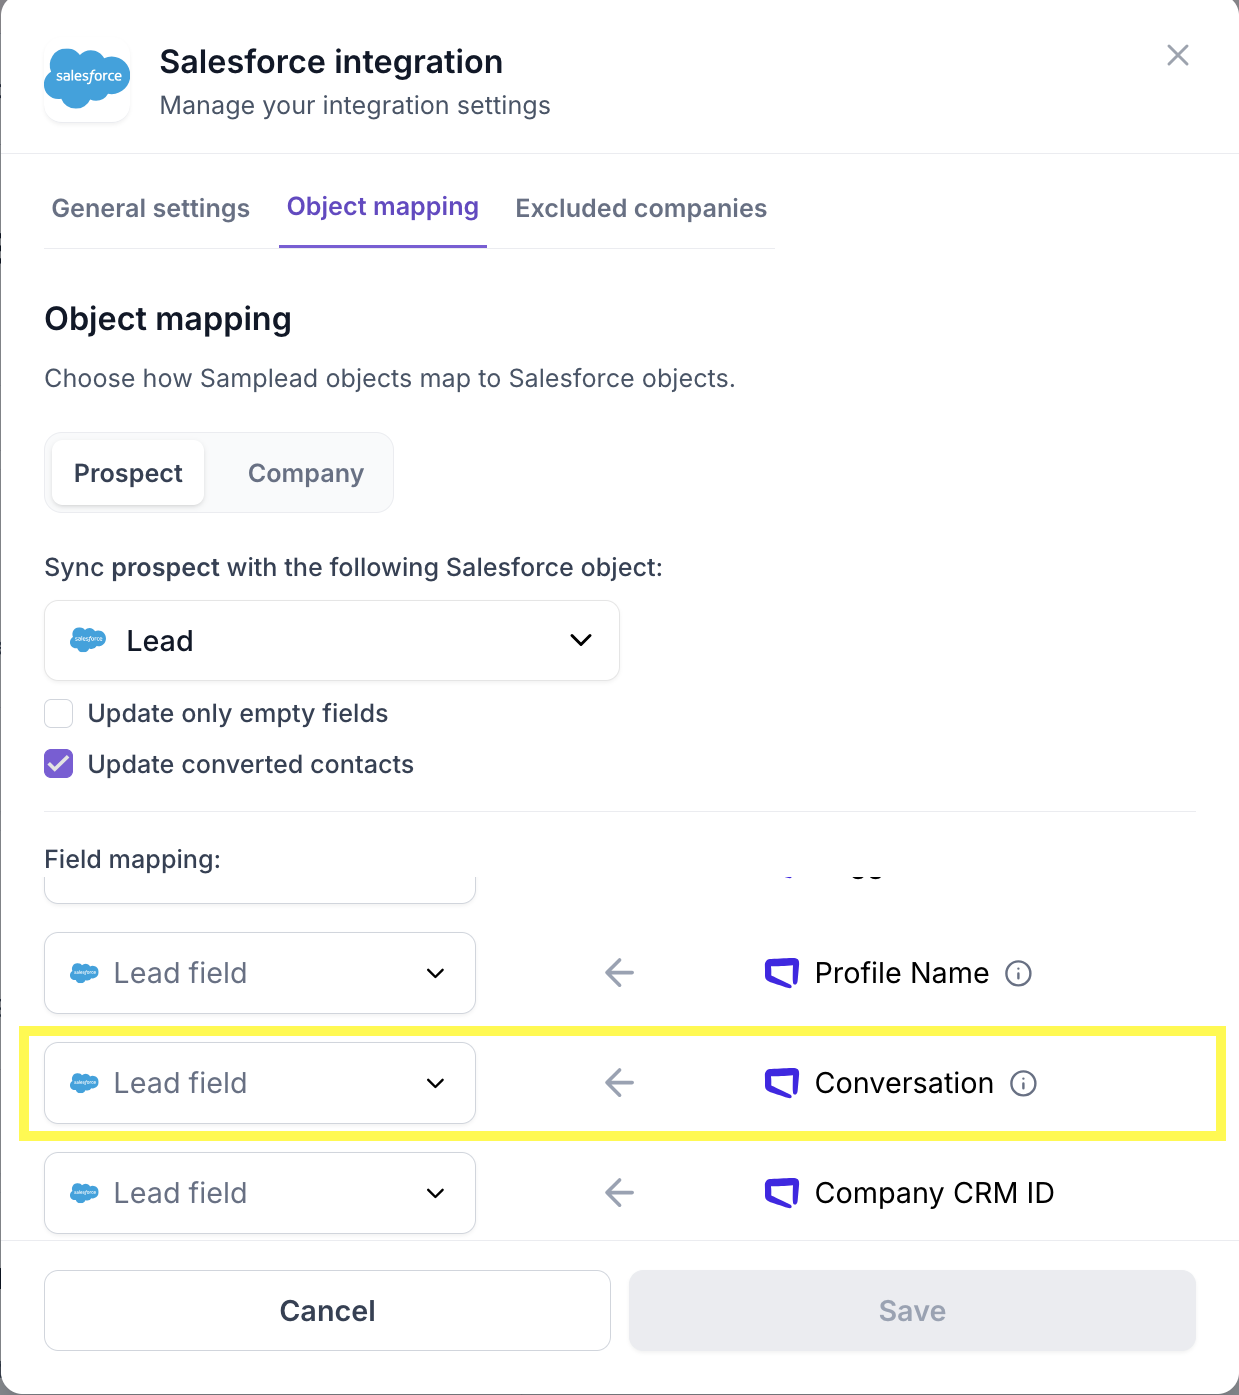
Step 4: Complete Object mapping
Choose which fields in Salesforce should be populated using the data points provided by Spear.
Real-Time Conversation Sync
Keep your CRM as a living record by automatically exporting full conversation transcripts.
- Locate the Conversation Field: In the Object mapping tab, find the row for Conversation.
- Map to Salesforce: Select the corresponding field in Salesforce where you want the messages to appear.
- Automatic Updates: Once configured, every new message in the conversation will be pushed to this associated field in real-time.
Why you’ll love it:
- Total Data Integrity: Every “let’s set a time” and “sounds interesting” is recorded in your CRM in real-time.
- Team Alignment: Your entire sales team stays on the same page without ever leaving their CRM dashboard.
Pro-Tip: When setting this up, look for the “Conversation field” in your mapping list. We recommend mapping this to a multi-line text property in Salesforce to ensure the full transcript fits perfectly.
Recommended: Mapping both the Prospect and Company fields — to create both objects in Salesforce.
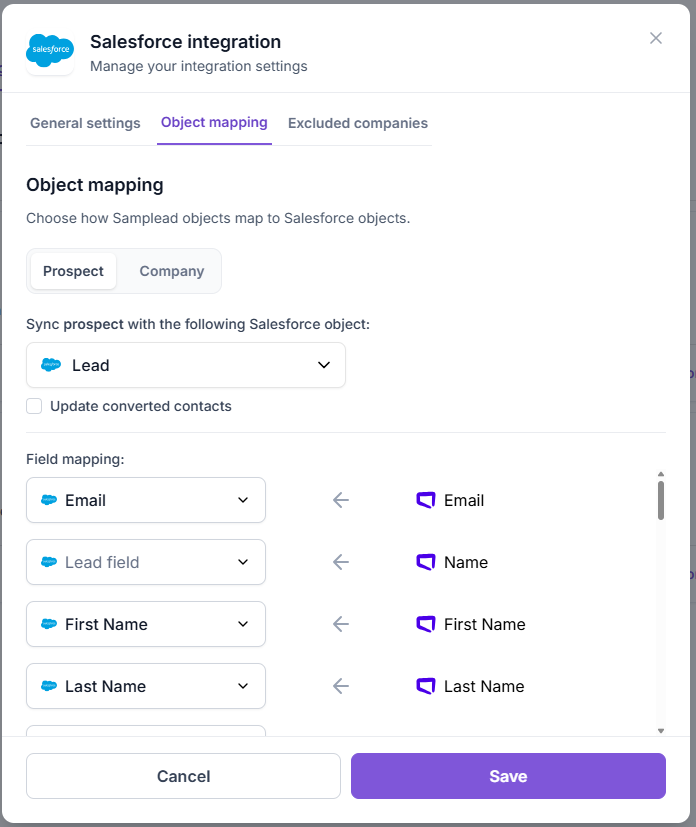
Optional: Custom Mapping — You can map static text by selecting '+Add Mapping' and defining the field. For example, you can add “Spear” so it appears with each exported prospect.

Note: If you wish to map a Spear field to Salesforce but don’t see the corresponding property in Field Mapping, you may need to create a custom field. Here’s a guide from Salesforce that explains how to do this - click here.
Step 5: Define excluded companies
You can define Excluded Companies through Spear - Salesforce integration, ie, companies Spear should not reach out to.
It is possible to upload Excluded Companies using a CSV file in Profile Settings > Excluded Companies, however we recommend using the Salesforce integration as it ensures companies are continuously updated.
To enable the integration:
- Select the company object – Choose the object in Salesforce that represents a company (e.g., 'Account' object).
- Set exclusion filters – Add filters to specify which companies should be excluded (e.g. exclude all active customers by setting Account Type = Customer). You can add multiple filters.
- Add additional objects (optional) – If companies are represented by more than one object type in your Salesforce, click Add object to include them.
This is an example of how the Excluded Company List may be configured. The exact setup will vary depending on each customer’s Salesforce configuration.


.avif)