Home>Knowledge Base>Integrations>How to integrate Spear to Zapier

How to integrate Spear to Zapier

Calendar icon marking the date this article was publishedMay 12, 2026
Clock icon marking how long this article takes to read5 min read

Integrating Spear with Zapier

Zapier allows you to connect Spear with thousands of applications such as Gmail, Slack, Google Sheets, HubSpot, Salesforce, and many others. With this integration, you can automate repetitive tasks and ensure that your prospect data flows seamlessly into the tools your sales team already uses.  

This means: less manual work, fewer errors, and more time for your team to focus on selling.

Before you start, make sure you have:

  • An active Spear account with access to Settings > Integrations.
  • A Zapier account (free or paid) already set up.
  • Clarity on the Trigger and Action you want to automate.

How to integrate Spear to Spear.

Step 1: Access Integrations In the bottom left corner, click the gear icon: Settings > Integrations > Connect to Zapier.
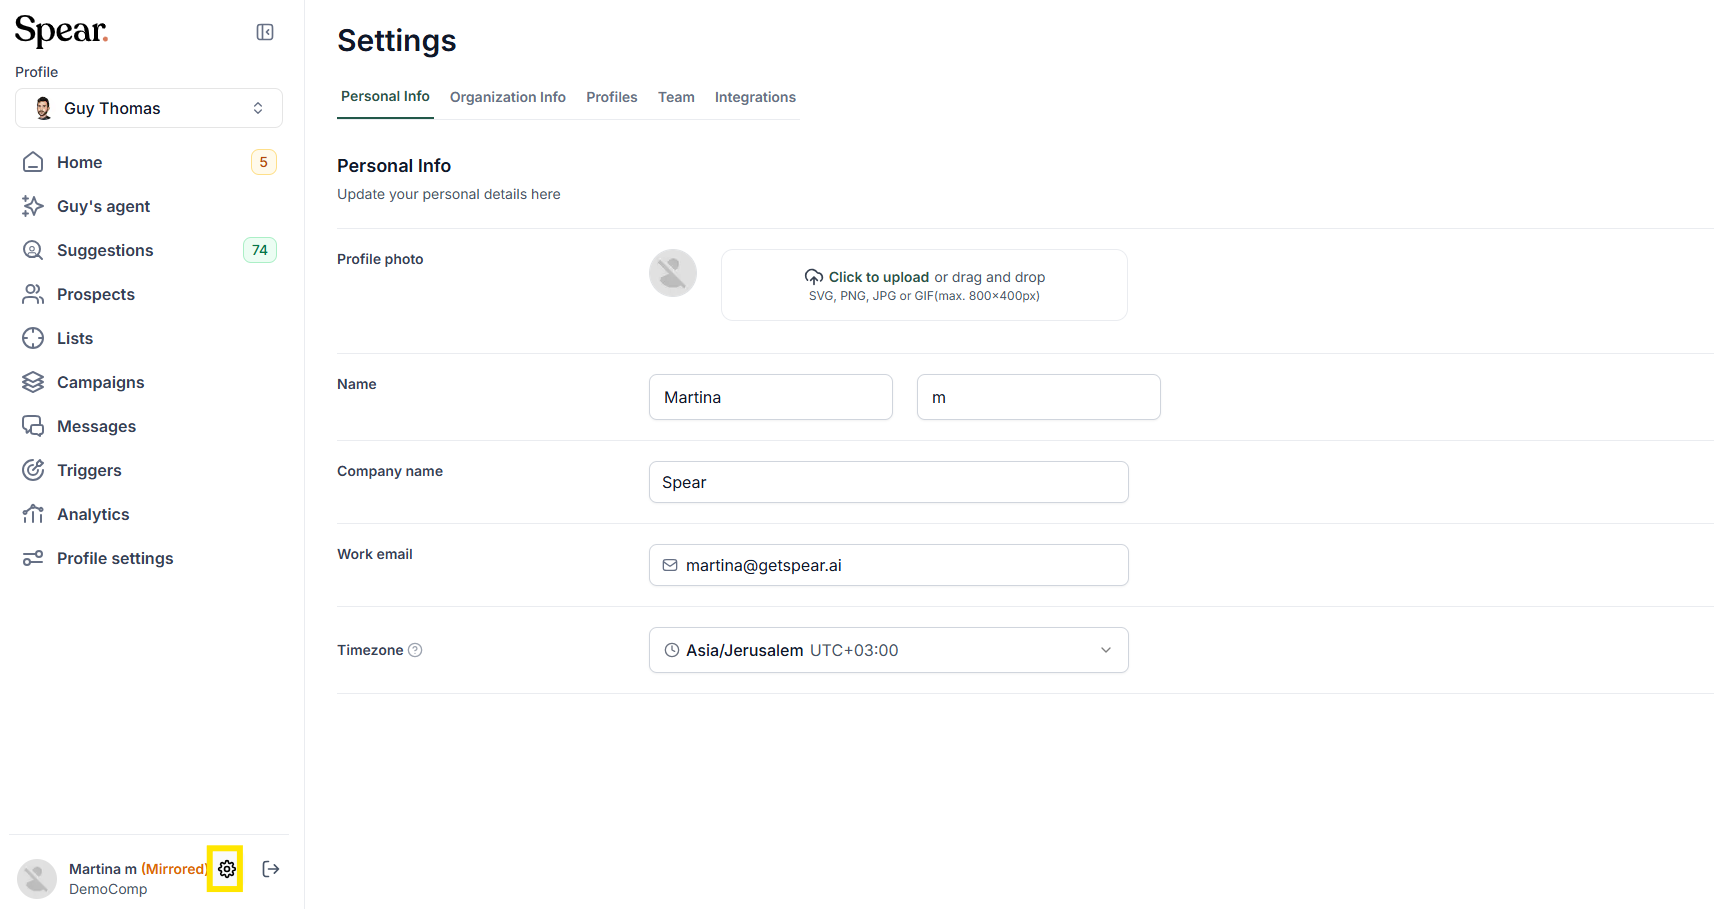
Personal info settings with the settings gear beside the user name highlighted, showing name, company, work email and timezone
Settings with the Integrations tab highlighted, showing the available integrations

Step 2: Integrate Zapier

  • Click Manage Integration and select Connect to Zapier.
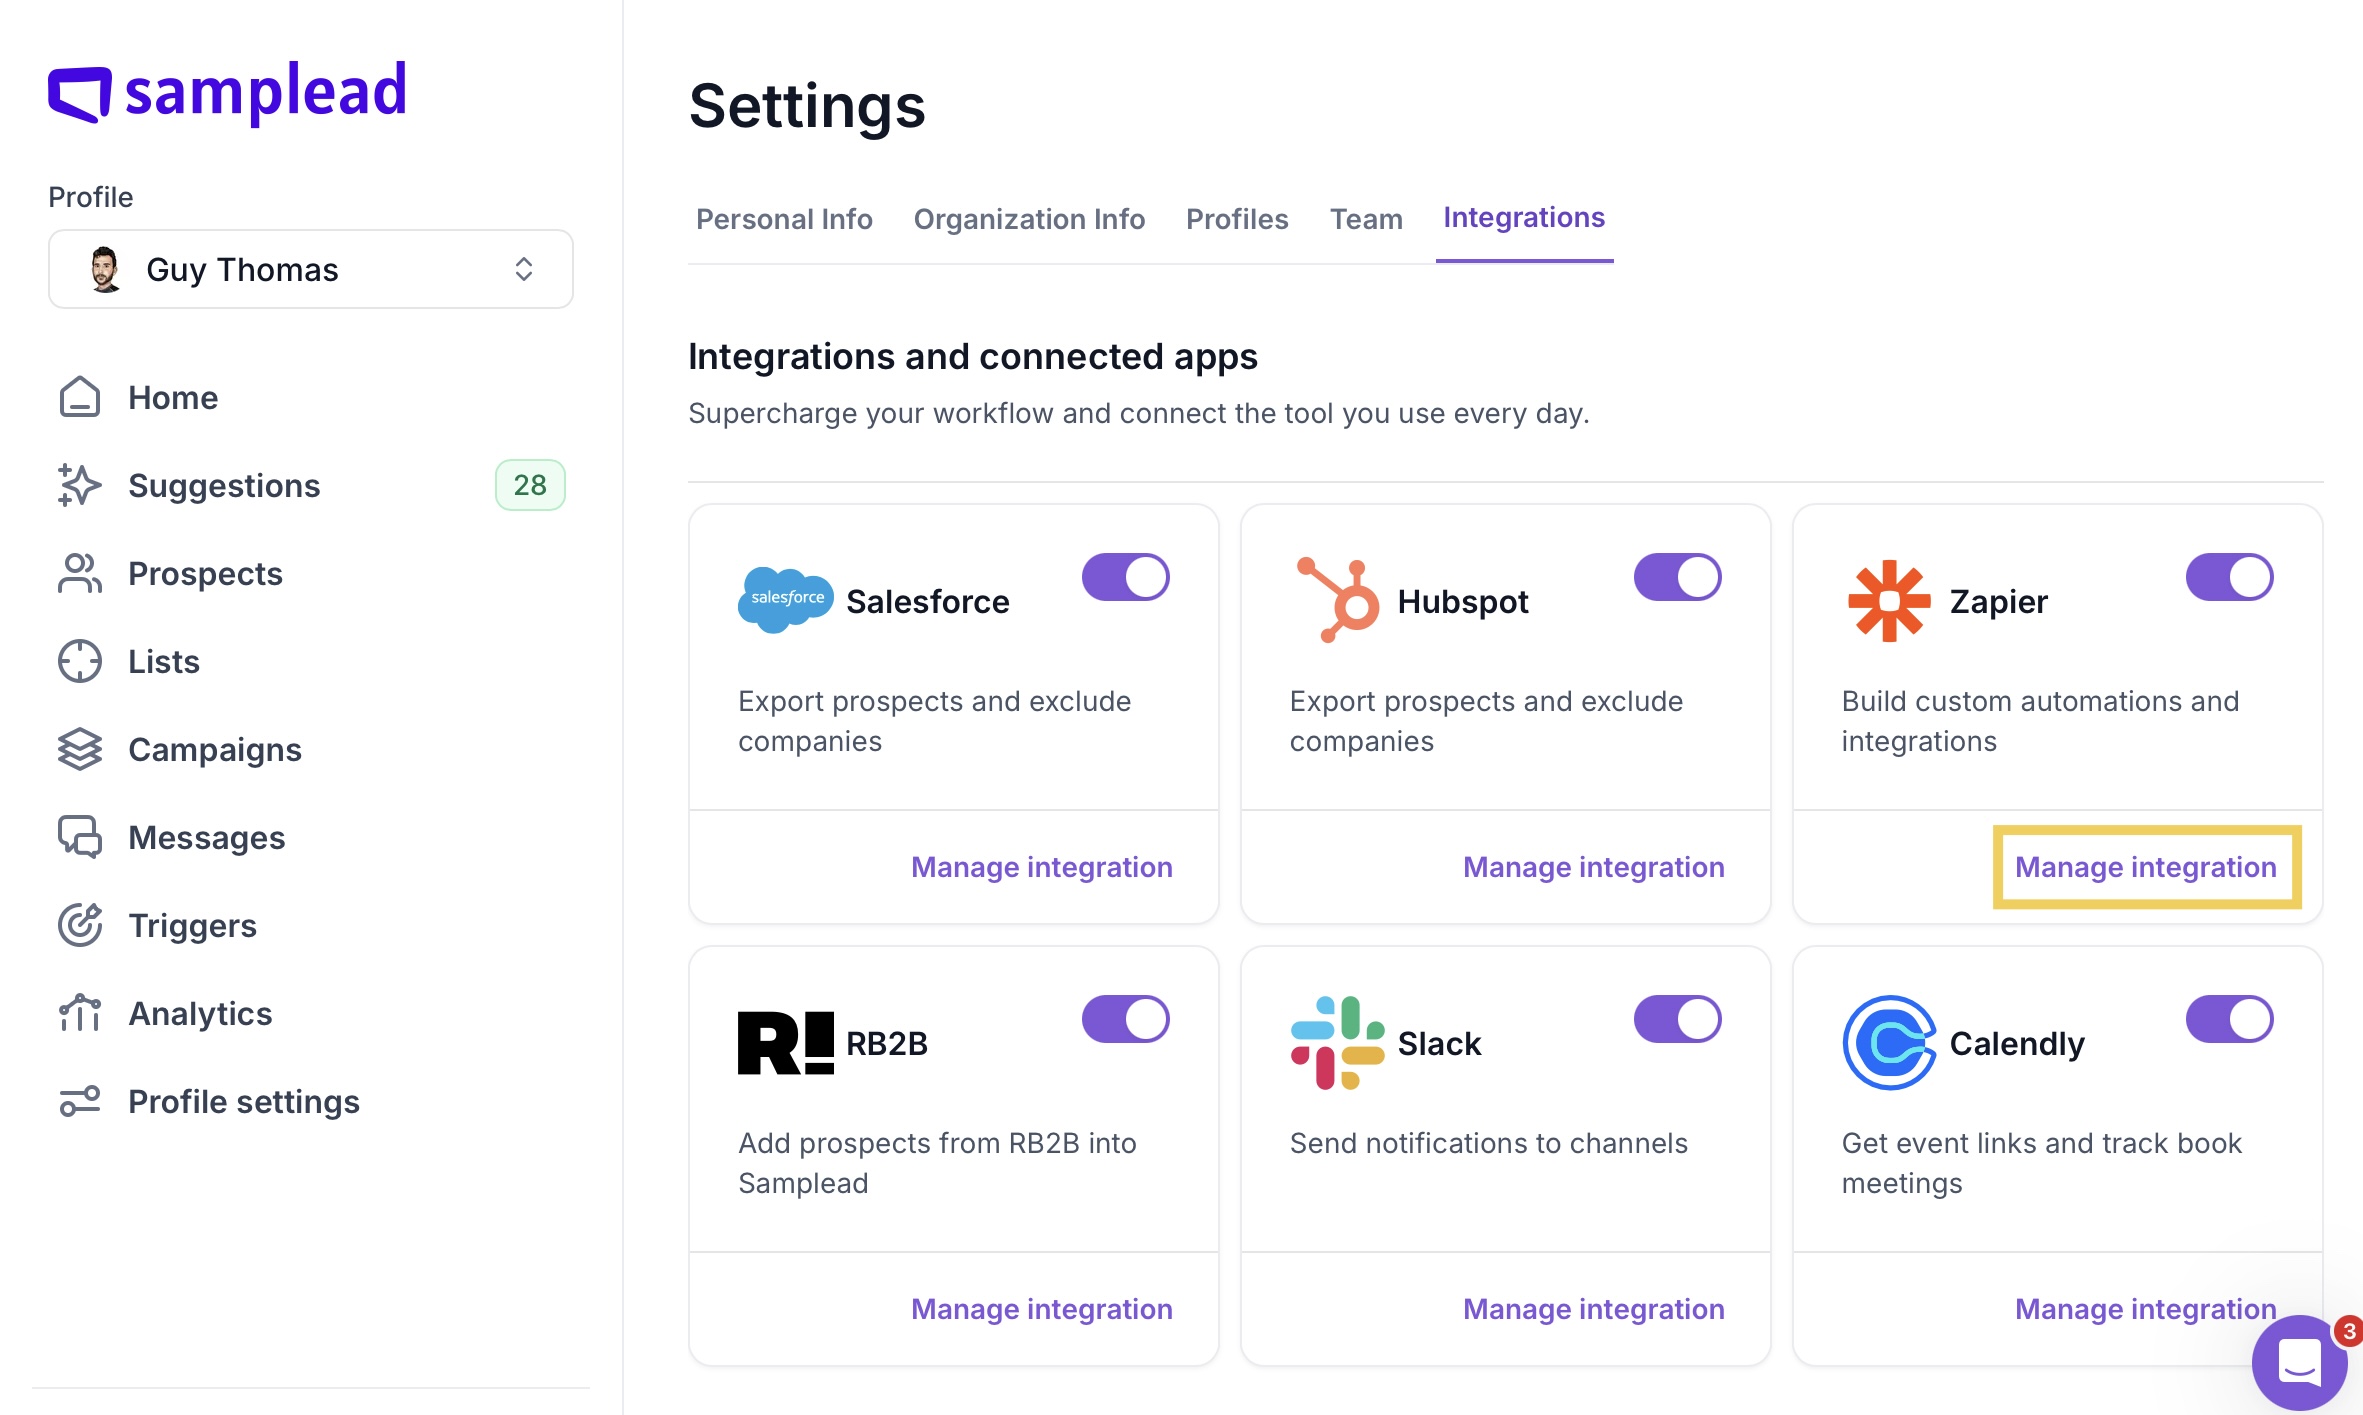
Settings on the Integrations tab with every integration connected and the Manage integration link on the Zapier card highlighted

  • Authorize Connection Log in to your Zapier account when prompted and authorize Spear to grant access.
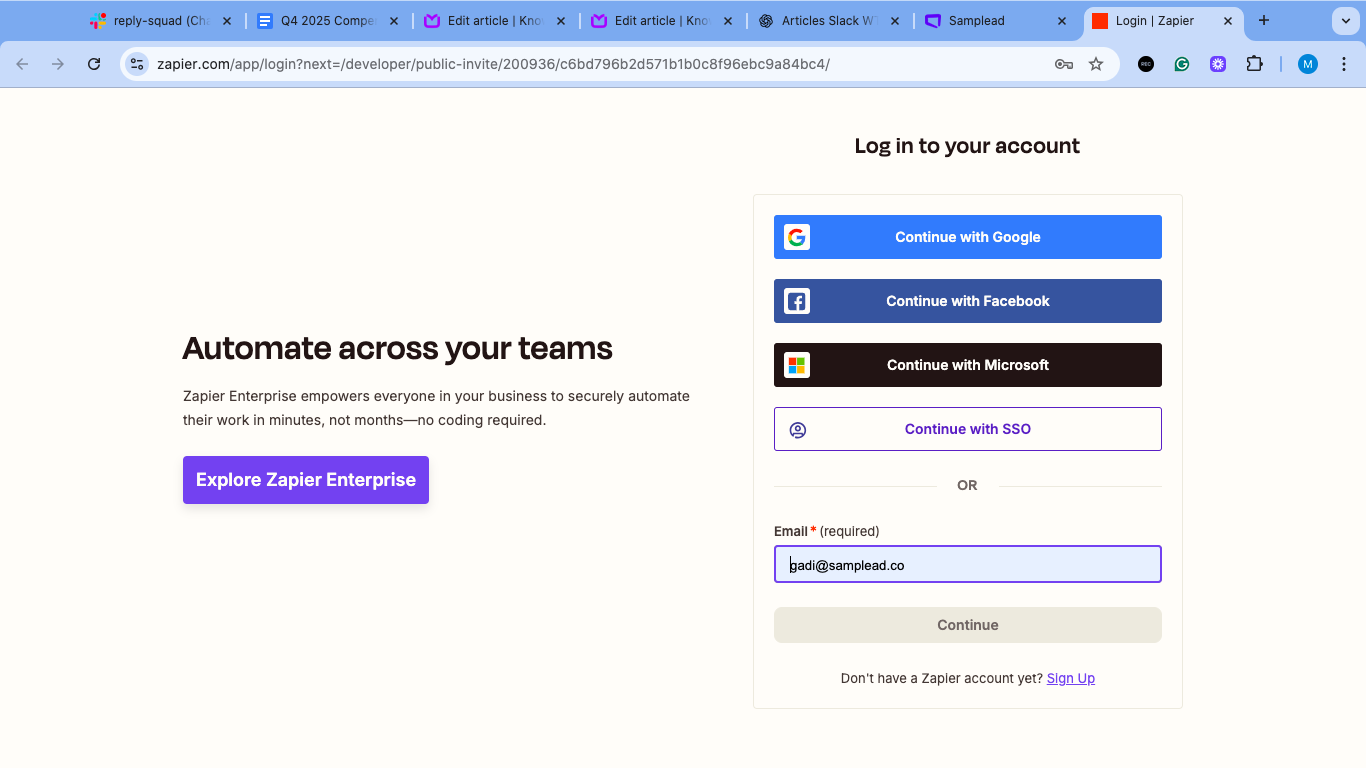
Zapier login page offering Google, Facebook, Microsoft and single sign on, with an email address entered

Step 3: Create your Zap

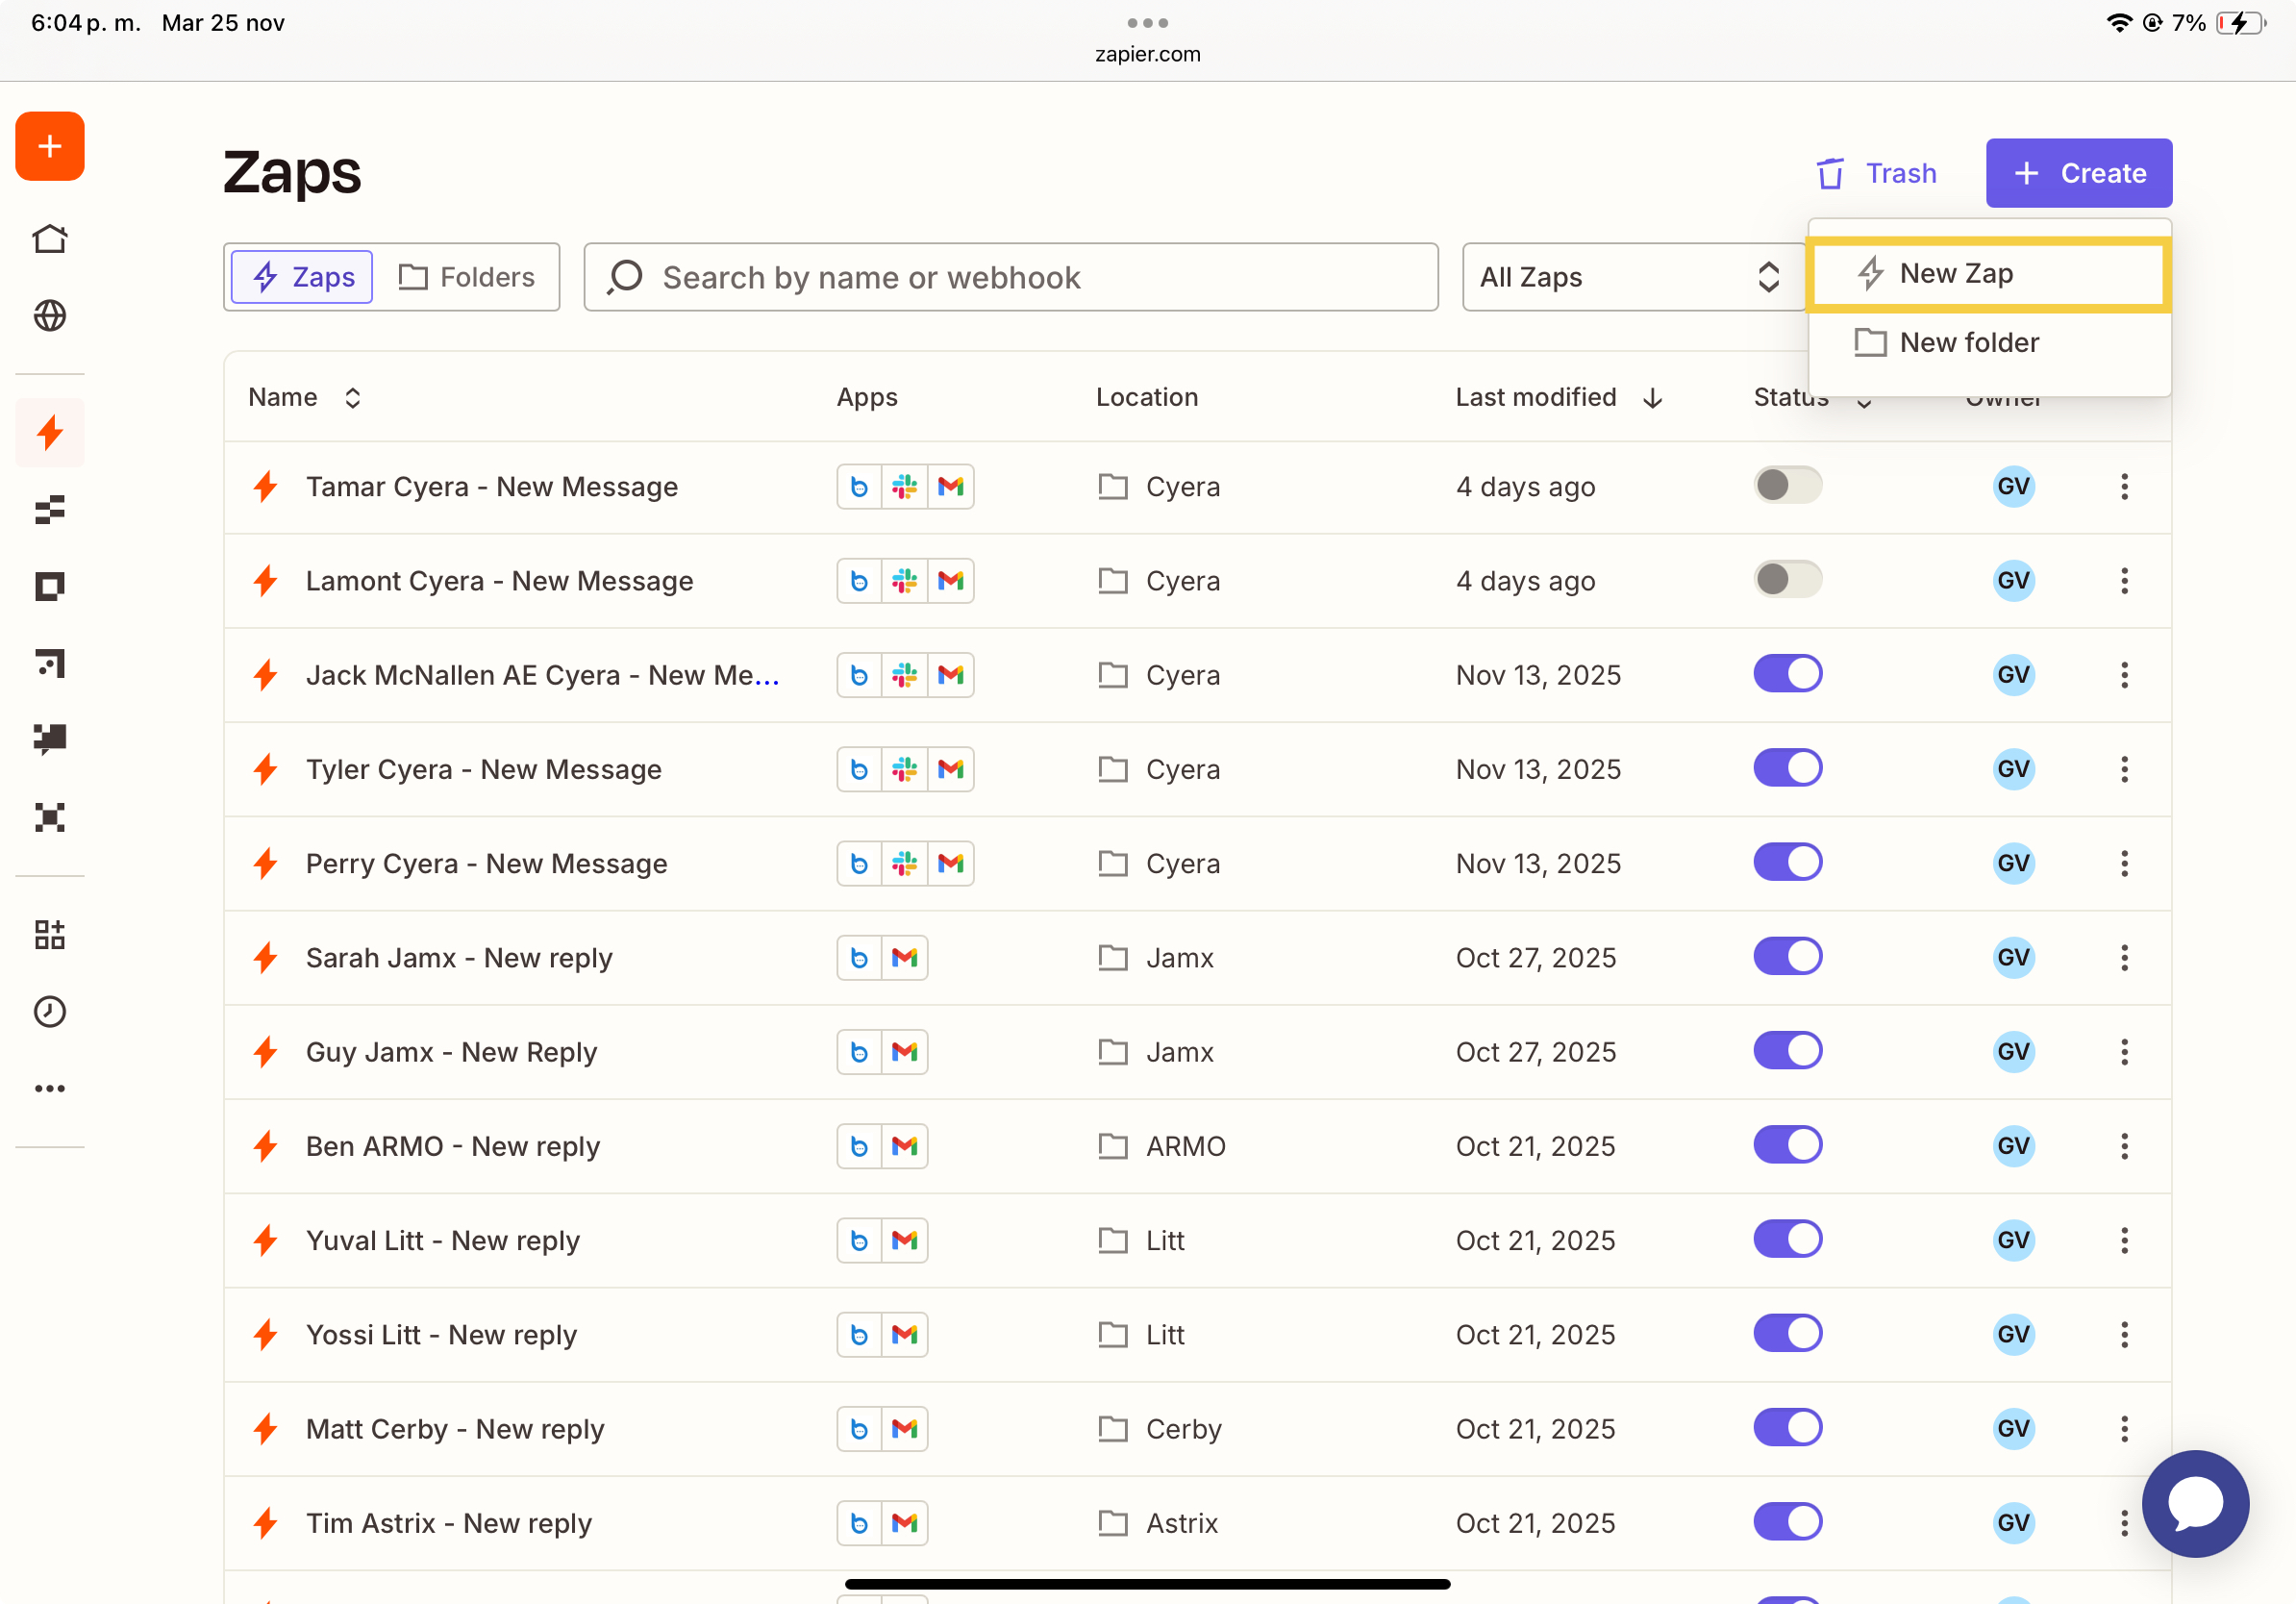
  • In your Zapier dashboard, click Create Zap.
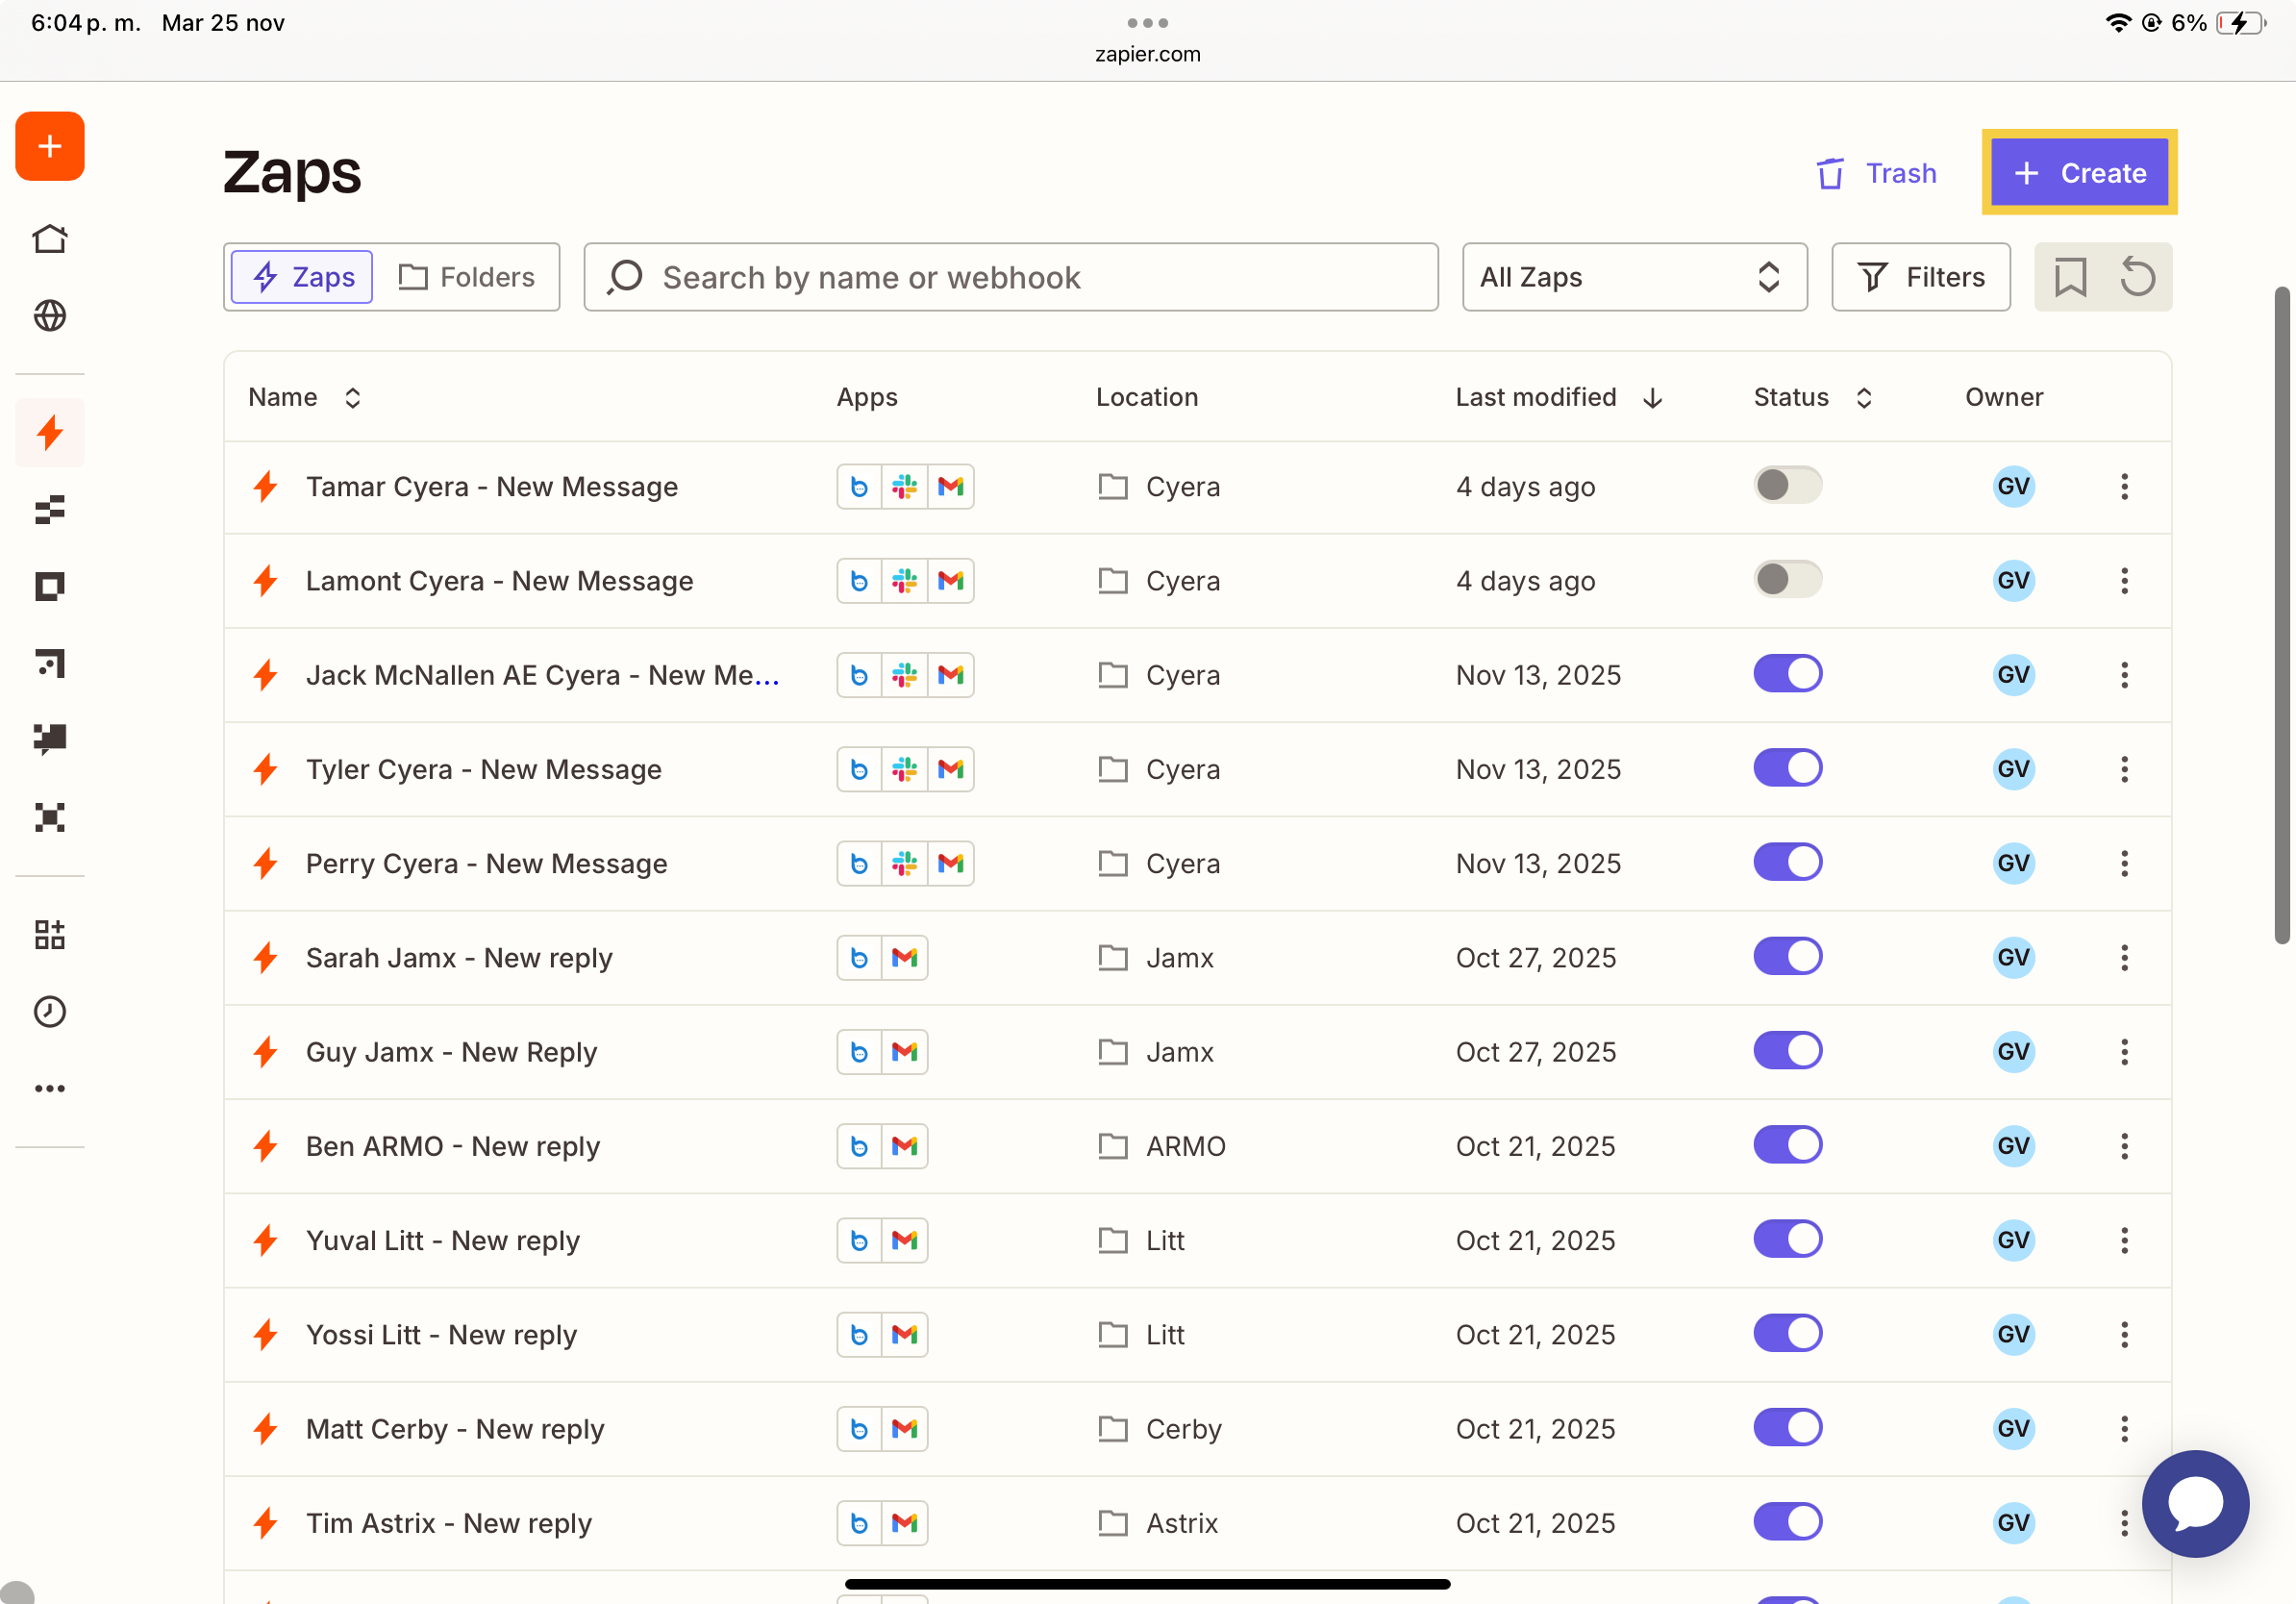
Zapier Zaps list with the Create button in the top right highlighted
Zapier Zaps list with the Create menu open and the New Zap option highlighted

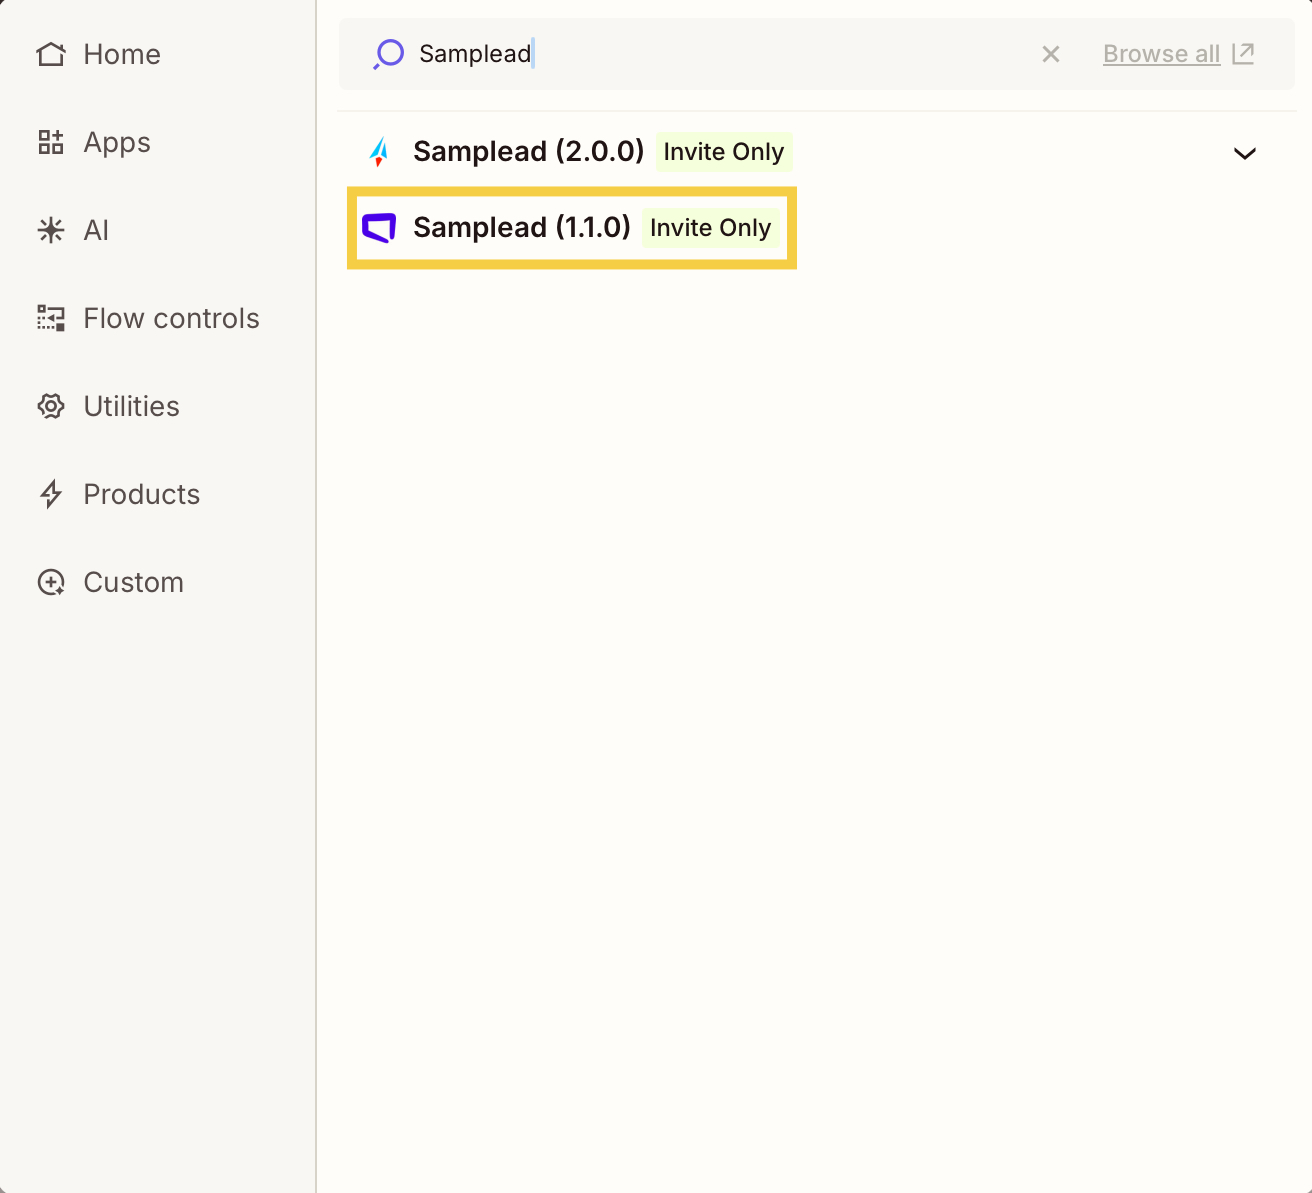
Step 4: Choose Spear as the trigger app.

Zapier new Zap canvas with the Trigger step highlighted above the action step
Zapier app search results with the Spear connector version 1.1.0 highlighted

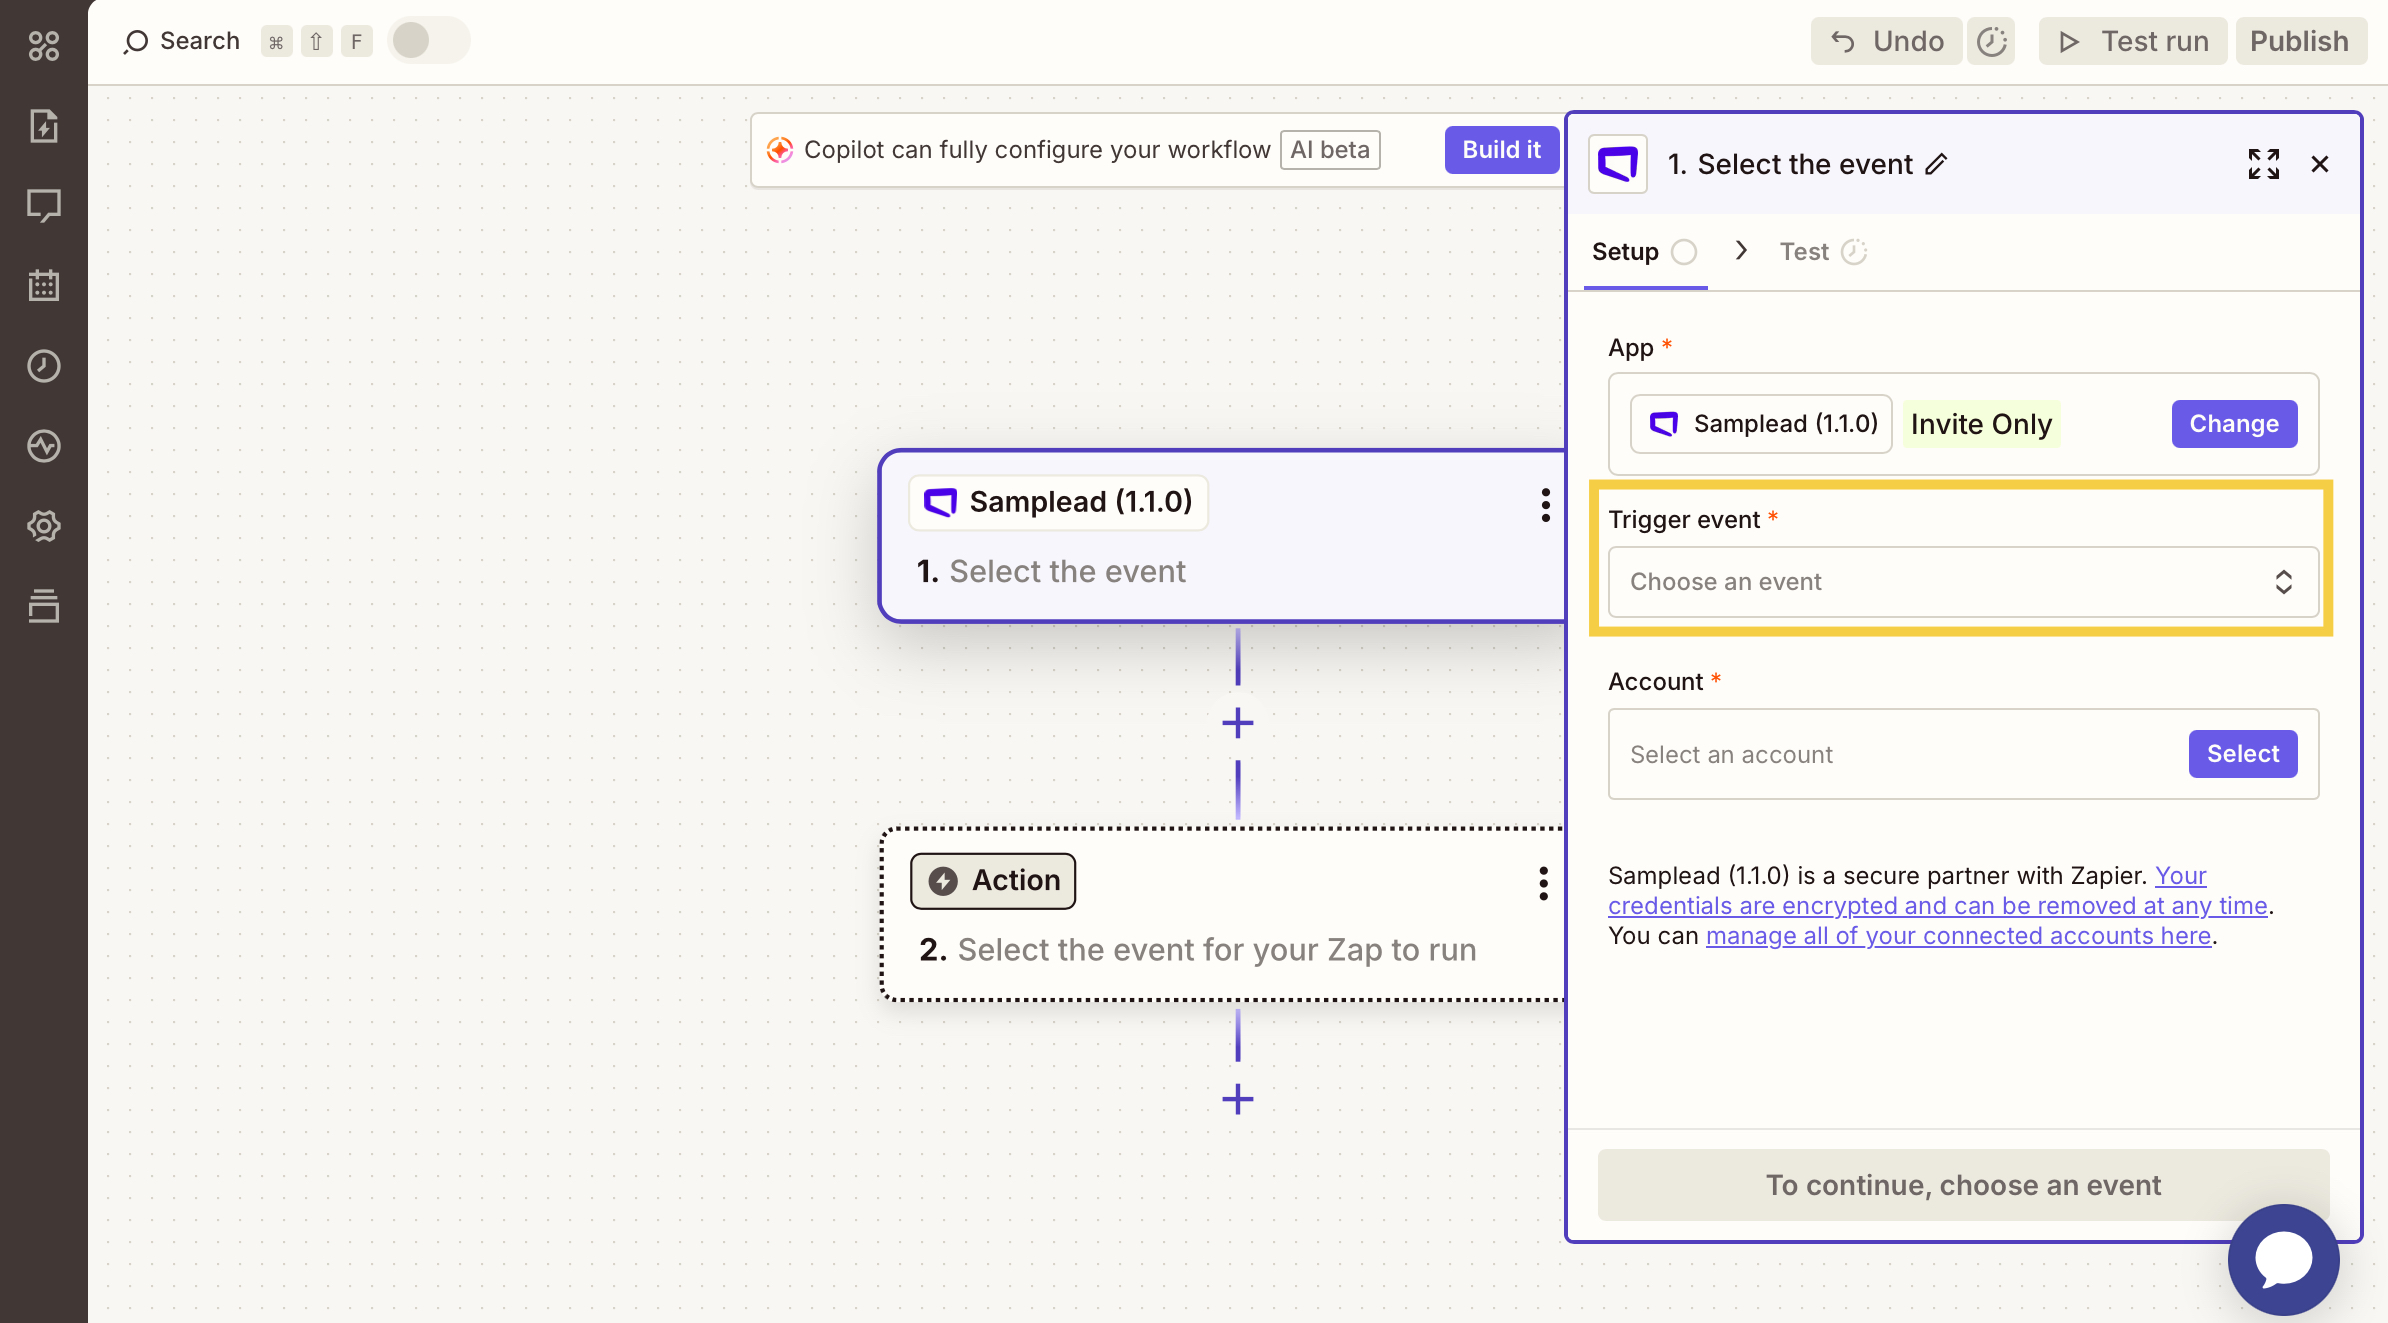
Step 5: Select a trigger event (e.g., New Approved Prospect).

  • Select the account
Zapier trigger setup panel with the Spear app selected and the trigger event field highlighted

Step 6: Define the Action

  • Select the app where you want the data to go (e.g., Google Sheets, HubSpot, Slack).
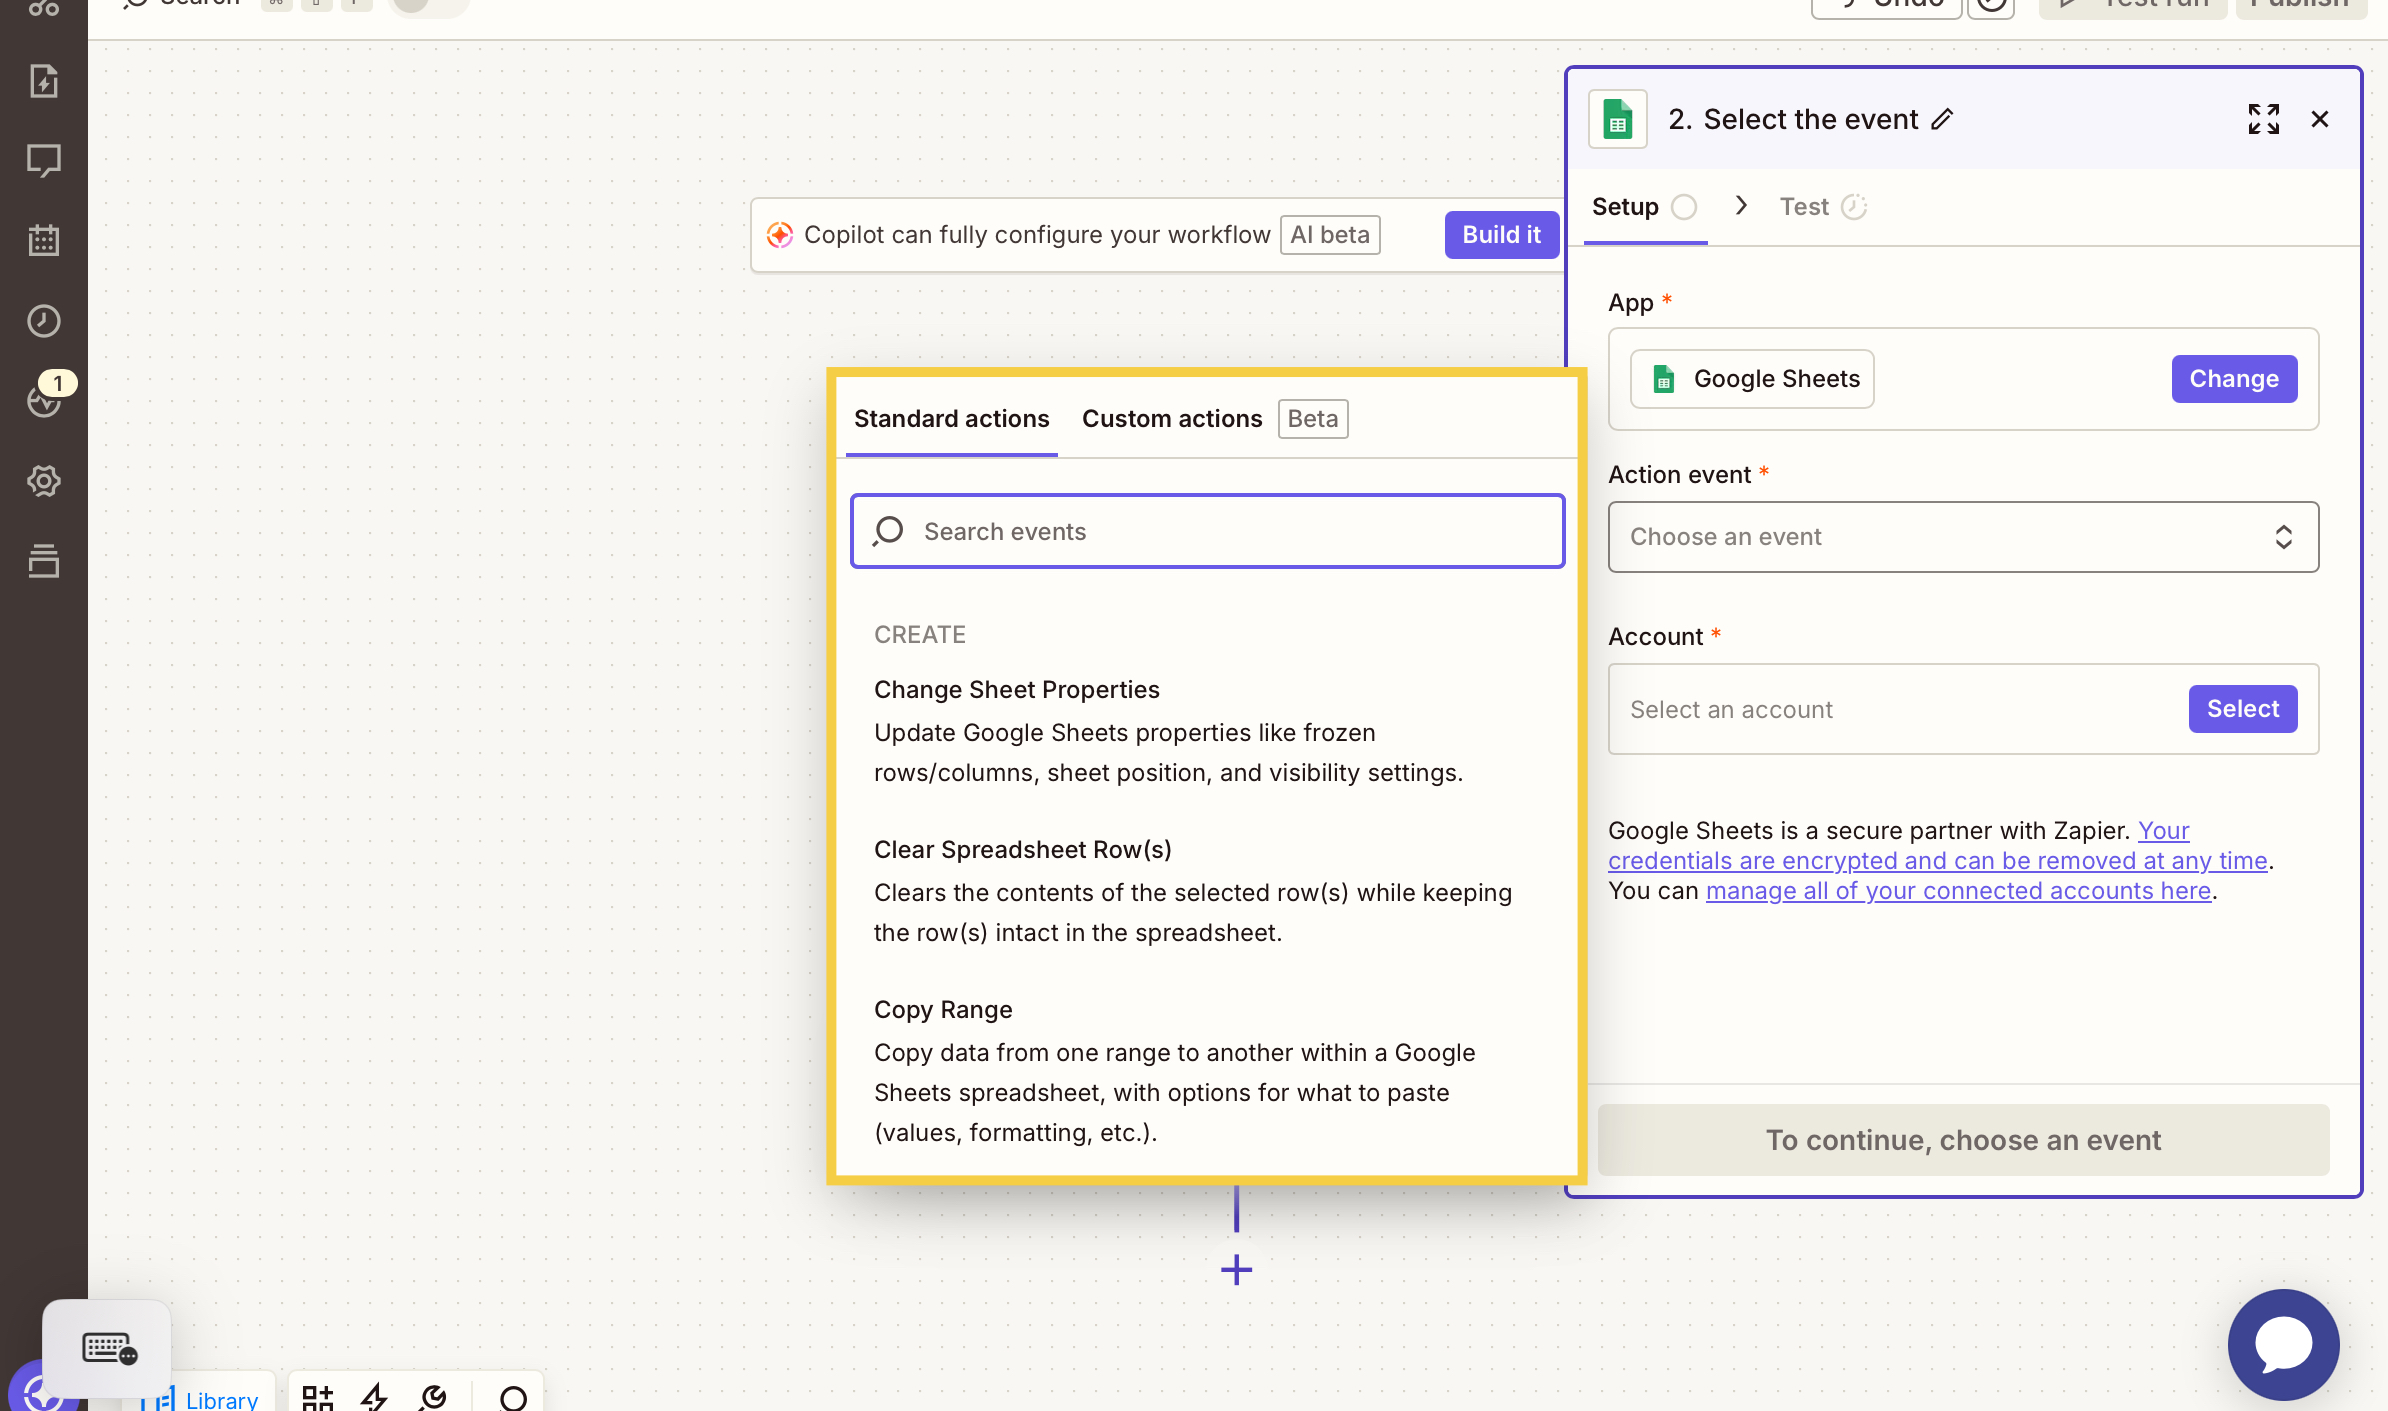
  • Choose the action (e.g., Add Row to Spreadsheet, Create Contact, Send Channel Message).
  • Connect the destination app and grant permissions.
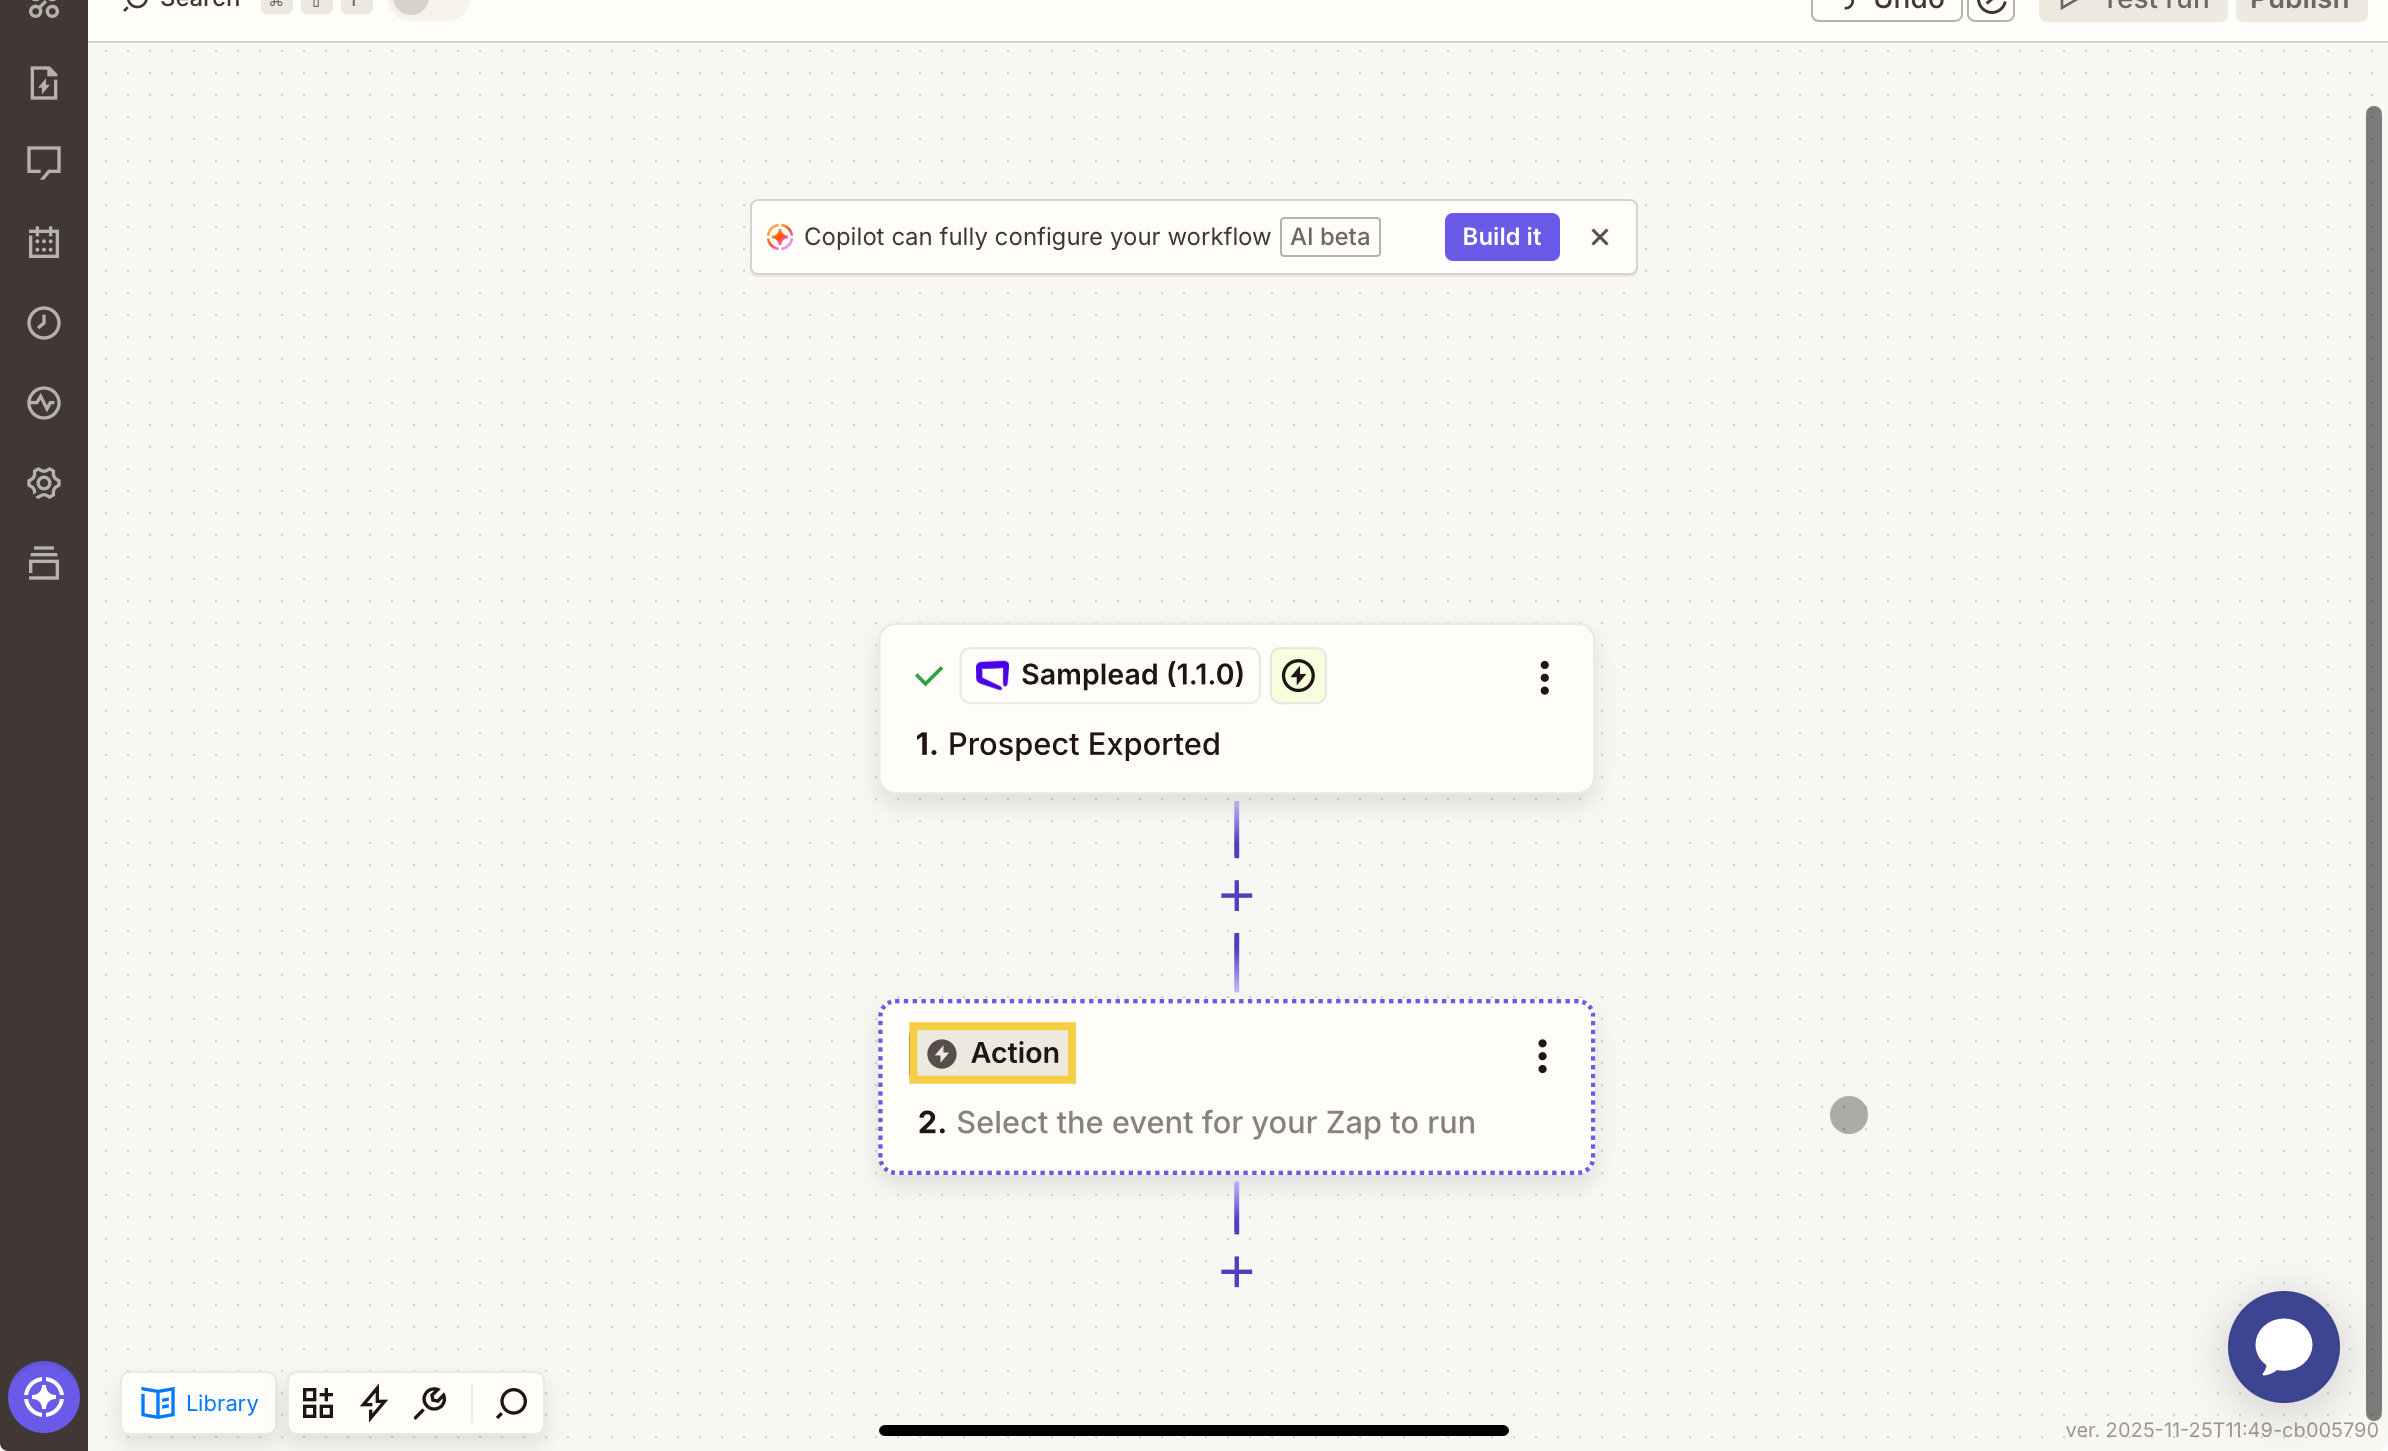
Zapier editor with the Spear trigger step configured for Prospect Exported and the action step highlighted below it
Zapier app picker with Google Sheets highlighted in the list of top apps
Zapier Google Sheets action setup with the action event field highlighted before an event is chosen
Zapier Google Sheets action event list highlighted, showing the available spreadsheet actions
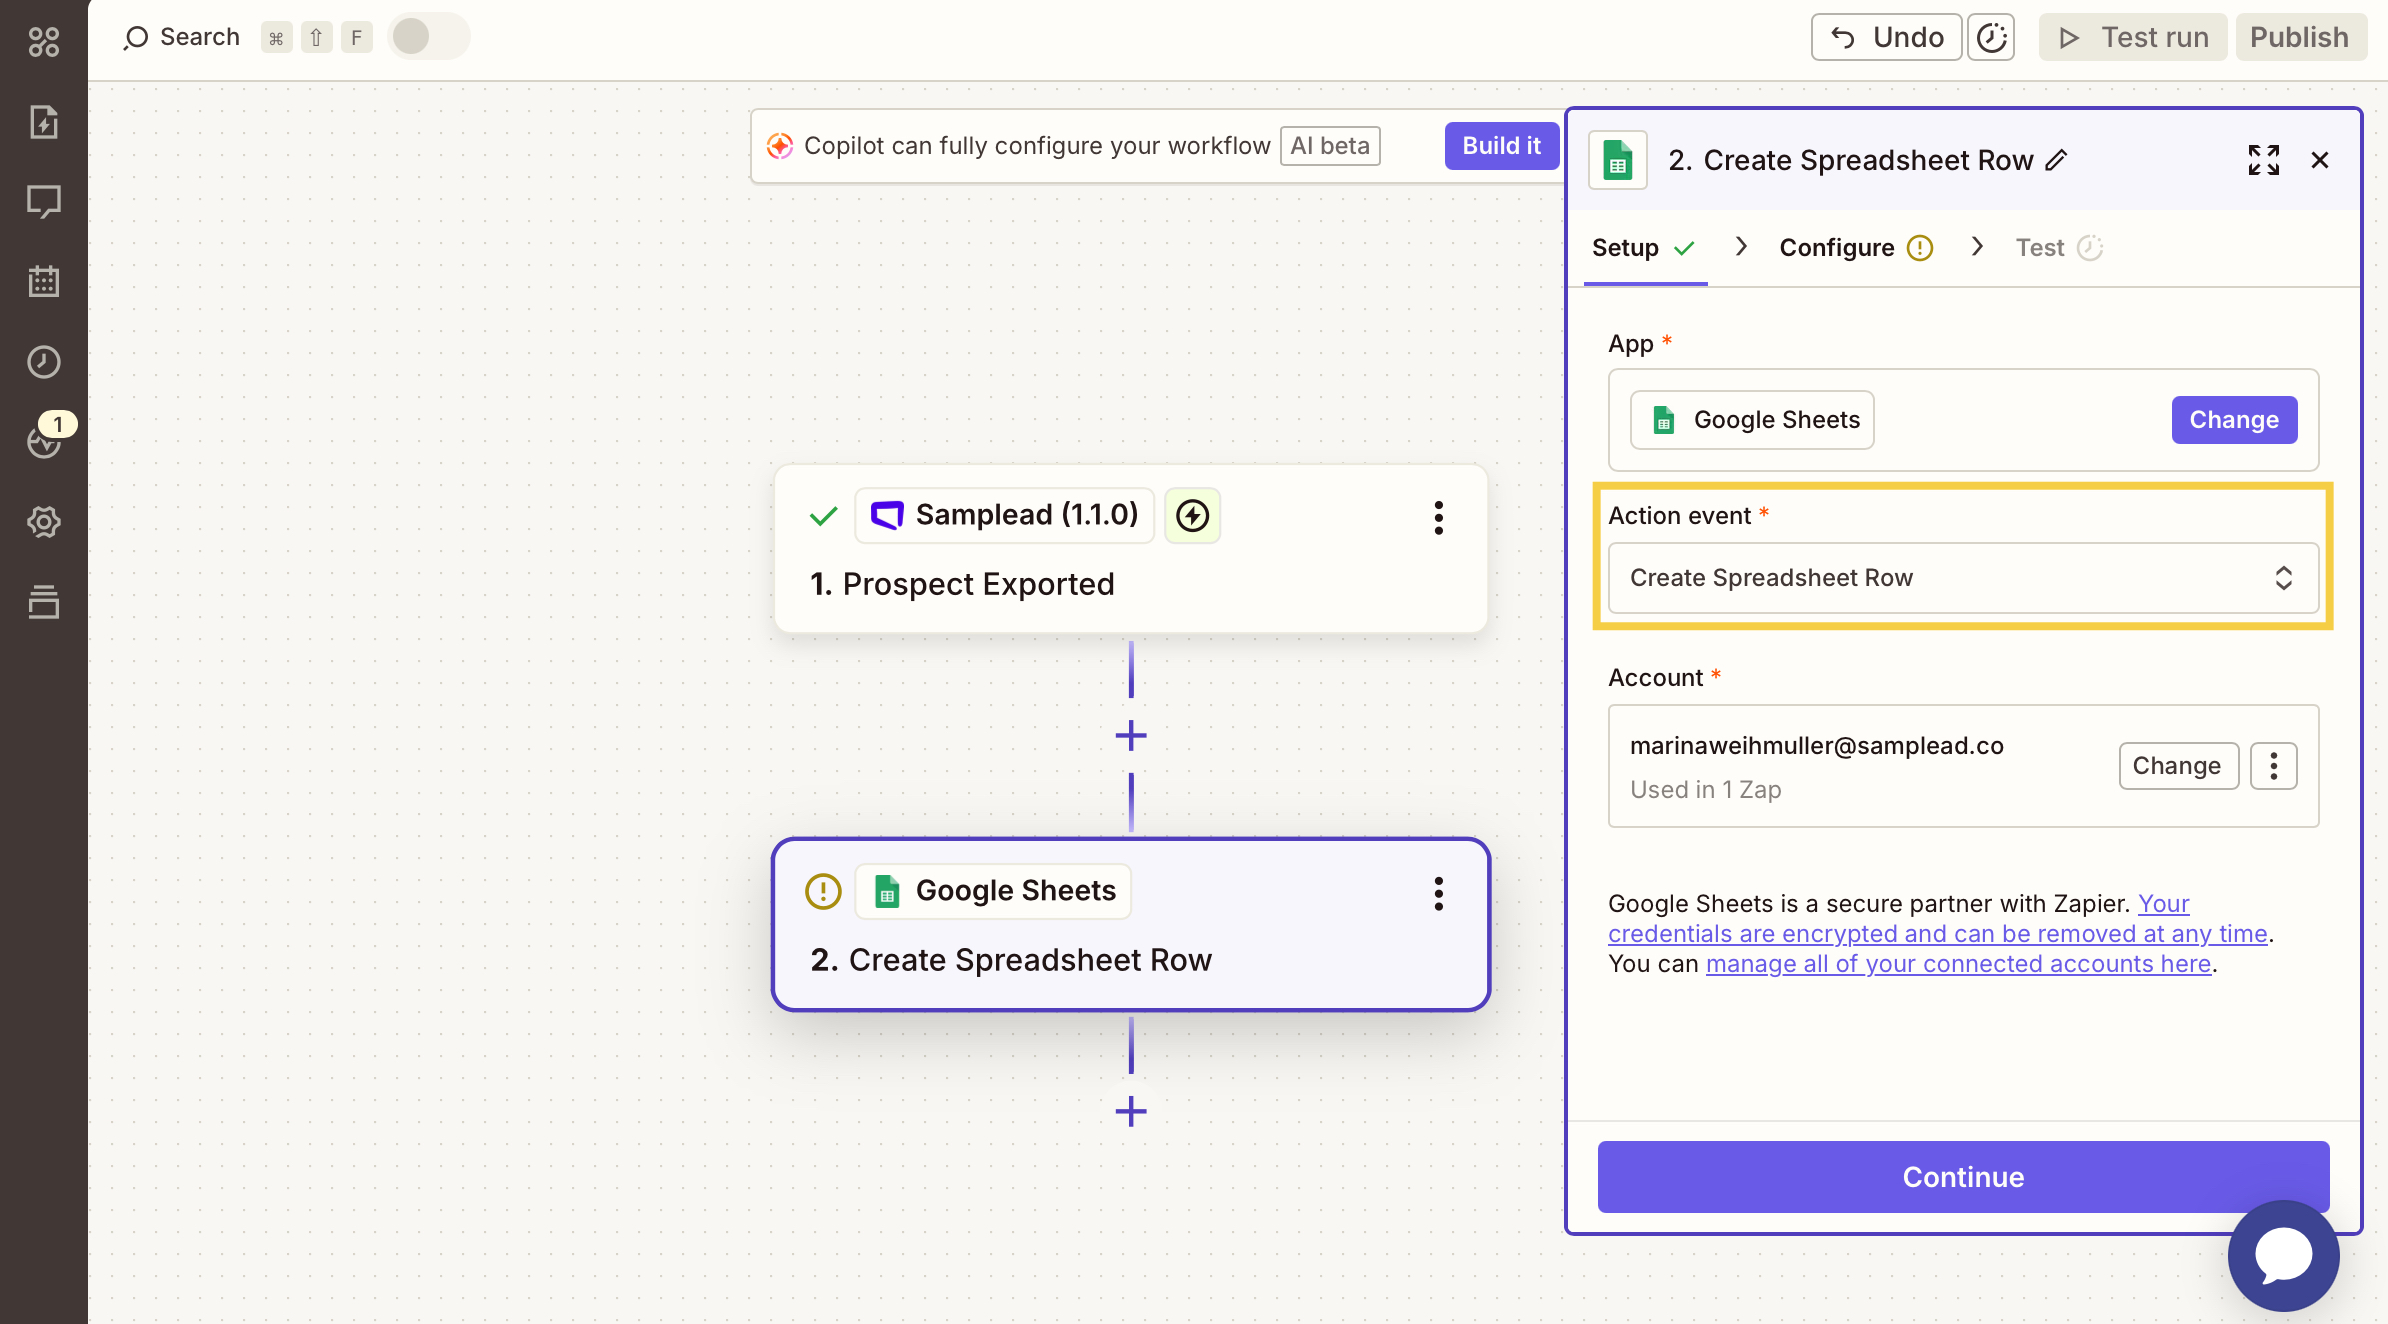
Zapier Google Sheets action with the Create Spreadsheet Row event highlighted and the account connected

Step 7: Map Fields

  • Match fields from Spear (e.g., name, company, email, phone) to the fields in the destination app.
  • Recommended: Map both prospect and company fields to keep records complete.
  • Optional: Add custom values (e.g., automatically tag each contact with “Spear”).
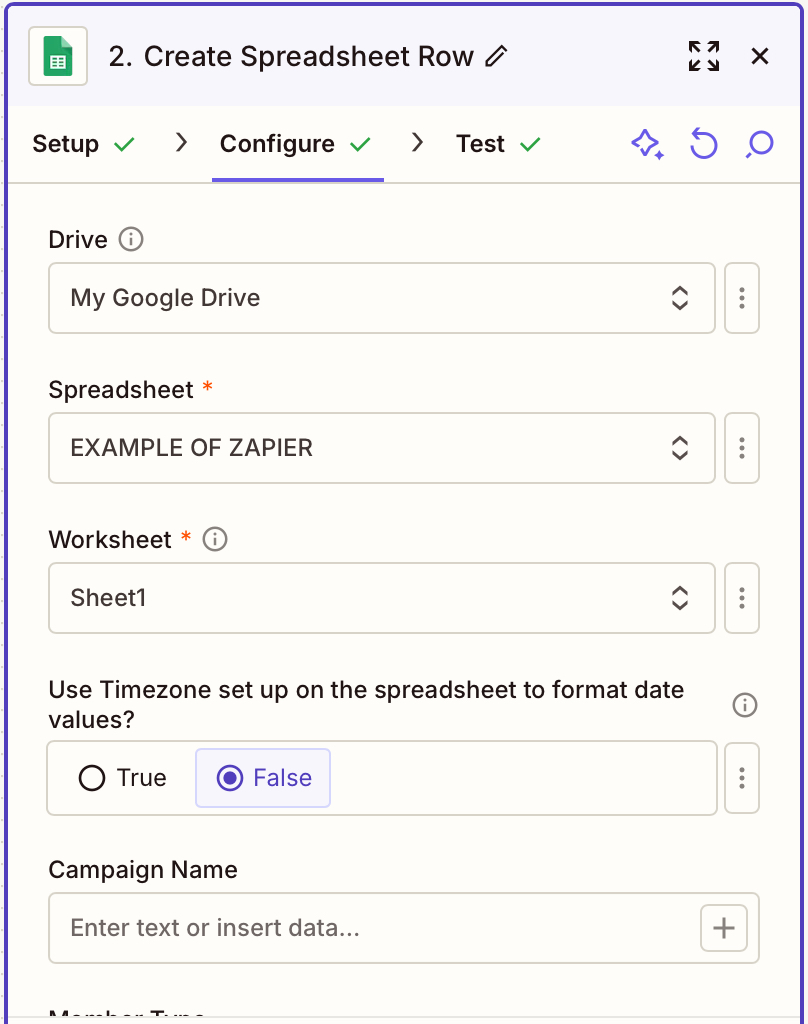
Zapier Google Sheets action configured with the drive, spreadsheet and worksheet to write the exported prospects into
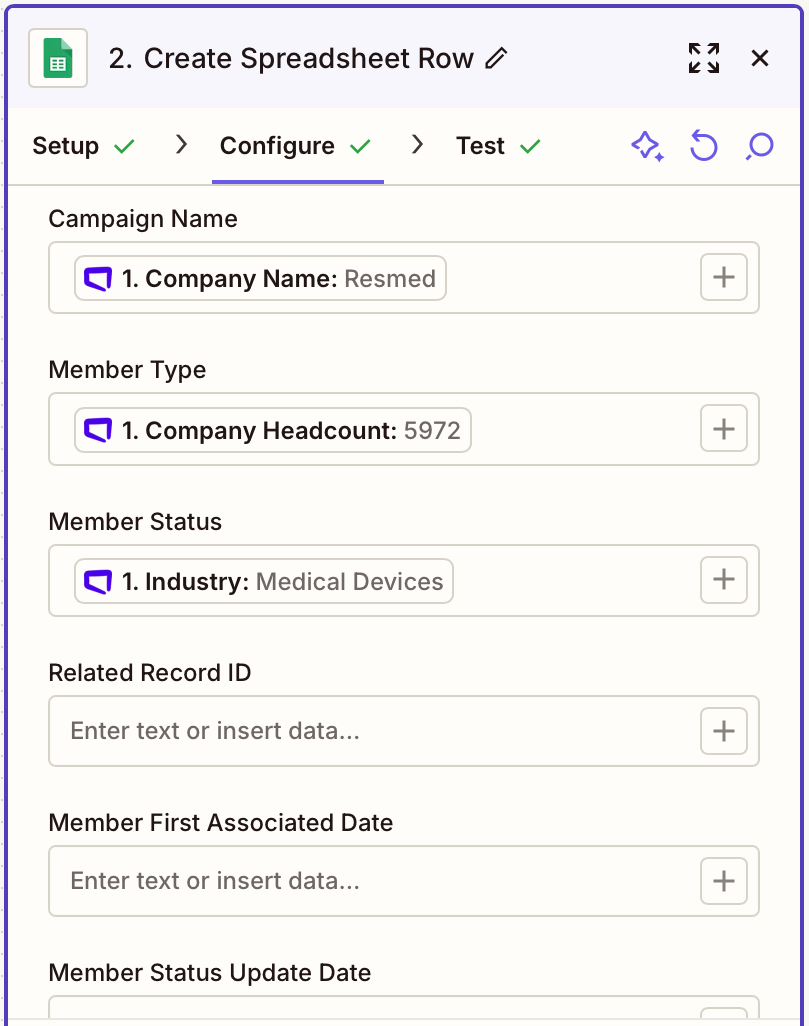
Zapier action configuration mapping campaign name, member type and member status to values from the Spear trigger

Step 8: Add Filters (Optional)

  • Add a Filter by Zapier step to control which prospects are exported.
  • Examples:
    • Only export Approved prospects.
    • Exclude prospects without an email.
    • Route leads by territory (e.g., only send US-based prospects to a specific CRM pipeline).

Step 9: Test and activate your Zap.
Run a test to confirm that data flows correctly, then turn on the Zap
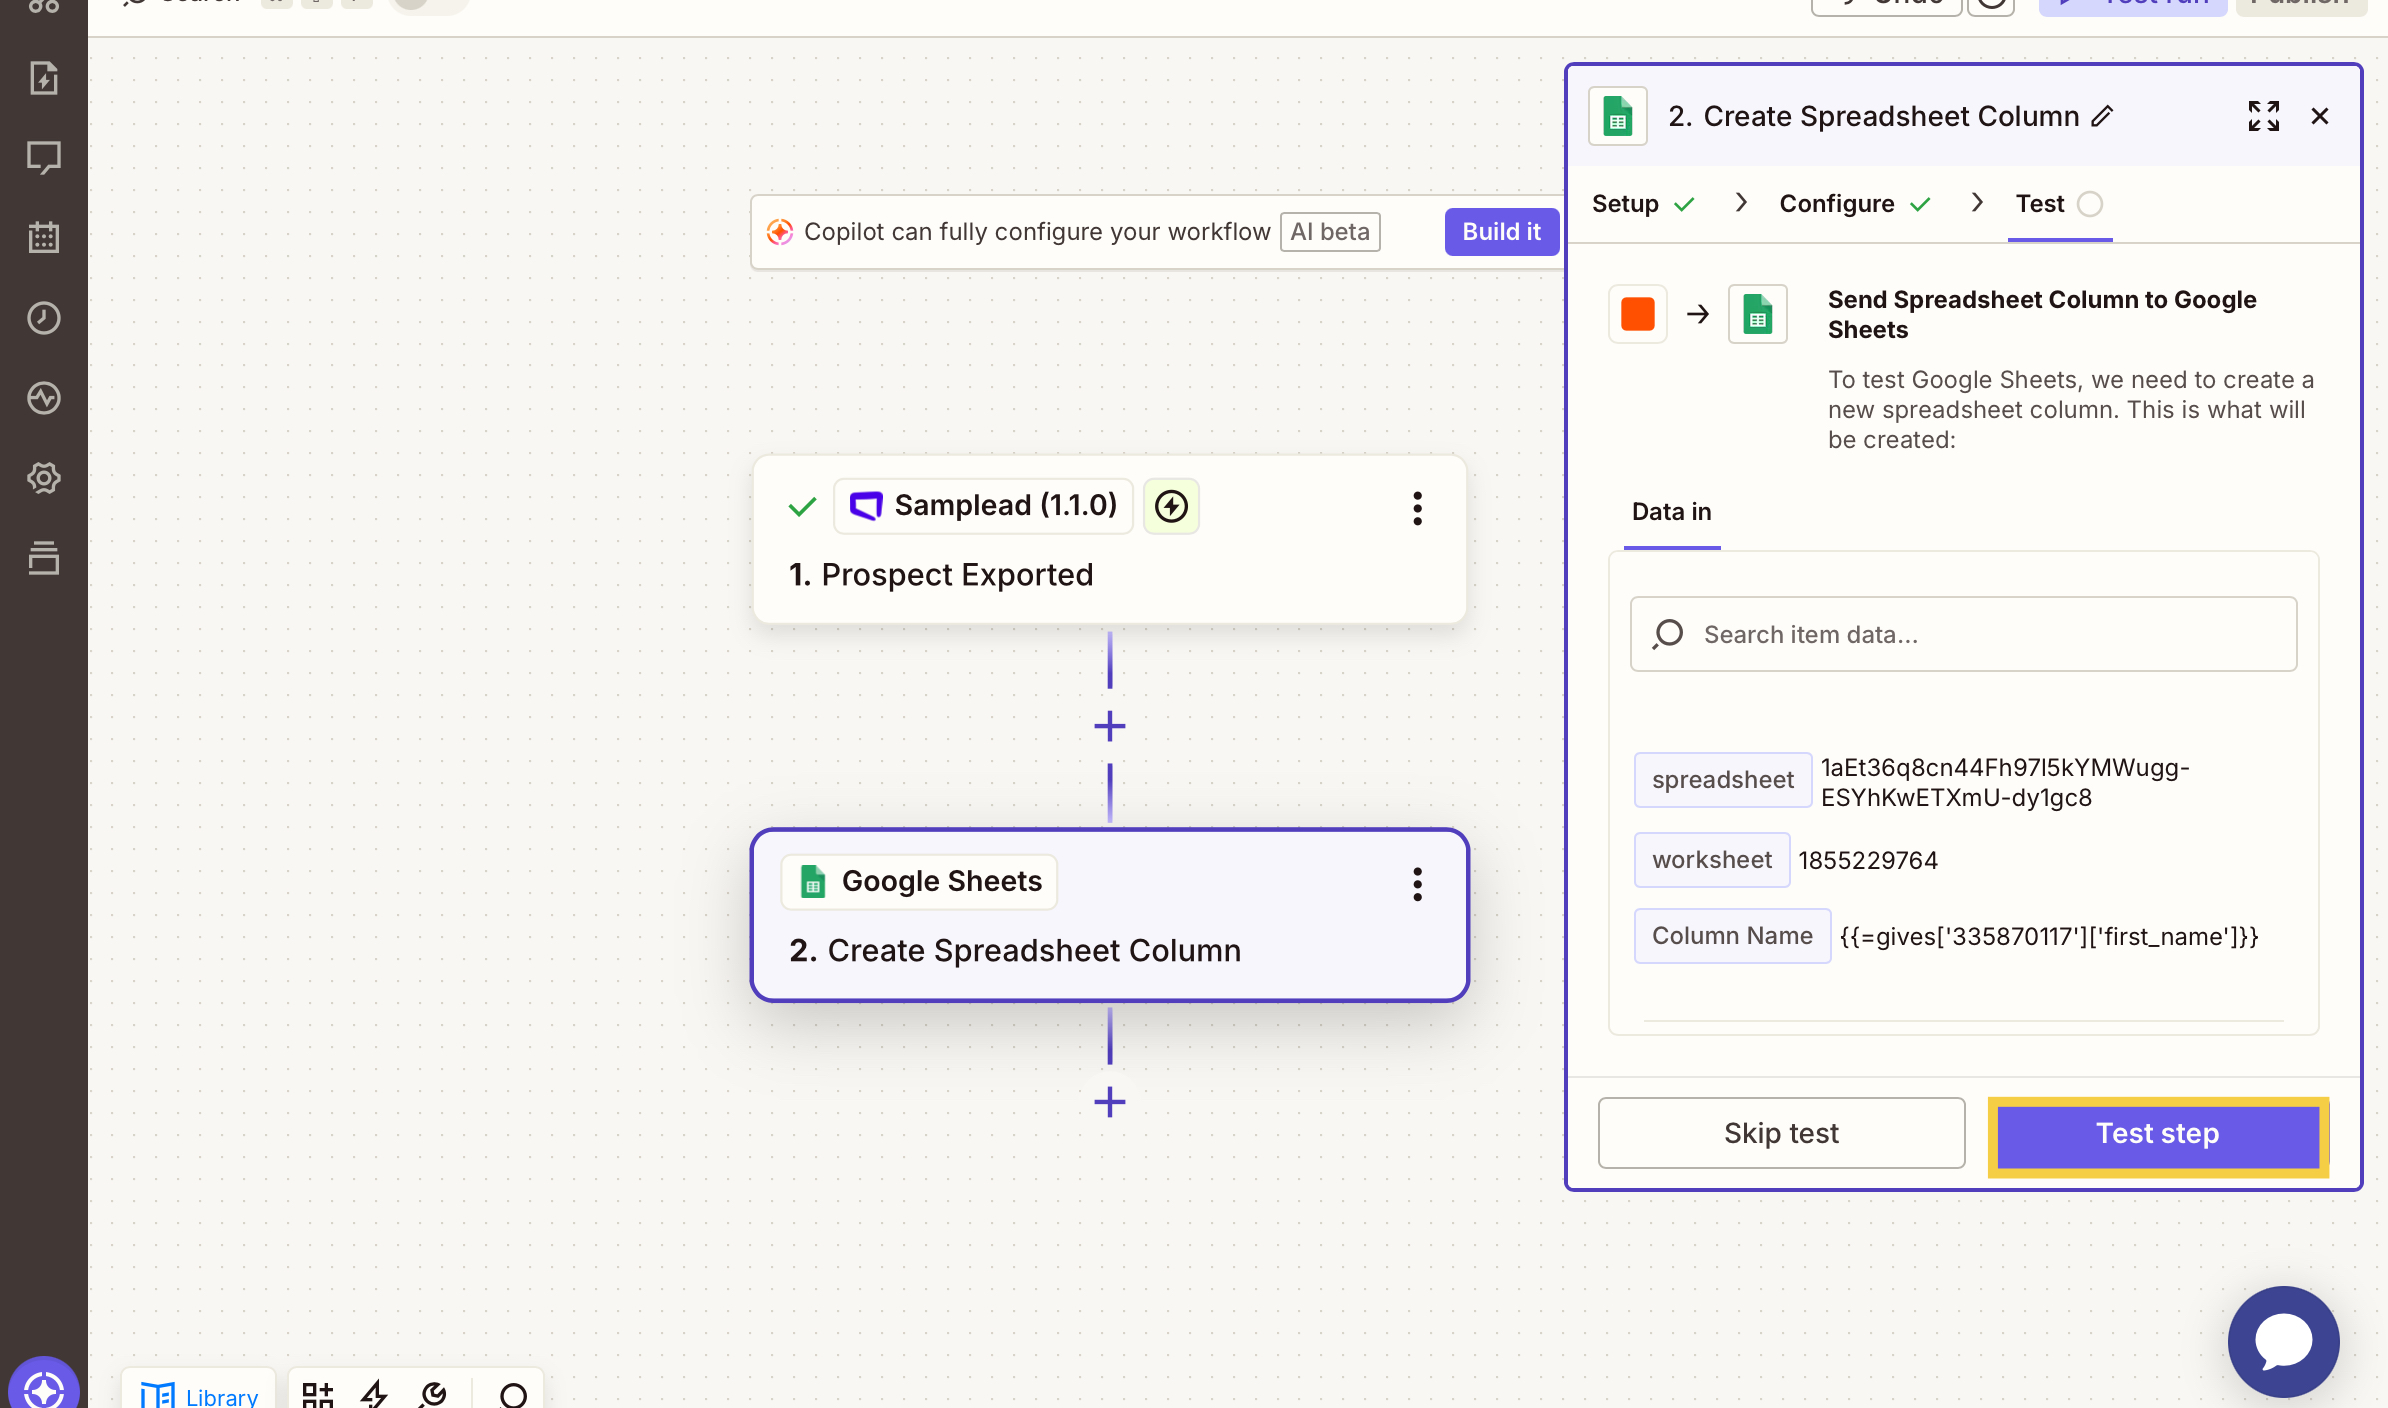
Zapier Google Sheets action on the Test step, with the data to be written and the Test step button highlighted

Recommended Zaps for Spear customers:

  • Auto-export Approved prospects into HubSpot or Salesforce.
  • Send notifications to Slack when a new lead is approved.
  • Add new prospects to Google Sheets for reporting.

Sign up for Updates

Get the playbook on outbound that actually converts.

We care about data. Check out our privacy policy.

Thank you!
Your submission has been received!
Oops! Something went wrong while submitting the form.
Line illustration of a spear on a coral background, beside the newsletter signup

Turn Triggers Into Pipeline

With Spear, companies leverage trigger-based outbound to craft a quality-driven GTM motion that actually books meetings.

Illustration of a person holding a spear on a hilltop path at sunriseIllustration of a person holding a spear on a hilltop path at sunrise