How to set up an event campaign
 May 12, 2026
 5 min read
Setting up an Event Campaign
In this article, you'll learn how to set up an event campaign using Spear. Before getting started, make sure you have:
- An active profile connected to Spear
- Know the ICP you want to input
- Have the campaign copy you want to use
What is an Event Campaign?
An event campaign is a time-sensitive strategy designed to generate business opportunities around a specific occasion. It uses a targeted message flow to secure registrations or meetings before a fixed deadline.
Each event campaign is crafted to maximize visibility and engagement toward one of the following goals:
- Driving registrations for a client-hosted event, such as an invite-only session, dinner, or webinar.
- Arranging sales meetings with prospects who are attending a major industry conference.
- Re-engaging contacts immediately after meeting them at a networking session.
- Targeting a specific group of relevant prospects, regardless of whether they are attending an event.
How to start a new event campaign
Step 1: Start a New Campaign
- Navigate to the Campaigns page in your Spear dashboard.
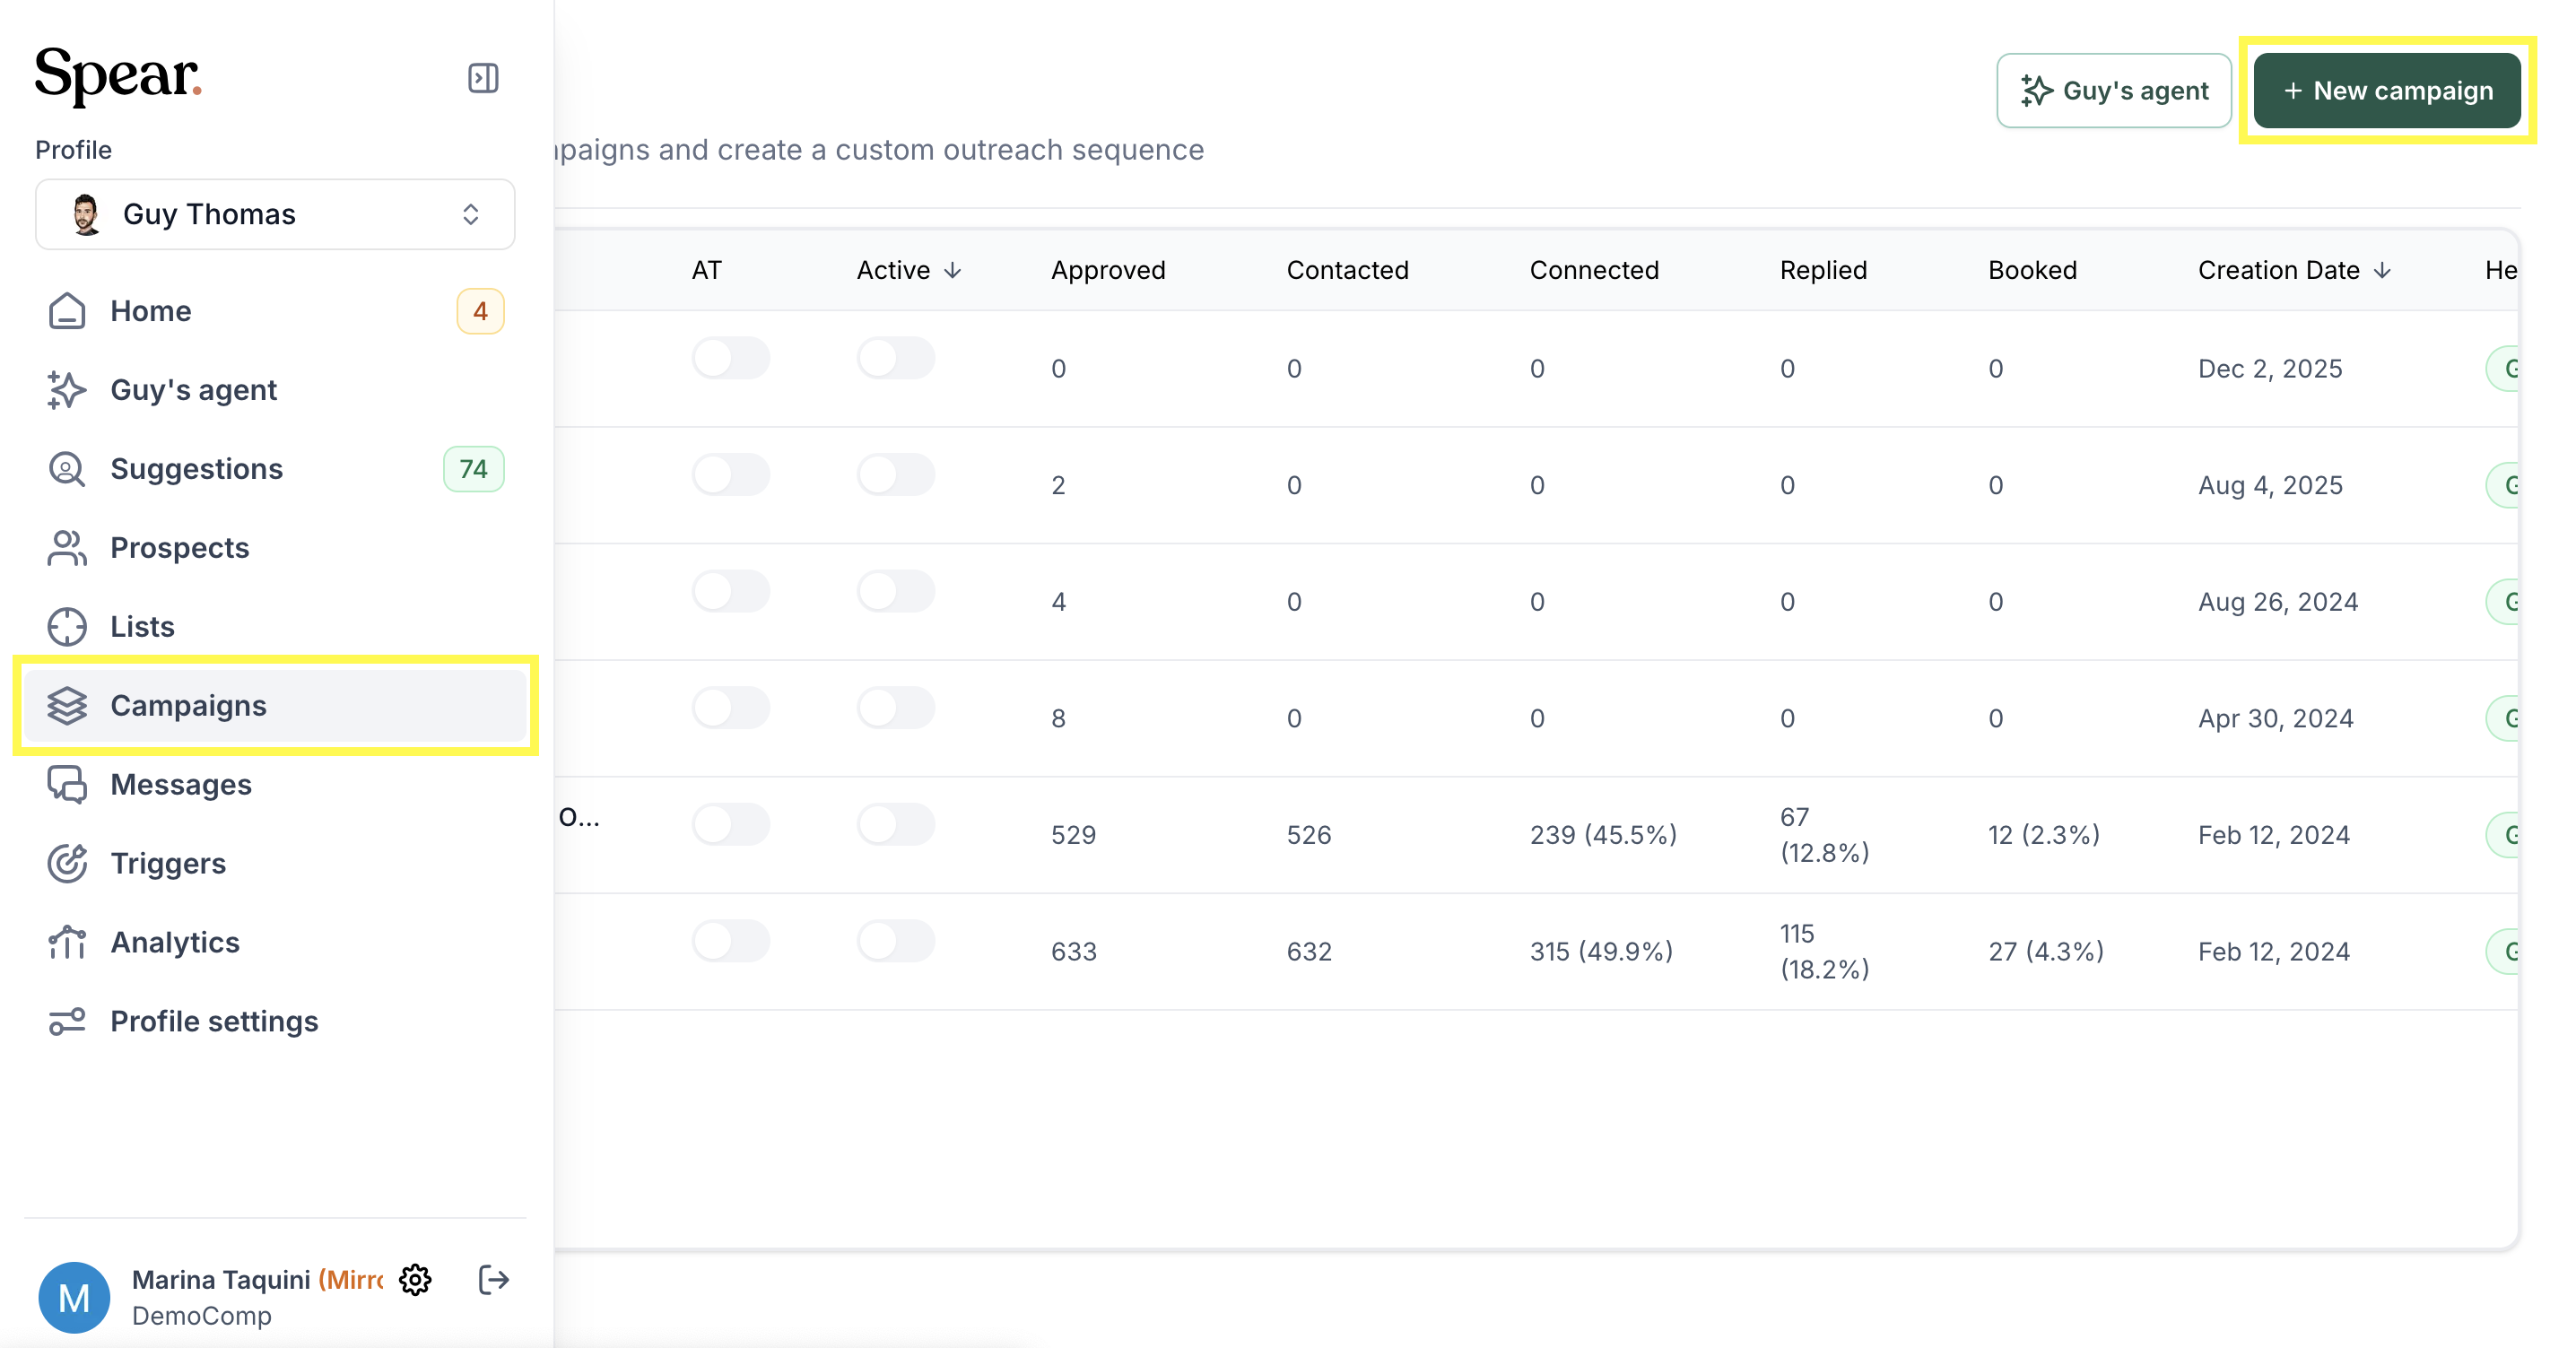
2. Click the '+ New campaign' button located at the top right of the page.

Step 2: Choose Your Campaign Type
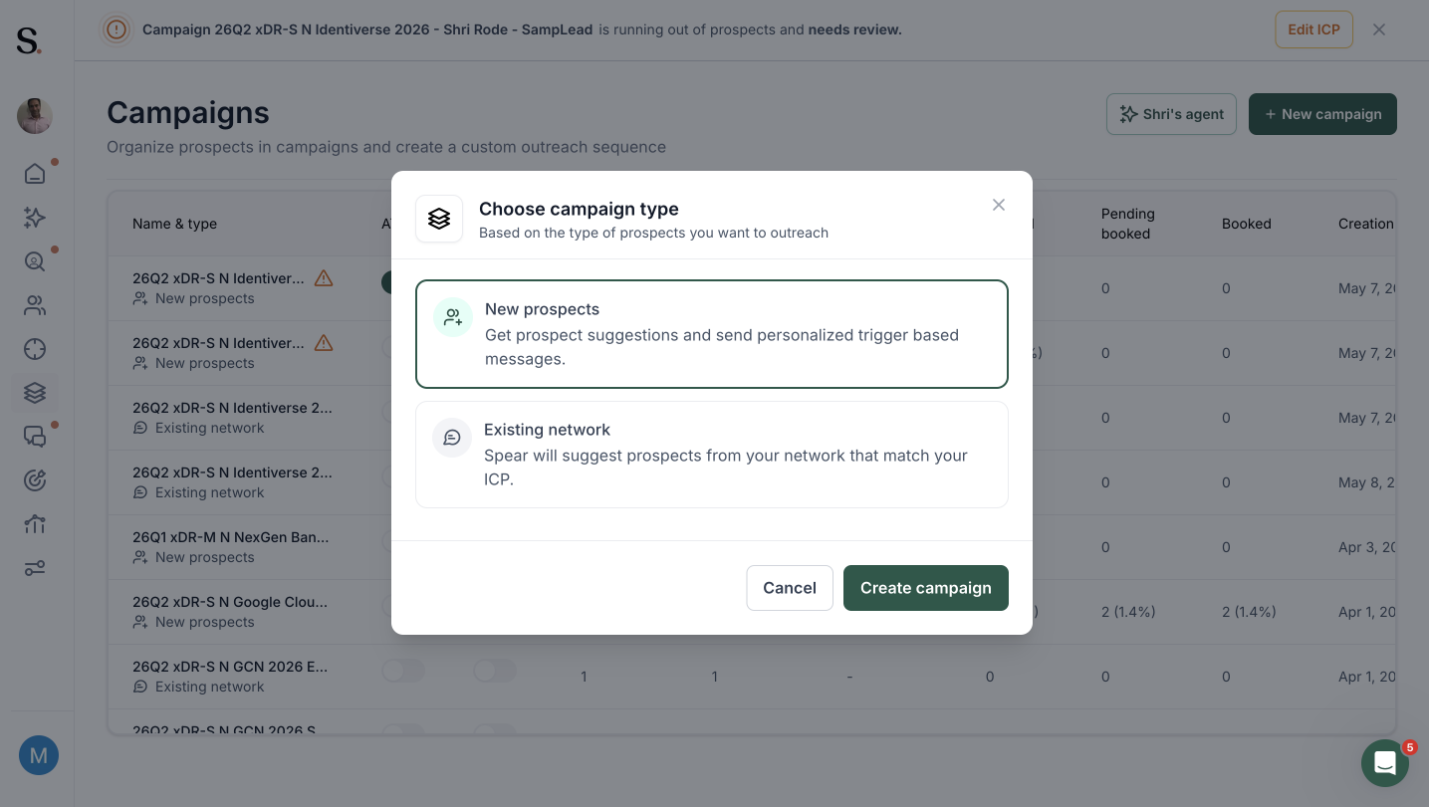
You will be asked to choose a campaign type based on the prospects you want to reach:
- New Prospects: For new prospects you are not connected with. Get prospect suggestions and send personalized trigger-based messages.
- Existing Network: For existing connections within the outreach platform. Spear will suggest prospects from your network that match your ICP.
Select your preferred option and click Create Campaign.
Step 3: Name Your Campaign
- Enter a clear and descriptive name for your campaign in the Campaign Name field.
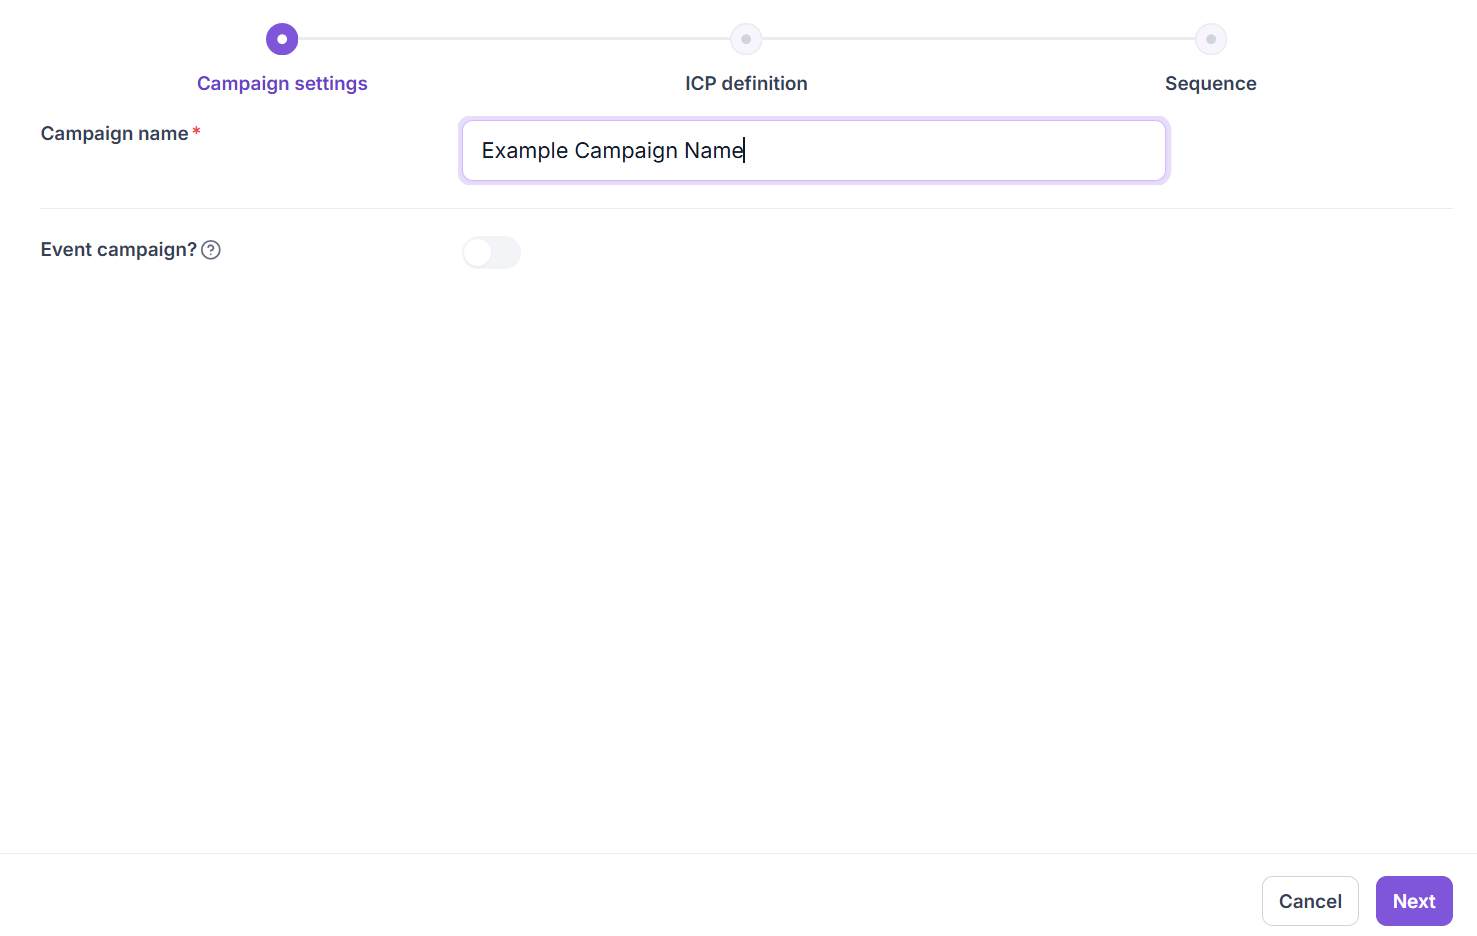
2. Activate the Event campaign toggle.
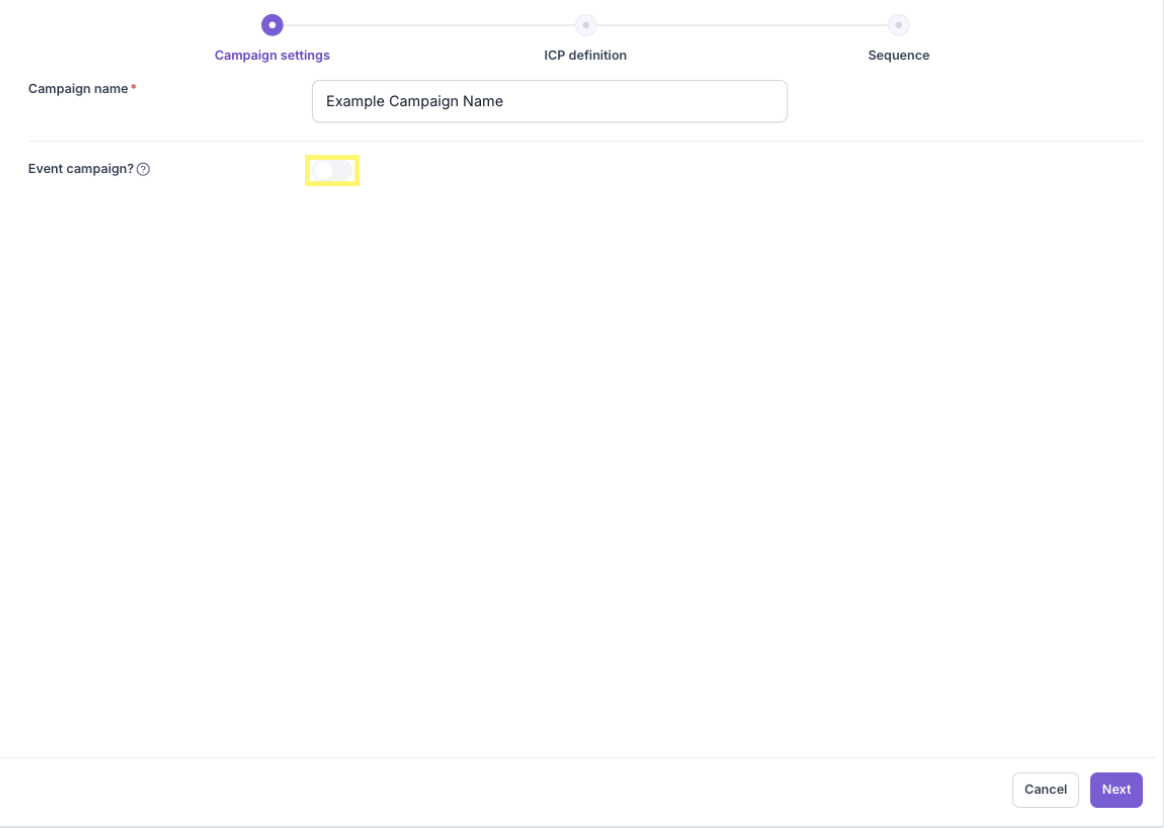
Step 4: Configure the Event Details
1. Enter the Event name and the Event domain (URL) in their designated fields so the system identifies the event correctly.

2. If the event uses a networking platform, enable the Networking app toggle.
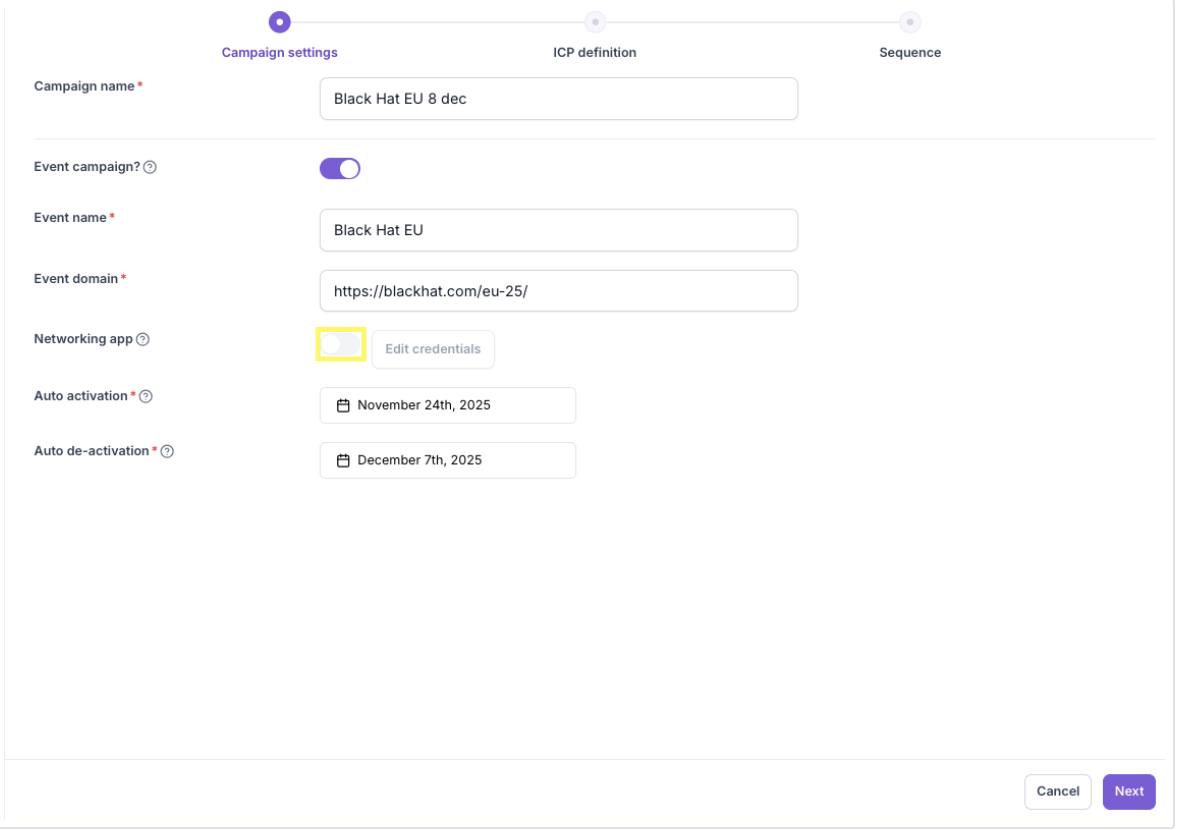
3. Input your login details. Then, click the 'Save' button.

4. Define the specific timeframe for your outreach by selecting dates for Auto activation and Auto de-activation. Then click 'Next' in the bottom-right corner of your screen.

Step 5: Input the ICP definition
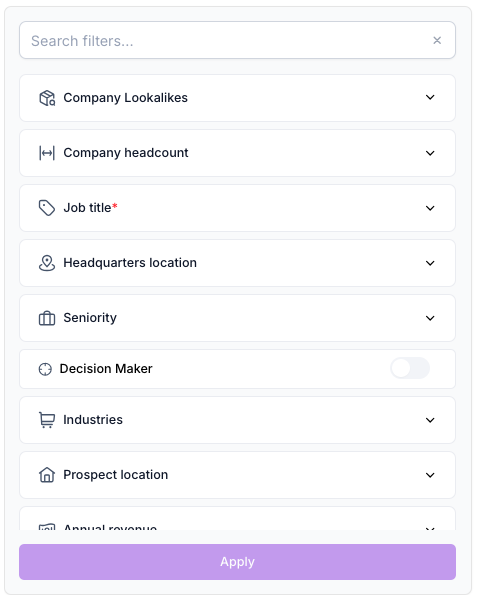
Use the filters to input the ICP you want to apply to this campaign.
Step 5: Input the ICP definition
Use the filters to input the ICP you want to apply to this campaign.
If you want to know more about how our ICP per campaign feature works, click here for the complete guide.
When building your Ideal Customer Profile (ICP), you have many filters to choose from to ensure your campaign is highly targeted. Below is a brief description of the main options:
- Company Lookalikes: Use your best-fit customers to automatically find other similar companies to target.
- Company Headcount: Filter prospects based on the size of the company to ensure scale and relevance.
- Job title: Target specific roles or functions within a company (e.g., Head of Sales, CFO).
- Headquarters location: Segment companies based on where their main office is located.
- Seniority: Filter prospects by their level of experience or hierarchy in the company (e.g., VP, Director, C-Level).
- Decision Maker: Toggle this on to narrow the results exclusively to contacts with decision-making power.
- Industries: Target companies operating in specific sectors or fields.
- Prospect location: Segment individuals based on their current geographic location.
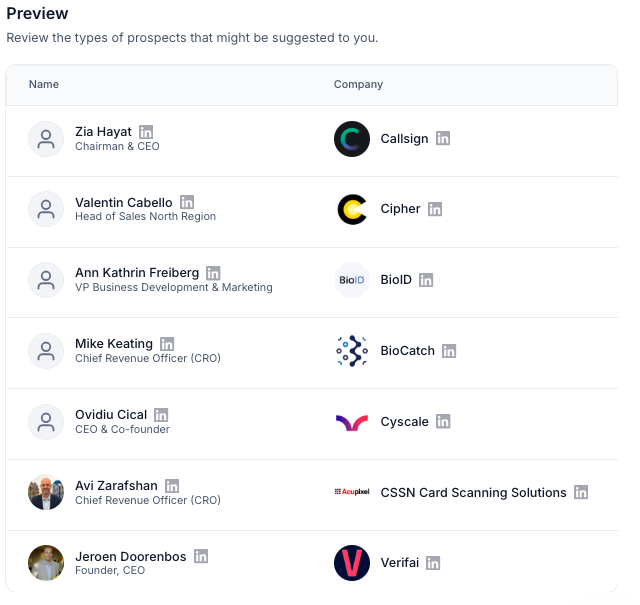
When your ICP definition is complete, hit 'Apply'. This is what a good campaign looks like:

If you want to know more about the ICP scoring, click here for the complete guide.
On the right, you'll see a preview of prospects Spear has found based on the ICP filters you entered. Review these examples carefully — if you spot prospects that don't match your ICP, you'll need to adjust your filters.
Tip: If you want to reuse the same ICP or sequence for multiple campaigns, you can click "Copy from" when creating a new campaign.
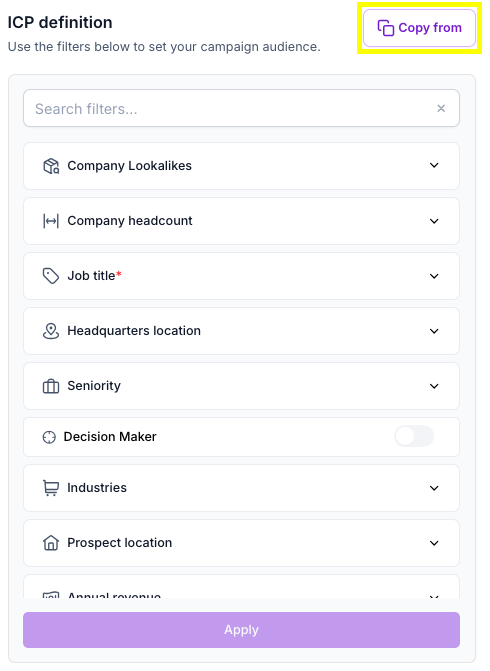
If you want to know more about how to copy a sequence from one user to another, click here for the complete guide.
Step 6: Set Up Your Sequence
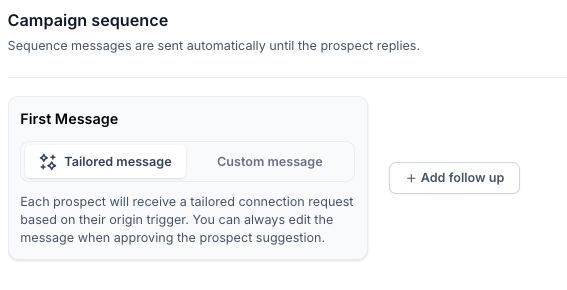
- Review the First Message options available:
- Custom message: Select this option to ensure every prospect receives the specific event context immediately.
- Tailored message: Each prospect will receive a tailored connection request based on their origin trigger.
- Click '+ Add follow up' to create subsequent messages in your sequence. Sequence messages are sent automatically until the prospect replies.
- Write your campaign copy. Remember to:
- Use the placeholders in Spear format
- Enter the timing of each follow-up message

Once all previous steps are complete, click 'Create Campaign' in the bottom-right corner of the screen to finalize your setup.
Useful Tips and Best Practices
- Start Early: Set Auto activation to 3 weeks before the event to give yourself enough time to book meetings.
- Stop on Time: Set Auto de-activation to one day before the event so you don't send meeting requests while the event is happening.
- Connect the App: If available, enable the Networking app toggle to pull attendee data directly from the event platform.
- Maximize Volume: Consider pausing other general campaigns for the profile attending the event to concentrate daily volume on the event campaign.
Related Articles
Now that you understand how to set up an event campaign, if you meet a specific contact at the event and want to target them immediately, read our step-by-step guide on How to add a single prospect to a campaign to ensure no lead is left behind.


.avif)